Introduction
In a prior post, I wrote about using digitemp to talk to 1-wire temp sensors.
Digitemp is a good first choice if you only care about temperature since it's already available in most linux distributions, and it's pretty easy to setup. However, digitemp is fairly limited: first it does not support anything but temperature, and one humidity sensor (with only one convertion table, and there are several depending on which one you end up buying). On top of that, the humidity sensor only works with the serial interface and not the USB one.
1-wire supports a lot more than just temperature, including several kinds of humidity sensors, a moisture sensor which can be used to measure the amount of watering needed for your lawn, and outdoors UV and solar intensity sensors (available from hobby boards).
1-wire also has weather stations, but you do have to worry about your pole with the wind sensor being hit by lightening that would then be channeled back inside your house and to your computer (not good). Also, I have not found 1-wire weather stations to be price competitive with an Oregon Scientific WMR968 which is wireless and can be directly connected and read from via its serial port on linux and through misterhouse.
http://www.hobby-boards.com/catalog/index.php?cPath=22
wind: $140 (95+45) (or some more expensive $225)
baro: $60
humidity/solar x2 (indoors/outdoors): $120
rain gauge: $93
then add wiring and a possible hub ($50)
This gives you a total of $493. For comparison an oregon scientific WMR968 weather station costs $200 (see this thread for details on that) and my WMR 968/rfxcom page for my setup.
After switching from digitemp, I realized that my single bus described here was really stretching the limits of a single bus. I therefore ended up adding a hub.
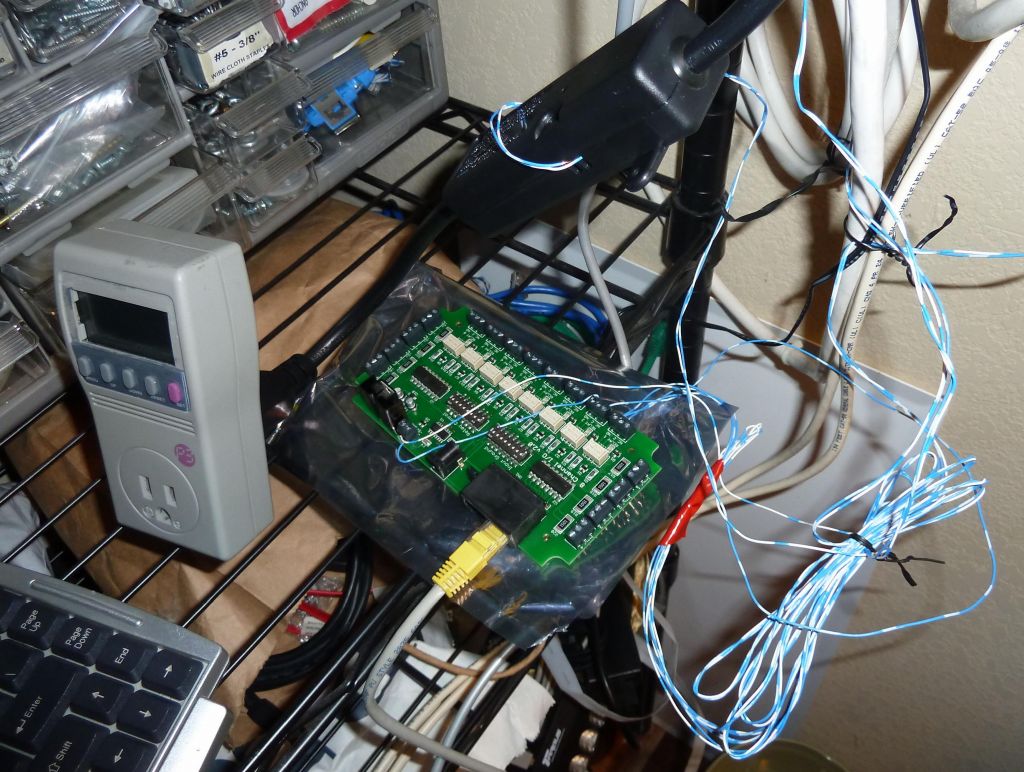
What you need to know about the hub is that you get 6 buses split off your original bus (i.e. you get 7, one is the original bus passed through but with bus power added, and there are 3 1-wire switch chips with a MAIN and AUX sub bus each, effectively giving you 6 more busses). The Hobby-Boards 1-wire hub, which is the one I bought, injects regulated 5V power and unregulated 12-24V power for some special outdoors 1-wire devices on all the ports, including the pass-through one.
Having a powered bus with 5 and 12-24V allows the use of some special 1-wire devices like the moisture meter, and the UV sensor.
If you go with the hobby-boards hub, you should plan to wire like they do to make your life easier: hobby boards wiring chart.
.
I talked about what to buy, and how to wire on my last Temperature monitoring and graphing with 1wire devices, digitemp, misterhouse, and cacti post. Go read that section.
If you have a wiring closet where all your cables come back, you have a star topology. With a hub, you can have up to 7 branches, which may be enough for you. If however you need more than that, when you use the wiring chart from hobby-boards, I recommend that you use pair 3-6 as a return for pair 4-5: i.e. you send signal down your cat-5 to some location and then you connect 4 to 3 and 5 to 6 at the end point. You then connect 3 and 6 to 4 and 5 of your next Cat-5 run elsewhere in your house.
When combining this techique and the 7 branches you get from a hub, this should give you more than plenty branches from your network closet.
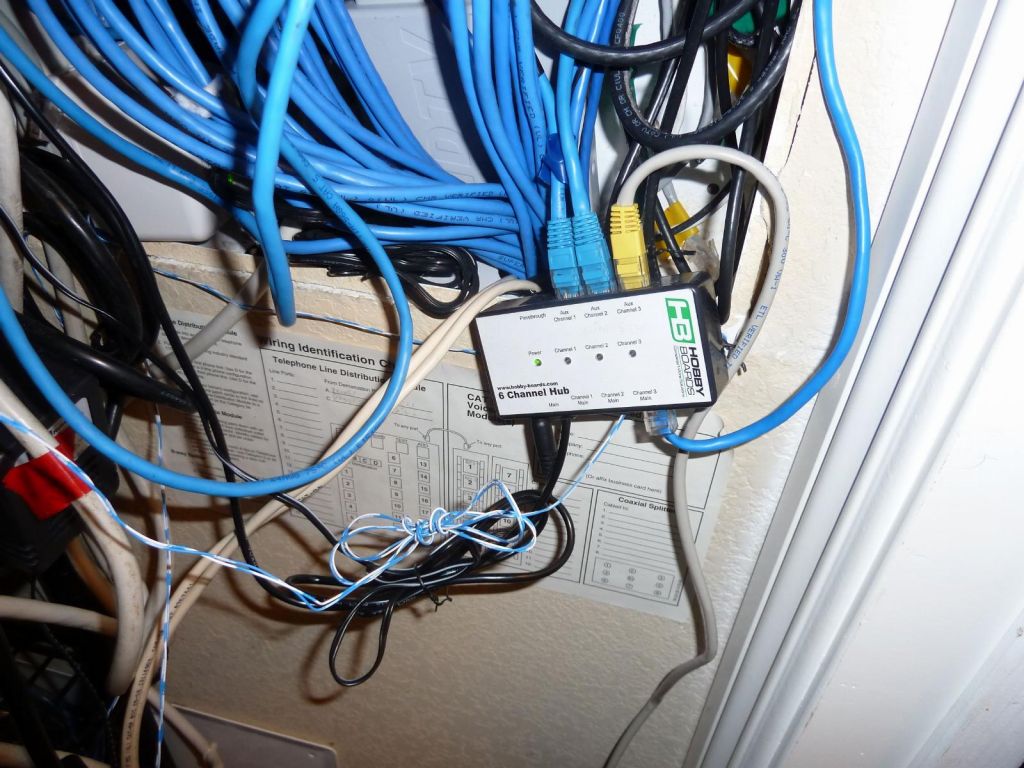
Hobby Boards 1-wire UV meter
I added the Hobby-Boards UV sensor to my roof 1-wire bus now that it had bus power added to it after I got the hub, and I used cella-wrap to make sure water wouldn't get in the box or touch the 1-wire device wires and create a temporary bus short. The UV board also has a built in temp sensor, but the weatherproof box it comes with will act as a greenhouse somewhat, so the temperature read by that sensor will be higher than normal (it is used for UV readout temp correction). If you don't care about UV index as much and would like outside humidity level, you may want to consider the humidity/temp/solar sensor instead (I get outside humidity through my WMR968 Oregon Scientific Weather Station, so I didn't care to have that in my outside 1-wire sensor).
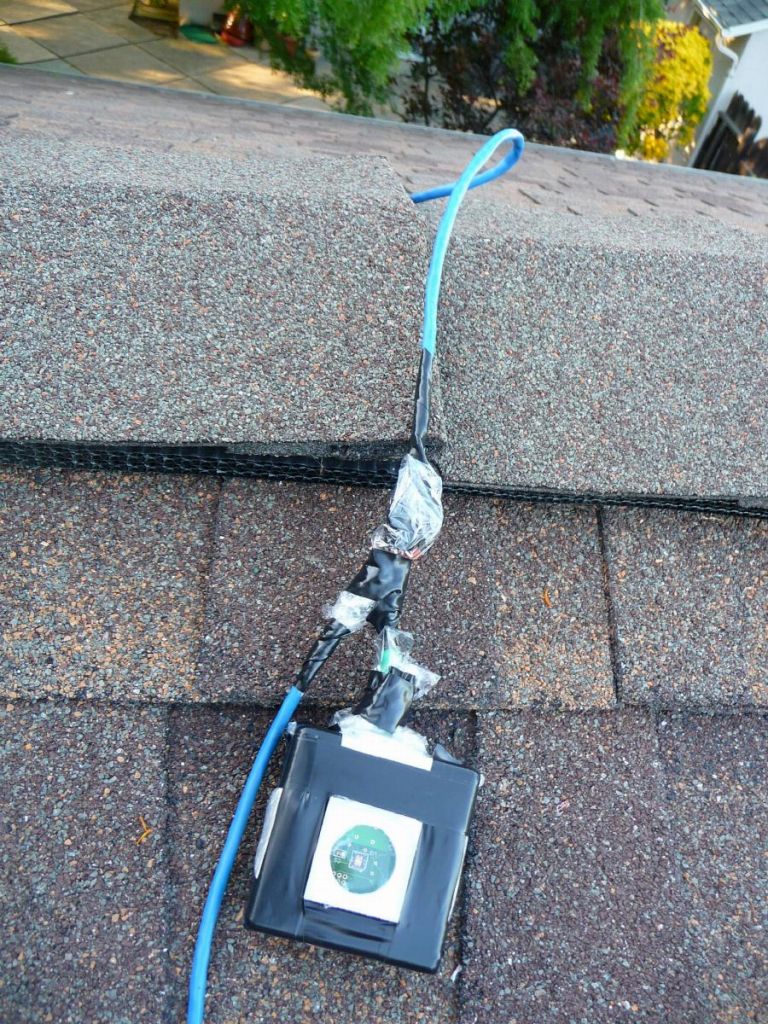
UV sensor in mostly water proof box
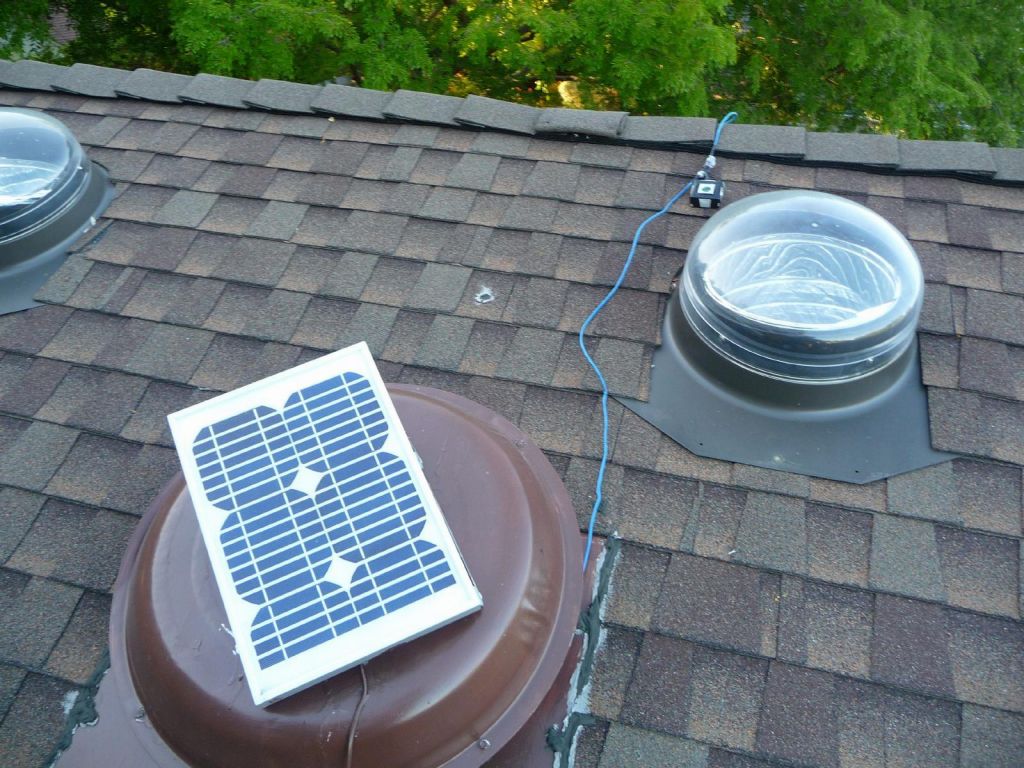
gets inside the attic through a water proof hole
Hobby Boards 1-wire Moisture Meter
The moisture meter has a temp sensor on the moisture meter control board, but it is unfortunately not used to correct the moisture readings from the moisture probe (this sensor does have a moisture value that can vary up to 50% when fully wet between temperature extremes). Thankfully in real life, your soil temperature deeper down should not change too much and affect the reading too much.
I then buried the control board too so that it could be used as a soil temperature sensor.
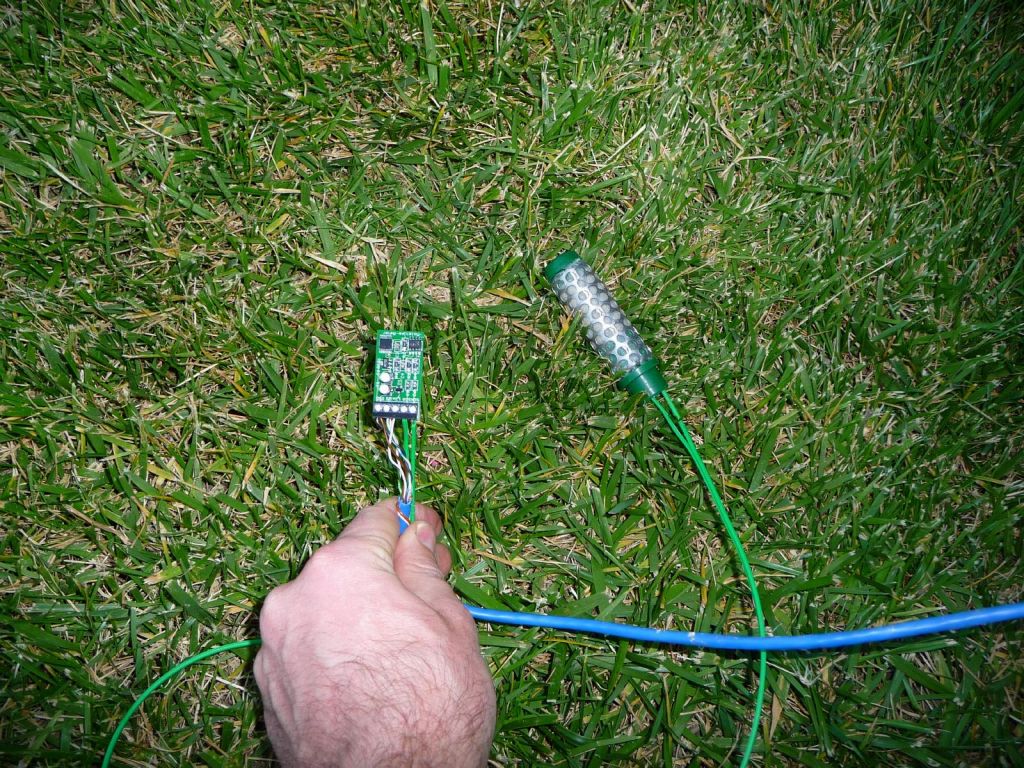
moisture meter
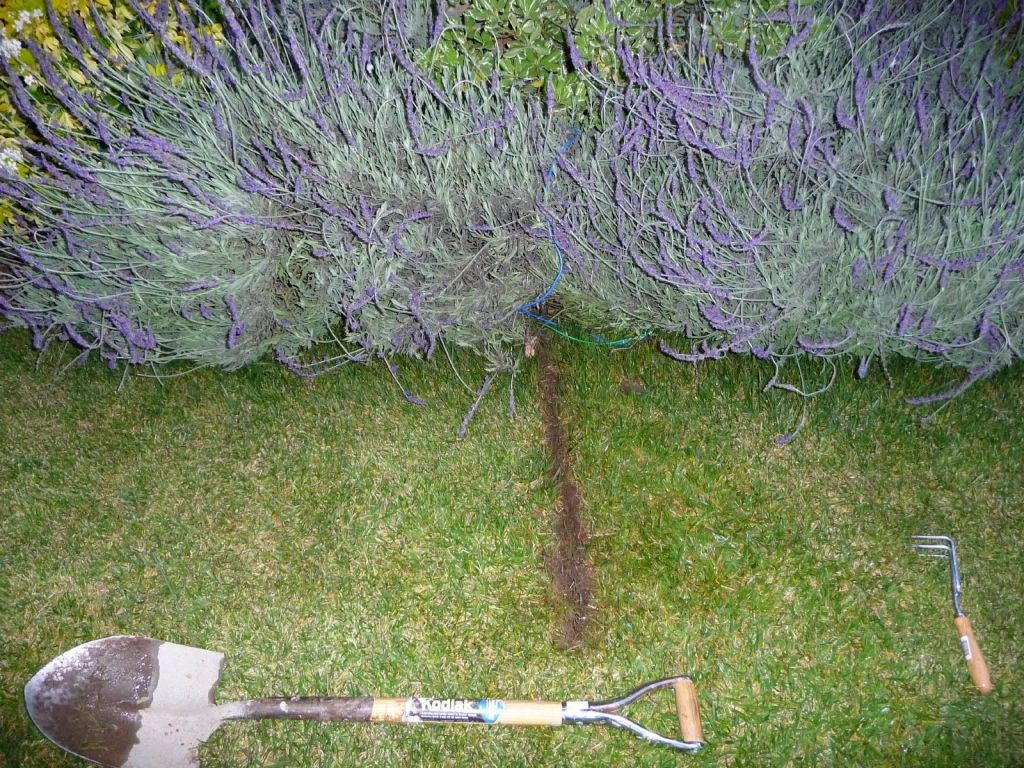
the trick was not to bury the sensor too deep: just as deep as my grass roots
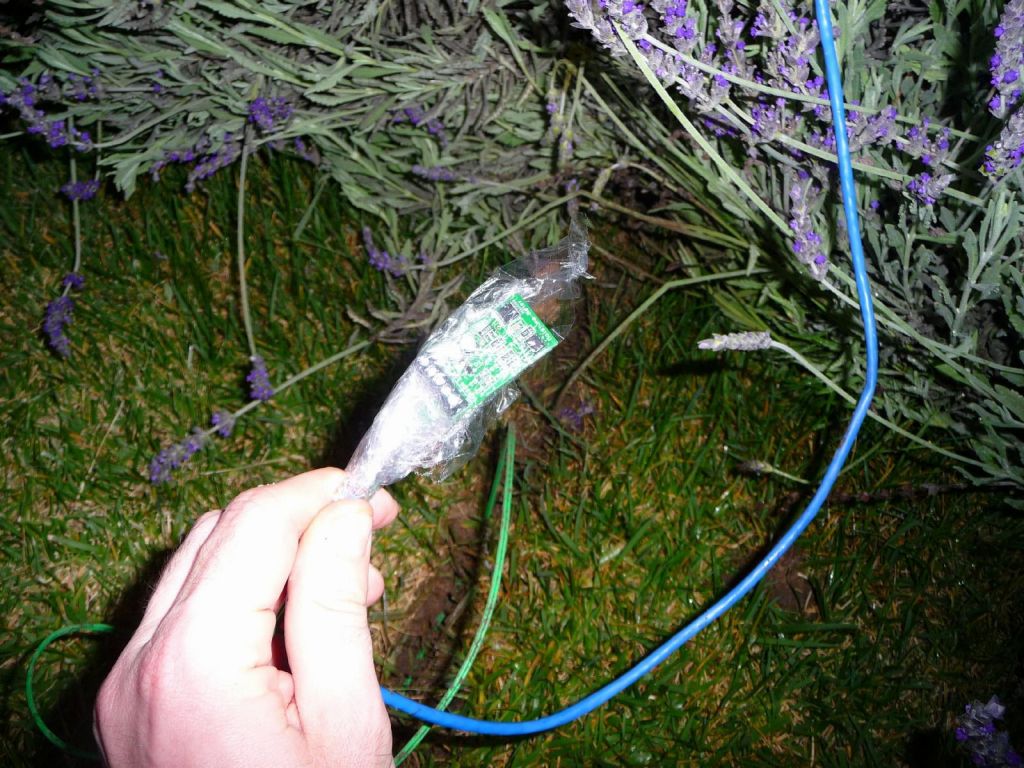
protecting the board from water
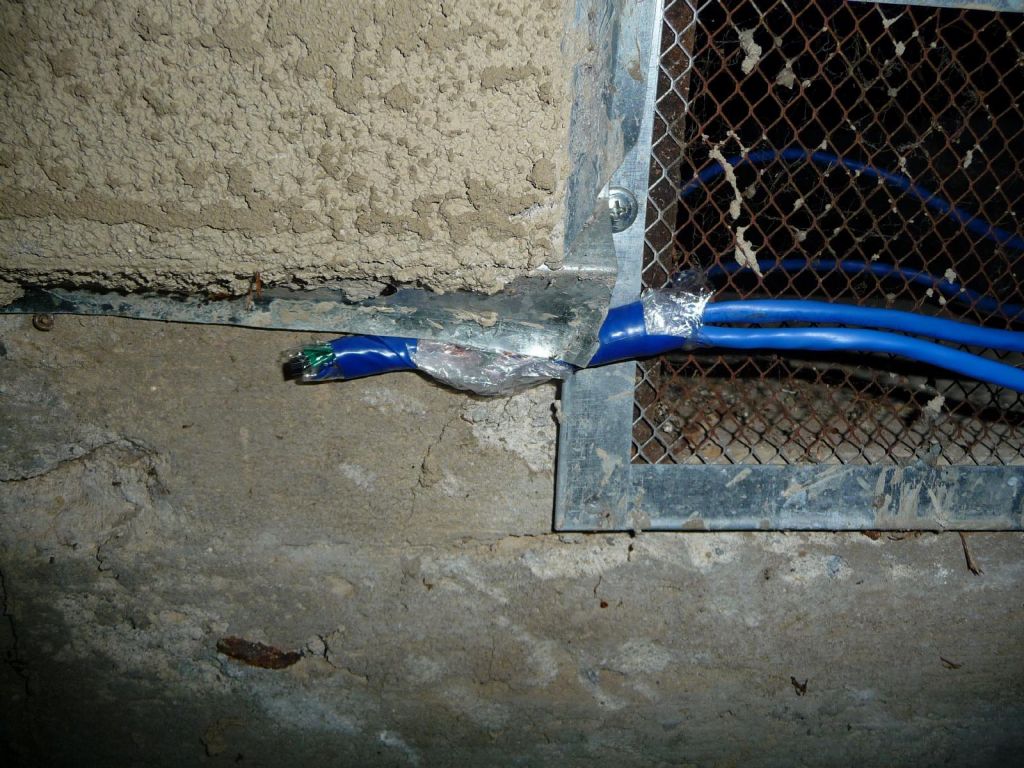
regular DS18B20 outside temperature probe in the shade
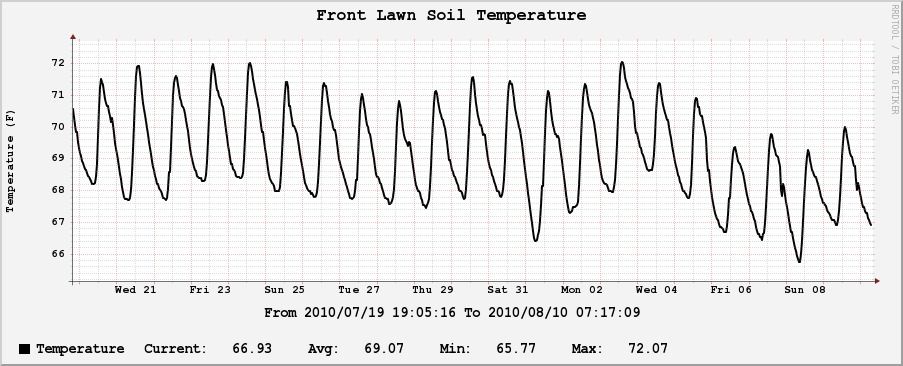
The temperature graph is not super exciting, but still good info. It's reassuring that the dirt temp doesn't change much and therefore the moisture readings won't be foiled much:
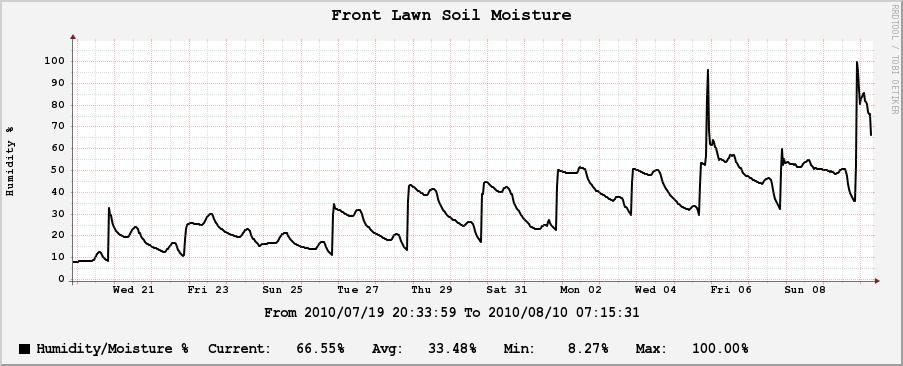
The moisture readings are more useful and for instance this graph shows how I wasn't watering enough, and turned up the sprinkler times a little bit so that the humidity ends up at a reasonable state:
But the really interesting graph is seeing soil humidity over soil temperature (green) and outside temperature (red):
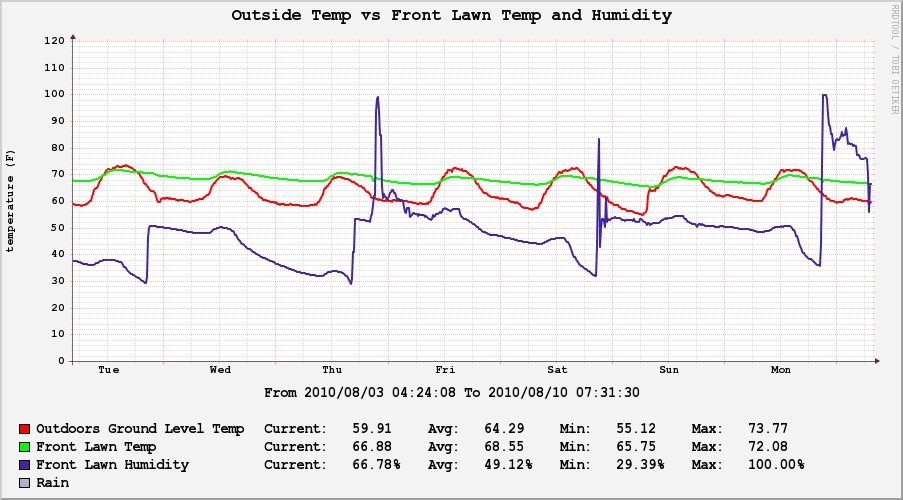
what this graph shows is outside temperature obviously affecting soil temperature a little bit, and when soil temperature goes up on a wet sensor, it brings up the moisture reading somewhat unfortunately.
Similarly, from the 1-wire side, you don't see a humidity percentage, but a negative current value
cat /etc/owfs/moisture/35\ Front_Lawn/current; echo
    -1.35875
I looked at the range of values I typically get for full dry and full wet, and this is definitely sensor and board dependent. There is also the problem that the hobby-board design up to 2010/05, did not have a ground loop isolation transformer (without which the sensor would behave erratically as soon as you put it in the ground). Once you add the isolation tranformer, it does change the current values for dry and wet though, so each person may have to compute their own. Unfortunately I've seen my sensor briefly return values all the way to -2.55 instead of the typical wet -1.74
See the owfs moisture sensor page I wrote for details on this.
This is the code I use for now:
# 0.56625/0.5675 bone dry, but once got 0.335625.
# glass of water yielded 1.74 but I've sometimes seen 2.555. What to use?
my ($min, $max) = (0.33, 2.6);

# value should be temp ajusted in an ideal world, but I don't have correction tables.
$value *= -1;
$value = $min if ($value < $min);
$value = $max if ($value > $max);
$value = (100 * ($value - $min) / ($max - $min));
I've struggled on finding the upper value. First, I got -1.74 but eventually I sometimes got -2.55 out of the blue for a few samples, which yielded some clipping, so I changed the max value from -1.74 to -2.6 at noon on this graph, explaining the sudden dip. You can however you can see on the left the jump to 100% when the sprinklers were started:
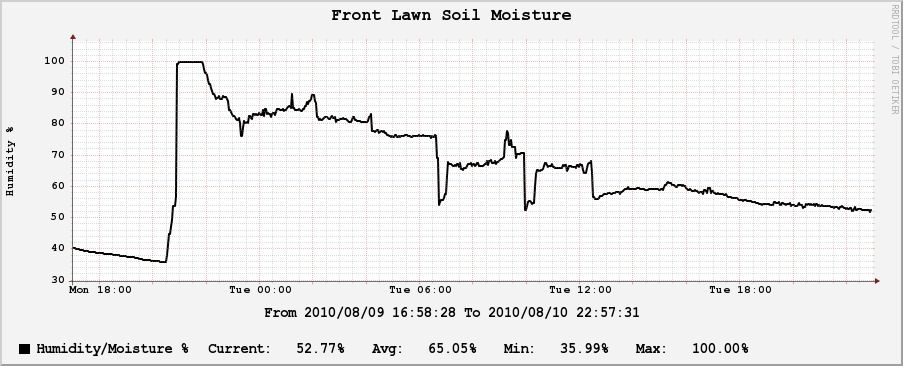
Despite the sensor being noisy, temperature dependent, and hard to calibrate, the overall graph is still useful enough to show whether your sprinklers are keeping the dirt moist enough, or if your overall moist is just going down (bad).
But back to 1-wire and owfs, owfs is more work to setup but it's just the way to go if you want anything more than temperature monitoring.
You need to start by getting the latest source code from http://www.owfs.org/, and compiling it. /configure --enable-debian did the right thing for me, but you need to make sure you have the right headers on your system
I wrote this script, read_owfs that reads from an owfs symlink tree and generates a digitemp looking logfile so that it's easy to parse the logfile later with the same code regardless of whether you use digitemp or owfs to capture the data.
owfs with a hub is a bit "interesting" since you have to find your devices in subtrees, which is why I made a symlink tree to make my life easier. I setup a symlink for each hub port and a chain name to point to each of the 3 buses' AUX or MAIN branch. This is what it looks like:
/etc/owfs/bus1 -> /owfs/1F.F05005000000
/etc/owfs/bus2 -> /owfs/1F.E25005000000
/etc/owfs/bus3 -> /owfs/1F.E15005000000
/etc/owfs/chain1 -> bus2/main
/etc/owfs/crawlspace_chain -> bus2/aux
/etc/owfs/dining_chain -> bus3/main
/etc/owfs/roof_chain -> bus1/aux

/etc/owfs/humidity/56 Hall_Closet -> ../chain1/26.2E4DF5000000/HIH4000
/etc/owfs/moisture/35 Front_Lawn -> ../crawlspace_chain/30.131A62120000

/etc/owfs/temperature/11 Family_Room -> ../chain1/10.A8D1ED010800
/etc/owfs/temperature/12 Living_Room -> ../chain1/10.52D1ED010800
/etc/owfs/temperature/15 Garage -> ../chain1/10.2223EF010800
/etc/owfs/temperature/21 Attic -> ../roof_chain/10.5DE1ED010800
/etc/owfs/temperature/22 Roof -> ../roof_chain/10.94A2ED010800
/etc/owfs/temperature/23 Outdoors_Roof -> ../roof_chain/28.57B659020000
/etc/owfs/temperature/25 Roof_UV -> ../roof_chain/EE.E749CB010800
/etc/owfs/temperature/31 Crawlspace -> ../crawlspace_chain/10.F9F3EE010800
/etc/owfs/temperature/32 Outdoors_Crawlspace -> ../crawlspace_chain/10.D1D0ED010800
/etc/owfs/temperature/35 Front_Lawn -> ../crawlspace_chain/30.131A62120000
(...)
This is how I start owfs and the xpl-owfs gateway:
gargamel:/etc/owfs# cat /etc/init.d/owfs
#!/bin/sh
case "$1" in
  start)
        umount /owfs 2>/dev/null
	# serial
        /opt/owfs/bin/owserver -d /dev/DS9097U -F --error_print 0 --error_level 1 --nozero
	# usb
        #/opt/owfs/bin/owserver -u -F --error_print 0 --error_level 1 --nozero
        /opt/owfs/bin/owfs    -F -s localhost:4304 /owfs --nozero
        /opt/owfs/bin/owhttpd -F -s localhost:4304 -p 8082 --nozero
	# this comes from xpl-perl, reads /owfs devices and relays their data periodically
	# over XPL, where they can be relayed to misterhouse.
        xpl-owfs --interface eth1 --owfs-mount /owfs >/dev/null &
        ;;
  stop)
        pkill -f '/opt/owfs/bin/owfs'
        pkill -f '/opt/owfs/bin/owserver'
        pkill -f '/opt/owfs/bin/owhttp'
        pkill -f 'xpl-owfs'
        ;;
  restart|force-reload)
        $0 stop
        $0 start
        ;;
  *)
        echo "Usage: owfs {start|stop|restart|force-reload}" >&2
        exit 1
        ;;
esac
exit 0
Gatewaying 1-wire data to misterhouse
owfs-xpl is a good way to relay 1-wire data to misterhouse via its XPL gateway as opposed to reading owfs directly since you're assured not to hang.
This is how you setup devices in misterhouse:
XPL_SENSOR, bnz-owfs.*:10.2223EF010800, garage_temp, , temp
XPL_SENSOR, bnz-owfs.*:28.3359C7010000, freezer_temp, , temp
XPL_SENSOR, bnz-owfs.*:28.998D4D020000, computer_closet_temp, , temp
XPL_SENSOR, bnz-owfs.*:26.2E4DF5000000, hall_closet_temp, , temp
XPL_SENSOR, bnz-owfs.*:26.2E4DF5000000.1, hall_closet_humidity, , humidity
If you use xpl-owfs, adding .1 behind a humidity value lets it pick another DA converter between the default one in owfs: .1 for HIH4000, and .2 for HTM1735 (it makes a difference since the analog value is turned into a different moisture percentage value as a result).
Here's what it looks like and the patch for xpl-owfs if you are not running a recent one with that support:
gargamel:~# grep . /owfs/26.2E4DF5000000/{.,*}/humidity
/owfs/26.2E4DF5000000/./humidity:     58.8895
/owfs/26.2E4DF5000000/HIH4000/humidity:     60.5681
/owfs/26.2E4DF5000000/HTM1735/humidity:     56.8768

--- /usr/share/perl5/xPL/Dock/Owfs.pm.orig      2010-04-17 09:08:43.000000000 -0700
+++ /usr/share/perl5/xPL/Dock/Owfs.pm   2010-04-17 09:25:25.000000000 -0700
@@ -154,6 +154,8 @@
   foreach my $dev (@$devices) {
     foreach my $rec ([ "temperature", "temp" ],
                      [ 'humidity', 'humidity' ],
+                     [ 'HIH4000/humidity', 'humidity', 1 ],
+                     [ 'HTM1735/humidity', 'humidity', 2 ],
                      [ 'counters.A', 'count', 0 ],
                      [ 'counters.B', 'count', 1 ],
                      [ 'current', 'current' ]) {
Once you have misterhouse configured to receive XPL messages, with those in mh.private.ini:
ipaddress_xpl_broadcast = 192.168.205.255
ipaddress_xpl = 192.168.205.3
# this is how you turn it off
#xpl_disable = 1
# if you are using a better XPL hub, turn off the mh built in one
#xpl_nohub = 1
Then, you can simply read owfs values in misterhouse via XPL like so:
my $compcloset_temp = $computer_closet_temp->state()
(there is one caveat there: misterhouse does not currently have a timer to remove the temperature value if you aren't getting updates from xpl/owfs)
Note that there are other ways to read owfs in misterhouse, namely:
via xAP (just like xPL, but unless you're already using xAP for something else, don't bother with it)
iButton code in MH if you use the iButton 1-wire interface as opposed to a DS9097U (serial) or DS2490 (USB)
Owfs_item code in MH from Jim Duda. This one talks to owfs via its owfs_server daemon and perl bindings, but I've found this to be had to get to work because the owfs perl bindings haven't been reliable for me. Jim actually recommends using xPL for new installs, but if you want to try his code look at thread #1 (you need to open the messages after this one) and thread #2.
The summary of the threads I posted however is that xPL and xpl-owfs are the way to go for reading owfs sensors in mh.
Now that you have data available in /etc/owfs/*, and being sent to misterhouse via xPL, you can (and should) log it to a file.
I have written two scripts for this:
read_owfs reads owfs data from a symlink tree in /etc/owfs/ and populates a digitemp looking file in /var/log/temperatures.
cacti_owfs reads a digitemp or owfs derived /var/log/temperatures file and converts it into rrdtool data or cacti compatible query data.
The second script is the important one which can generate cacti data or help you regenerate/build an rrdtool RRA file from scratch if you add fields or change your data format (my recommendation is to plan ahead and add extra fields in your RRD file for probes you might add later (you can't add fields after the fact without regenerating the entire file and refilling it with all the data from time 0, so it's better to plan ahead and get it right the first time, and a good way to do that is to just add extra fields that you're not using yet but can use later) ).
For more details on cacti integration, see my Gatewaying 1-wire, XPL (Oregon Scientify Weather), Brultech ECM1240 Power Data, and Brand OneMeter Data to cacti page.
cacti_owfs can also be used for feeding data in an rrdtool after the fact (--dump-cacti) and used like so:
sort -u < dump | time xargs rrdtool update $RRD --template `cacti_owfs --cacti-dump-header`
(after having freshly re-created the RRD and make sure you use --start 1271572300 with the right second value that's just before the first one in your dump). Setting up cacti
See my cacti config page.
Ok, first you can find all the graphs here: all regular owfs derived graphs.
And here are the interesting composite graphs.
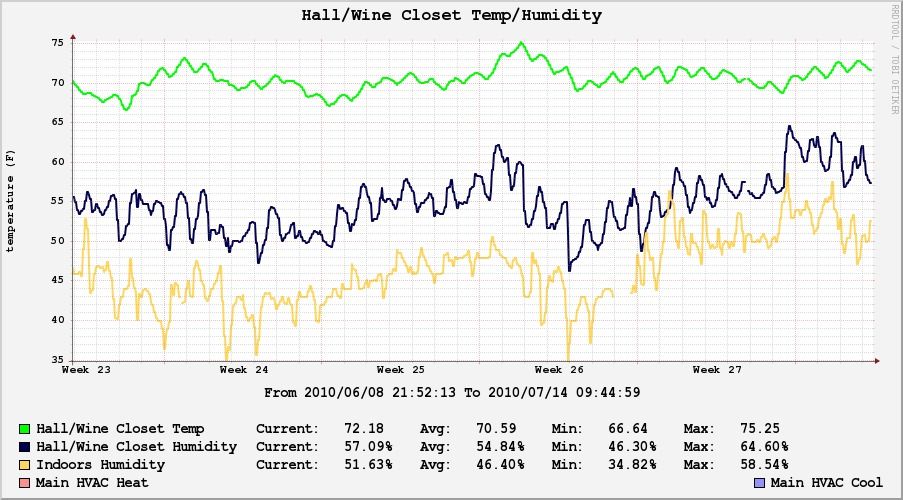
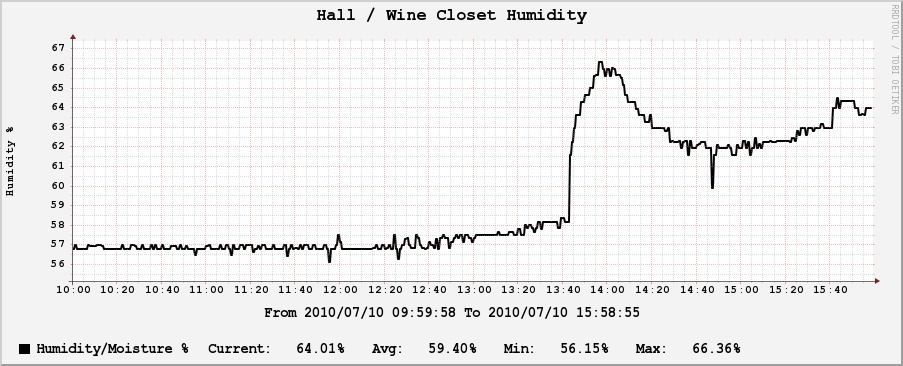
I keep track of the humidity in our wine closet. This chart shows when I refilled the evaporation water plate:
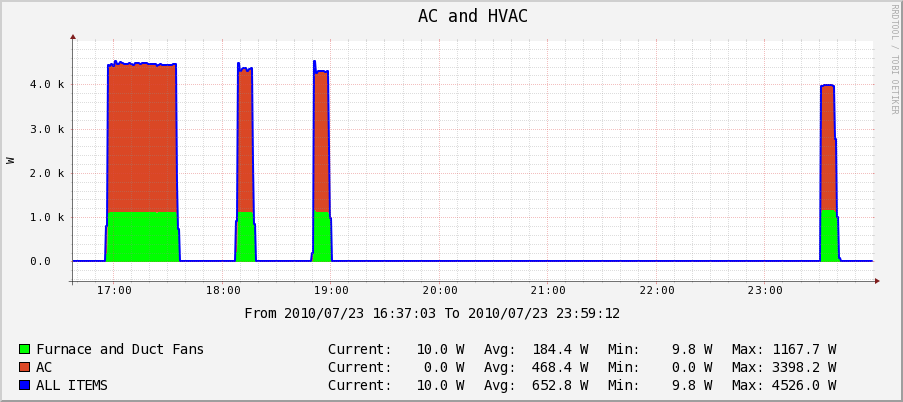
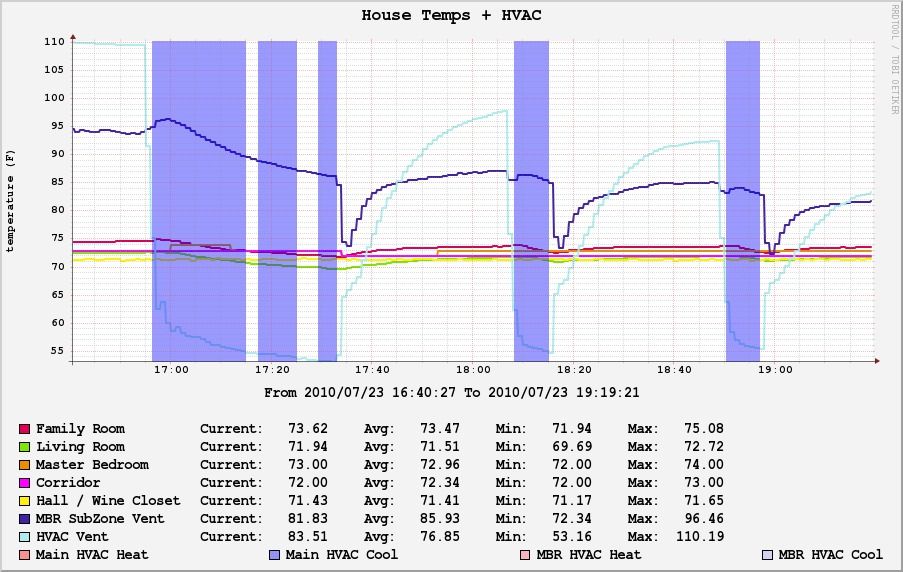
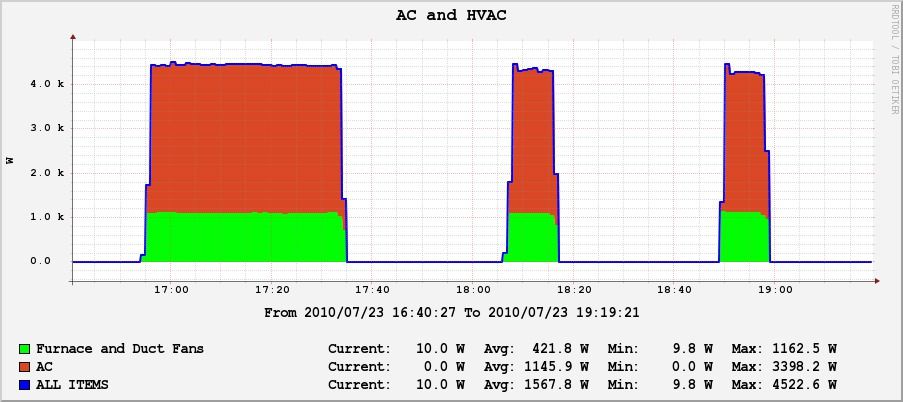
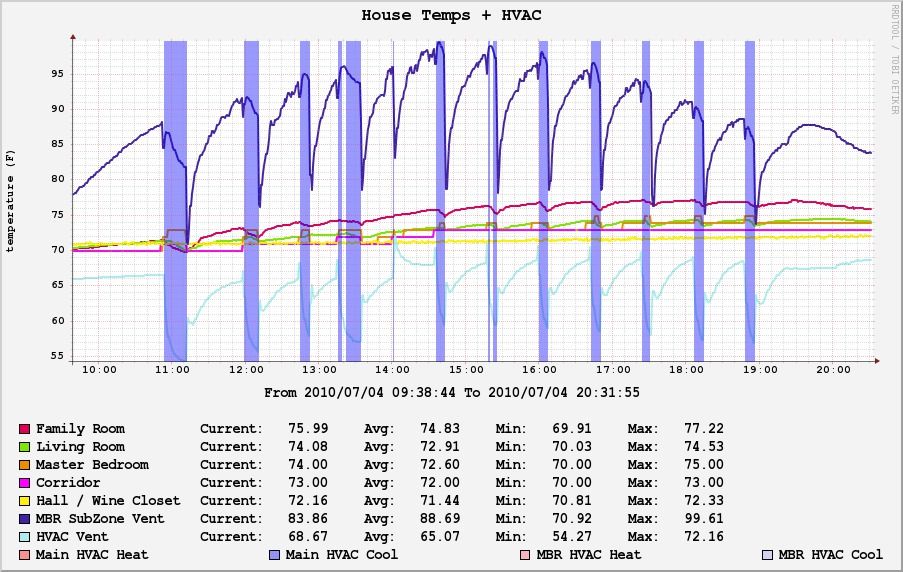
AC run on a warm day:
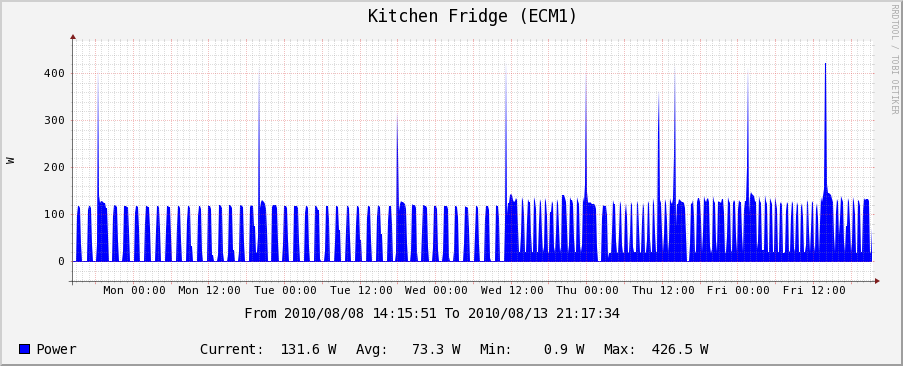
I was curious to know if our old fridge in the garage was having unreasonable and too frequent on/off cycles. The old garage fridge does run a bit warmer but doesn't cycle that much more often than the new one, so I'm not as worried about it dying soon as much (it does take a fair amount of extra power though, being 10 years older):
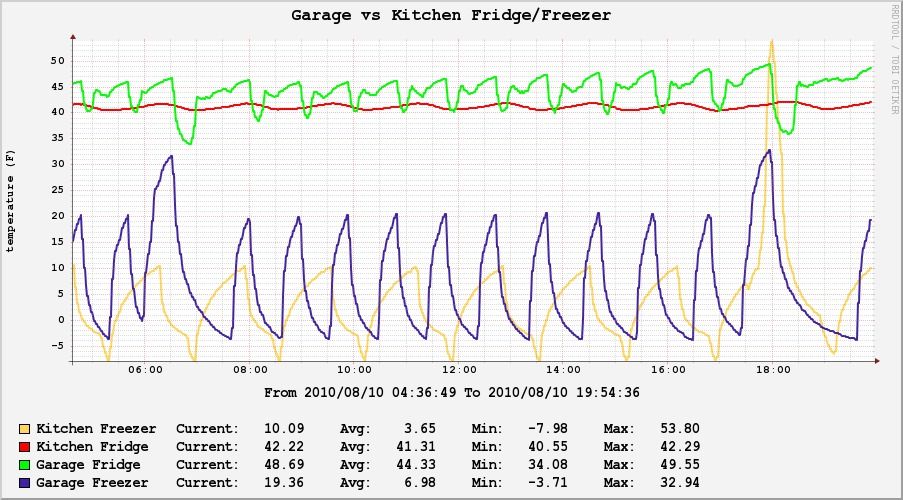
Interestingly enough, it is actually the newer kitchen freezer which has occasional big temp jumps to >50F.
And this lets me keep track of temperature and humidity in our wine closet (the good news is the water plate in the closet does keep humidity higher compared to the house humidity level):
