Marc's Public Blog - Linux Hacking


All | Aquariums | Arduino | Btrfs | Cars | Cats | Clubbing | Computers | Dining | Diving | Electronics | Exercising | Festivals | Flying | Halloween | Hiking | Linux | Linuxha | Monuments | Museums | Outings | Public | Rc | Sciencemuseums | Solar | Tfsf | Trips

This page has a few of my blog entries about linux, but my main linux page is here
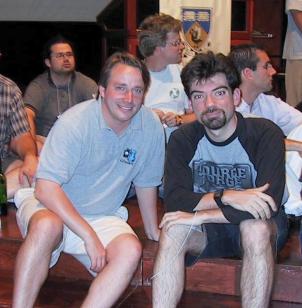
Picture of Linus


Table of Content for linux:

More pages: April 2023 March 2023 September 2021 May 2020 January 2020 January 2019 December 2018 March 2018 January 2018 September 2017 January 2017 October 2016 August 2016 July 2016 June 2016 March 2016 February 2016 January 2016 May 2015 March 2015 January 2015 October 2014 May 2014 April 2014 March 2014 January 2014 November 2013 September 2013 May 2013 March 2013 January 2013 December 2012 August 2012 May 2012 March 2012 January 2012 December 2011 August 2011 July 2011 January 2011 October 2010 August 2010 June 2010 April 2010 March 2010 January 2010 December 2009 November 2009 September 2009 August 2009 July 2009 May 2009 January 2009 December 2008 November 2008 October 2008 January 2008 November 2007 August 2007 July 2006 January 2006 August 2005 April 2005 November 2004 March 2004 February 2004


2018/12/20 Accessing USB Devices In Docker (ttyUSB0, /dev/bus/usb/... for fastboot, adb) without using --privileged
π 2018-12-20 01:01 in Linux

Problem:You want to use devices like /dev/ttyUSB0 or need to access raw USB devices under /dev/bus/usb in a docker container

This is not going to work easily for a variety of reasons. Let's go through them.

Before I go there, yes, giving --privileged will "fix" all your problems but it will also give full access to everything in your container, where the container can wipe the host device, steal password from memory outside the container and so forth. Maybe that's ok for you anyway, but if not, read on:

/dev/ttyUSB0 does not show up under /dev in the container

This does 2 things: 1) create the device in the container, and 2) give the container write access to the block device (more or that later)

docker run --device=/dev/ttyUSB0 -i -t --entrypoint /bin/bash --cap-add SYS_PTRACE debian:amd64

I added SYS_PTRACE so that you can use strace -e trace=file command to debug access problems

/dev/bus or /dev/serial do not show up under /dev in the container

Try this:
docker run -v /dev/bus:/dev/bus:ro -v /dev/serial:/dev/serial:ro -i -t --entrypoint /bin/bash --cap-add SYS_PTRACE debian:amd64

This will make /dev/bus and /dev/serial show up as bind mounts in your container. Yet you will find that _fastboot devices or adb_ will not work. Strace will show you permission denied. What you want instead is this:

docker run --device=/dev/bus -v /dev/serial:/dev/serial:ro -i -t --entrypoint /bin/bash --cap-add SYS_PTRACE debian:amd64

See https://docs.docker.com/engine/reference/run/#runtime-privilege-and-linux-capabilities

This mounts /dev/bus in your container and gives you access to all the block/character devices in there. Now, fastboot will work. Well, it will work until...

/dev/bus, fastboot/adb work until I disconnect/reconnect the device

Yeah, this is where things get more hairy. what the --device command above did was give access to all the block/character devices that existed when your container was created. If new ones appear (unplugging and replugging a device or rebooting it), those don't work.
I have not found a way to get docker to make them work after the container has started.

Thankfully there is a clue here: https://www.kernel.org/doc/Documentation/cgroup-v1/devices.txt

You want to go back to running

docker run -v /dev/bus:/dev/bus:ro -v /dev/serial:/dev/serial:ro -i -t --entrypoint /bin/bash --cap-add SYS_PTRACE debian:amd64

Then, grab the container ID in $A:

A=$( docker ps |awk '/bin.bash/ { print $1 }' )

Note the major number of your device:

root@fuchsia-tests-x64-lab01-0002:/sys/fs/cgroup# l /dev/bus/usb/004/* | head -1
crw-rw-r-- 1 root root 189, 384 Dec 18 17:51 /dev/bus/usb/004/001
Here it's 189. What changes it the minor number (384) when you plug/unplug devices.

Finally, tell the linux container via an opaque cgroup interface, that all character devices of major number 189, are allowed:

root@fuchsia-tests-x64-lab01-0002:~# echo 'c 189:* rwm' > /sys/fs/cgroup/devices/docker/$A*/devices.allow 

After that, things should work.

My /dev/ttyUSB device keeps changing and the new one isn't allowed

See above and run
root@fuchsia-tests-x64-lab01-0002:~# echo 'c 188:* rwm' > /sys/fs/cgroup/devices/docker/$A*/devices.allow 

Then inside the container, create them all:

root@f47dbbab392b:/dev# for i in $(seq 1 255); do mknod ttyUSB$i c 188 $i; done

Hope this helps!

2018/12/20 Getting Around USB3 xhci 32 Device Limit "Max number of devices this xHCI host supports is 32"
π 2018-12-20 01:01 in Linux
Are you stuck with xhci_hcd 0000:00:14.0: Max number of devices this xHCI host supports is 32 ?

Wait, you're saying, but USB should support 127 devices (which include hub ports), why only 32?
Well, xhci/USB3 actually has an extra limit of 96 endpoints and each device uses 3 endpoints, which leaves you with only 32 devices. Yes, this is terrible, I agree. It's also not well documented and few people know how to get around it.
https://forums.intel.com/s/question/0D50P00004905stSAA/hardware-limitations-on-usb-endpoints-xhci?language=en_US contains more details, although apparently some further details are only available under NDA, but it looks like a mess.

Originally I found this page which explains how to connect USB3 hubs with USB2 cables to save a few USB IDs, but ultimately it does not contain the real solution which is:
If you need more than 32 devices, do not use (and disable) USB3/xhci
Yes, it is that sad, intel has actually designed a newer USB that is much much worse than the previous version as far as number of devices is concerned.

What wasn't clear to me is that xhci supports USB2 and USB1 devices, but no matter what devices you use (USB2 or USB1), you're still limited by that artificial 32 device limit that is due to the broken design of xhci as long as the xhci controller is handling those USB2/USB1 devices for you.
I've been told that some motherboards auto assign their USB ports to an ehci controller or xhci controller depending on what you plug into them. If so, this is the time to plug your USB3 hub with a USB2 cable to force the port to be routed to EHCI. This didn't work on the motherboard I tried on, however.

Now, the good news is that because motherboards try to work with older operating systems that may not support xhci, they usually provide an ehci controller too, the only issue is to get those USB ports assigned to the ehci controller(s).

How do you do this?

  • Turn off USB3 in the bios altogether (what I did). The supermicro motherboard I was using is old enough that it actually contains 2 ehci chips which then multiplied the number of devices you can plug in, gave me 8x more devices than when I had USB3 enabled (ehci can do close to 128 instead of 32 and 2 controllers instead of 1).
  • remove/blacklist the linux xhci driver modules. If the motherboard auto assigns xhci/ehci depending on what driver is loaded, this should work
  • If the motherboard only comes with an xhci controller, you are up a creek without a paddle, but you can still get an external USB2 PCI(-e) card: https://www.amazon.com/gp/product/B002RL8V7E "PCIe USB 2.0 Card - PCI-E USB 2.0 Card" actually comes with 2 USB1 controllers and one USB2 controller. It's not very clear how they are assigned (maybe dynamically depending on what is plugged into the ports). In either case the USB1 and USB2 have the high device limit you're looking for, but if somehow you're needing lots of devices (past 128), you may be able to get more out of the USB1.1 controllers (although at USB1 speeds, so that's probably not what you want). This is how that external card looks like
  • 06:04.0 USB controller: VIA Technologies, Inc. VT82xx/62xx UHCI USB 1.1 Controller (rev 62)
    06:04.1 USB controller: VIA Technologies, Inc. VT82xx/62xx UHCI USB 1.1 Controller (rev 62)
    06:04.2 USB controller: VIA Technologies, Inc. USB 2.0 (rev 65)

    Now, I found another interesting way to do this, on some motherboards you can reroute the USB ports to the USB2 chipset without changing the bios. See https://www.systutorials.com/241533/how-to-force-a-usb-3-0-port-to-work-in-usb-2-0-mode-in-linux
    In the case of my supermicro board, I didn't look at how the two EHCI (USB2) controllers were routed, but it had extra USB cables on the motherboard, so I bought USB headers installed them on the front, and moved some USB devices to them: https://www.amazon.com/gp/product/B00NMBXUXI .

    Note that you likely don't want to buy a USB-3 PCI(-e) card like https://www.amazon.com/gp/product/B00FPIMICA because it creates a new root hub but only allows a measly extra 30-ish devices to be added (vs 120+ with the USB2 card mentioned above).

    Big thanks to

  • Alan Stern who helped me figure this out in https://www.spinics.net/lists/linux-usb/msg175224.html
  • Ruchira Ravoori from fuchsia kernel team who explained things to me further and pointed me to https://forums.intel.com/s/question/0D50P00004905stSAA/hardware-limitations-on-usb-endpoints-xhci?language=en_US

  • More pages: April 2023 March 2023 September 2021 May 2020 January 2020 January 2019 December 2018 March 2018 January 2018 September 2017 January 2017 October 2016 August 2016 July 2016 June 2016 March 2016 February 2016 January 2016 May 2015 March 2015 January 2015 October 2014 May 2014 April 2014 March 2014 January 2014 November 2013 September 2013 May 2013 March 2013 January 2013 December 2012 August 2012 May 2012 March 2012 January 2012 December 2011 August 2011 July 2011 January 2011 October 2010 August 2010 June 2010 April 2010 March 2010 January 2010 December 2009 November 2009 September 2009 August 2009 July 2009 May 2009 January 2009 December 2008 November 2008 October 2008 January 2008 November 2007 August 2007 July 2006 January 2006 August 2005 April 2005 November 2004 March 2004 February 2004

    Contact Email