The Brotronics Broversity RX is an LRS receiver designed to work with a backup 1S lipo which gets recharged from the main power source and can used to power the emergency beacon and a backup twitter to help you find a crashed model in tall weeds :)
If you are interested in that, I also wrote a page on the smaller Brotronics PowerTowerRX without diversity
It's a great LRS module. On top of having the diversity receiver:
It's a good module with good reception (not like the crap from Orange)
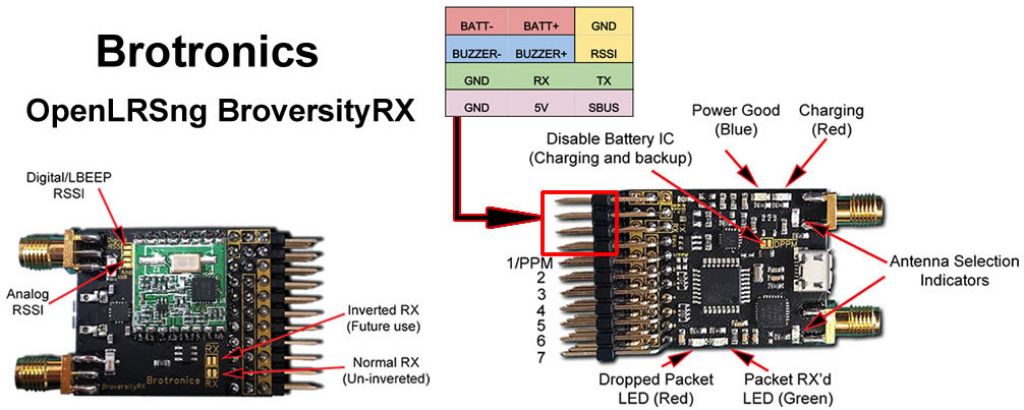
Support for 11 ports (7 PWM, RSSI/LBEEP, Buzzer, RX, TX/Sbus/SUMD/Spektrum)
RX/TX are conveniently wired on 3 adjacent pins (but you have to use the TX pin for SUMD, and GND/5V from the header next to it)
SBUS actually works as the module includes a hardware UART inverter, making SBUS possible. Just use the 3 pins and configure port 11 as SBUS.
However, as a downside the module, or configurator for the module, does not allow setting any port as ANALOG. As a result, you cannot pass 2 analog voltages back to an Frsky receiver via the telemetry link.
Sadly, the author seems to provide absolutely 0 support for his module, and the documentation was minimalistic to say the best. Yet, it's a great little board, but sadly it comes with virtually no instructions, and the author hasn't replied to any of my Emails. I did figure out how to use it in the end, but it took longer than it should have, so I'm going to do the documenting work here:
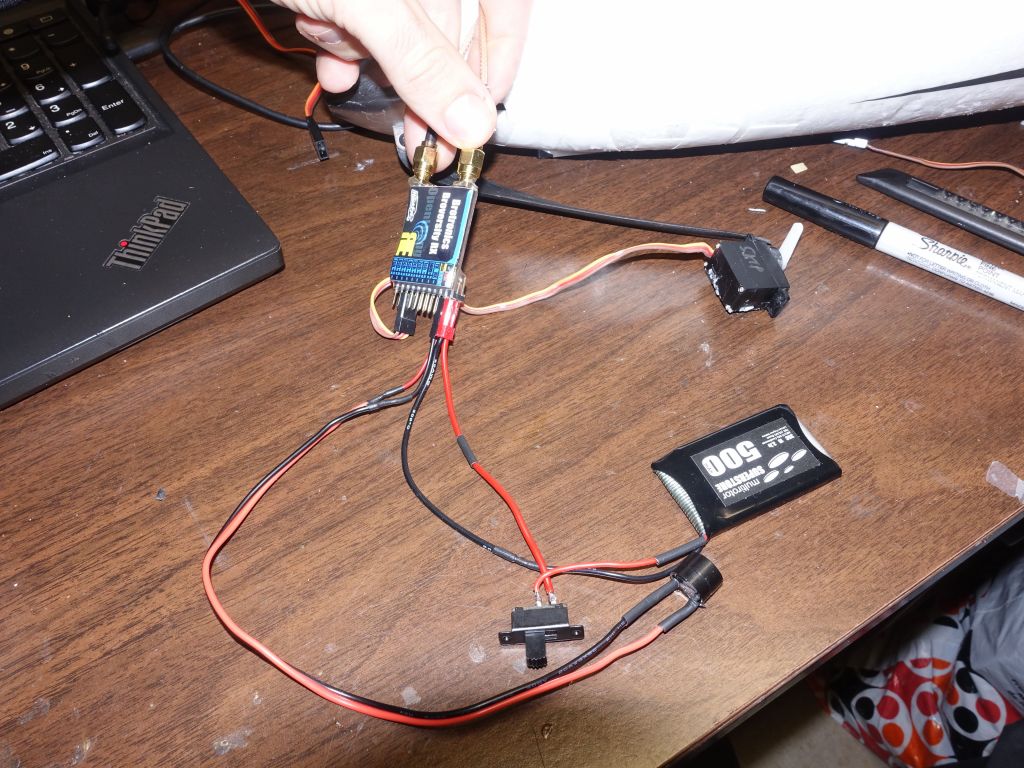
you can see both dipole antennas at a 90 degree angle
the buzzer tells me if TX signal is lost, and acts as a lost model finder
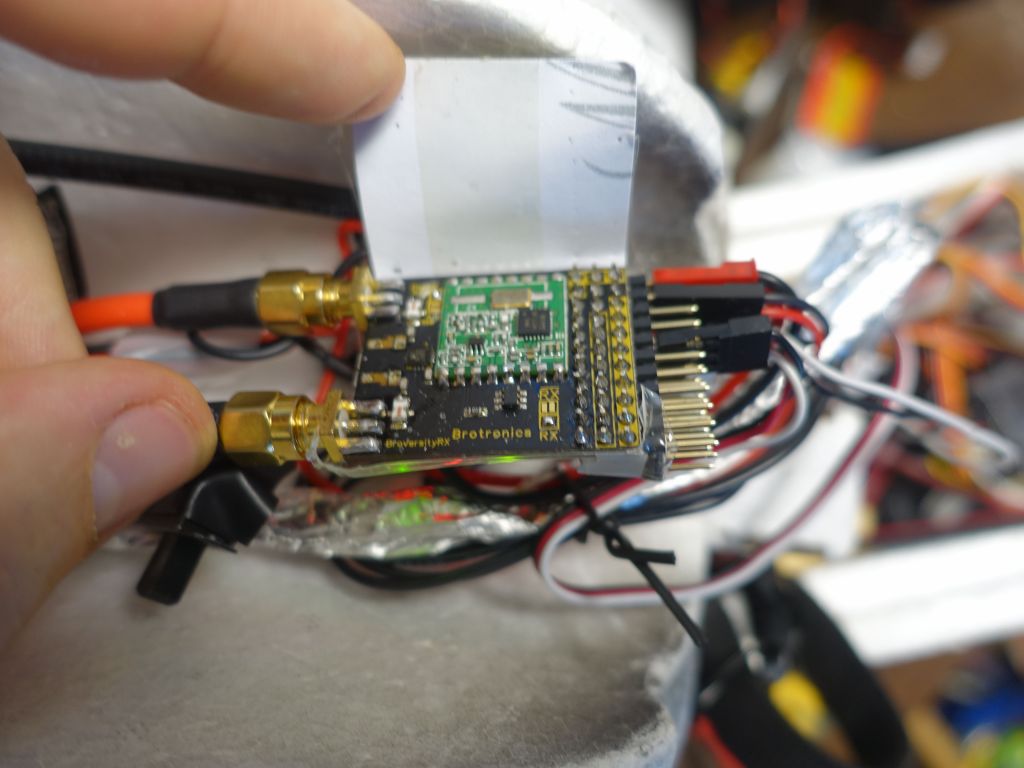
What's not clear from the instructions is that the labelled RSSI pins will not work at all as shippped. I had to cut open the very nice plastic wrap, and hidden under the instructions sheet, in the upper right, you have to bridge 2 pads with solder. I did not get analog RSSI to work, but digital RSSI (i.e. what you'd get from an Frsky receiver, and it requires a capacitor and resistor to get a proper analog signal out of it), worked.
Too bad I had to cut all of this open to get working RSSI :(
This is the single instructions sheet that comes with the device. It has most of what you need, but the pinout is not super clear (I thought the top pins were opposite from what they were after seeing the picture below. Have a look at the video for a better overview of how this all works.
All in all, it's a really nice board, but the limited instructions, and lack of an accessible jumper to get RSSI, is a pity. As to why RSSI isn't even soldered to work at all when you receive the board, I have no idea.
Wiring is not super obvious, and neither is how everything works, so this little video should be worth a thousand words:
If you are using Ardupilot on Pixhawk, some relevant notes:
PPM support on Ardupilot only works with 12 channels as of AP 3.4 (you can map channels 13-16 to actual pins on the module)
SUMD can be connected to a pixhawk via the spektrum satellite port as long as you route power to a 5V line and not the 3.3V on the satellite port. This supports passing 16 channels to pixhawk.
SBUS, compared to other modules like hawkeye, just works, plug it in and you're in business
However, both SUMD and SBUS will prevent you from using the TX pin to send serial telemetry back, so you have to chose serial telemetry, or 16 channels passed to pixhawk
If you pick SBUS, note that scaling and endpoints are different, so you'll get slighly different values read with SBUS compared to PPM or SUMD.
Update #2: Mobius USB tools has been back for a while and works again. therau2000 likely changed his name to iMobiusMike given all the bad press he got, but once burnt twice shy. I do not encourage you to buy his app, no matter what he promises, given how he royally screwed his users in the past. Tomas Chladek's Mobius ActionCam app works fine now, use that one.
Update 2015/12/23: Kudos for Tomas Chladek for having stepped up and added USB support to his Mobius ActionCam and app. Thanks to him, and for a very reasonable price, one can update/reconfigure mobius cameras in the field without a computer.
Original post:
Sigh, I was on the field with my RC plane and need to change the contrast on my mobius cameras before taking off, and when I started Mobius USB Tools, I was greeted by a screen that said it wasn't supported anymore and that I had the option of uninstalling it.
Well, crap....
I just spend a few hours today looking into WTF happened, and sadly the author, therau2000@videotron.ca deliberately sabotaged his very nice app and screwed all his users in the process.
What seems to have happened is that he was hoping to get money from mobius for each camera sold in return of his work. To be fair, he did put in a lot of work, and the result was a great app that helped a lot of people. I write open source myself and give it away to help others too, so I know how this works, well except that I've likely spent less time on it and also I don't expect compensation in return
Mobius apparently declined to provide whatever compensation he asked for (or maybe it was an ultimatum or shakedown, hard to say), and in turn he decided to kill his app and screw all his users who would have been happy to give him money for his work, but never were given the chance to.
This is where the app used to be: https://web.archive.org/web/20150708002619/https://play.google.com/store/apps/details?id=therau2000.amcamobiusac
I checked http://www.appdownloader.net/Android/App/81629/therau2000.amcamobiusac to see if I could just go back to an earlier APK that wasn't sabotaged, but I found out that he clearly had planned to do this a long time ago and sabotaged all his apks so that they would not work when a new version was out. I've gone all the way back to 'Mobius USB Config (aMCA) 7.0.0.4' from 2014, and it tells you to upgrade to a newer version instead of working. I tried a few versions in the middle of none of them worked in a useful fashion, even in airplane mode.
Obviously the author has the right of screwing over all his users like he did, but it's really a dick move, and instead of being mad a mobius like he was hoping I/we'd be, I'm mad at him for throwing away his good work, and screwing all his users. While http://webcache.googleusercontent.com/search?q=cache:U9hpWobhL5kJ:pages.videotron.com/therau20/nr16/android.html+&cd=1&hl=en&ct=clnk&gl=us claims "There has never been any intention on my part to hurt any of the 16,160 Mobius USB Tools Users", that is exactly what he did. Saying otherwise on a web page is BS.
Sadly, the replacement options aren't as good. You can get https://play.google.com/store/apps/details?id=cz.chladek.mobiusactioncam but it doesn't have the code to mount the sdcard via USB, it's meant for you to put the microusb card from your mobius inside your phone (this has now been fixed, please use this app).
If your phone is rooted, in theory you can use https://play.google.com/store/apps/details?id=eu.chainfire.stickmount to mount your mobius locally and hope the other app lets you edit the settings directly. https://play.google.com/store/apps/details?id=com.vaultmicro.camerafi&hl=en is supposed to let you see video from camera (press the recording button after plugging the mobius in to switch to webcam mode).
I personally would prefer that someone hacks the last good known version of therau2000.amcamobiusac and removes the disable code. Anyway, sad state of affairs for mobius and android users.
That said, for now, my workaround is to use my rooted phone where I can run stickmount if everything works well, then it mounts the mobius under /sdcard/usbmount/sda1 where in turn the "mobius actioncam" app can mount a syscfg.txt file that I first need to create with long press menu, long press power on (with camera unplugged). I've also verified that long press on the camera button does turn the camera into webcam mode, and then it works with 'camera fi' to see where the lens in pointing.
(on a good day it also seems that my marshmallow phones can mount the mobius as a usb storage device, only using basic OS support, but I have no idea where it's mounted, and that feature doesn't seem to be reliable at all)
I was interested in using geofencing only to get an altitude deck. As in if for some reason, I'm flying too low, the autopilot would take over and bring the airplane back to a proper altitude. This lets me fly freely at any altitude, but if some reason I lose control (or video during FPV and the aircrafts descends too much before I have time to hit RTL), I have the peace of mind that Arduplane will take over.
This was however not easy to setup at all because geofencing is not really designed with that use case in mind in APM::Plane. As discussed in this bug: https://github.com/diydrones/ardupilot/issues/2984 , in arducopter you can simply set an altitude limit but not in Arduplane.
So, what you need to do is the following:
FENCE_ACTION,1
FENCE_AUTOENABLE,0
FENCE_CHANNEL,8 =-> change to your channel
FENCE_MAXALT,130 => you must set a max alt, or min alt will not work :(
FENCE_MINALT,50
FENCE_RETALT,100
FENCE_RET_RALLY,1 => very important, means that guided will go back to the nearest rally point, or if you have none, to your RTL/takeoff point.
You're not done though, now you have to upload a useless geofence area or nothing will work. As per http://plane.ardupilot.com/wiki/geofencing/ , I uploaded a geofence as big as the US, and put the geofence return point in the middle of the ocean.
The end result is that the geofence return point is too far, so when guided mode kicks in, it looks for a rally point, I have none, and then falls back to the RTL/takeoff point, which is what I wanted.
Sadly, though, I was only able to setup that useless geofence area with mission planner.
So there you go, this can be made to work, but apparently you have to use mission planner (which means Virtualbox for me since I'm on linux), and you need to setup a huge polygon, a gence return point that is very far away from where you'll ever fly, and make sure that you do set FENCE_MAXALT or FENCE_MINALT won't work (which seems to be a bug, as of AP 3.4).
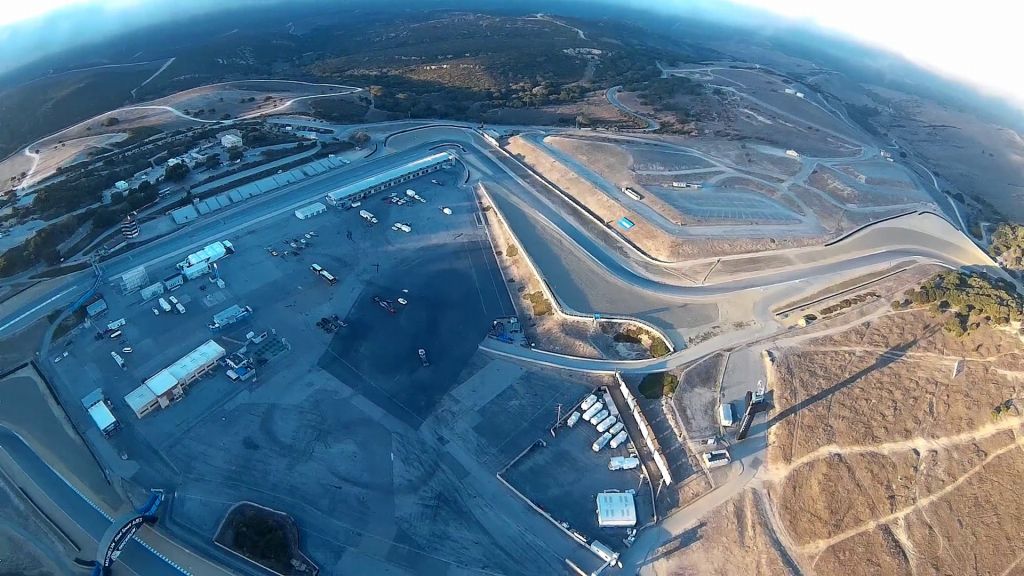
It also had been ages since I took some RC shots from Laguna Seca in 2009. Back then, I took my small minimag with a heavy gopro hanging from it, and flew it line of sight from a few corners of the track. As a result, it was impossible to fly the whole track.
I was back for an Unlimited sound day with Trackmasters, so I figured I'd do a nice overflight with my big powered glider. Sadly, because we still think that not having daylight savings time all year is a good idea, we had just switched back to the time where it gets dark way too early for no good reason, and I was only able to start flying when driving was over and the sun was already setting, first giving me sun glare, and then flying in dusk where lighting was questionable.
Due to the conditions which included heavy winds and poor lighting, I put a fairly high altitude floor on my autopilot, and as a result all the shots are from a bit higher than they should have been for better views, so sorry about that.
Little climb up
My gear, ready to go
rear cam on 1st flight takeoff
climbing up the hill, gave me a reasonable vantage point on the entire track
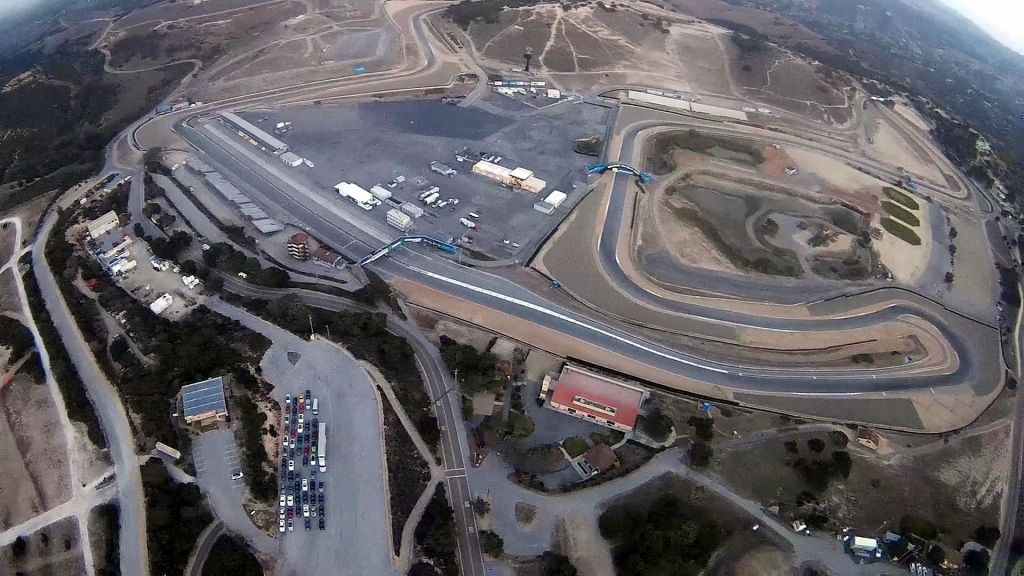
By the time I started, everyone had driven out or was driving out already. As a result, the paddocks were a bit bare already:
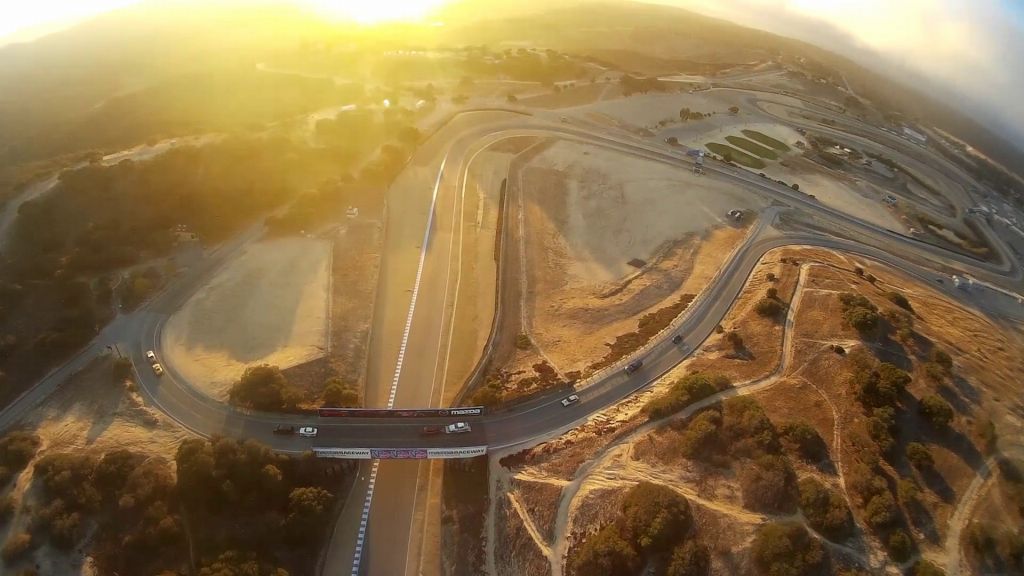
And here is a list of Laguna Seca's turns from a few different angles:
T1
T1-T2-T3-T4
T2-T3
T4-T5
T4 seen from the rear
T5
T5 from the rear
T6
T6
T7
nice little hill on the side of T7
T8-T9-T10-T11
T8
T8-T9
Cool to see where the bridge before T9, goes
T9 from the rear
T10 from the rear
T10-T11
T11, definitely sharp... Never noticed you could drive off the track to an access road on the right
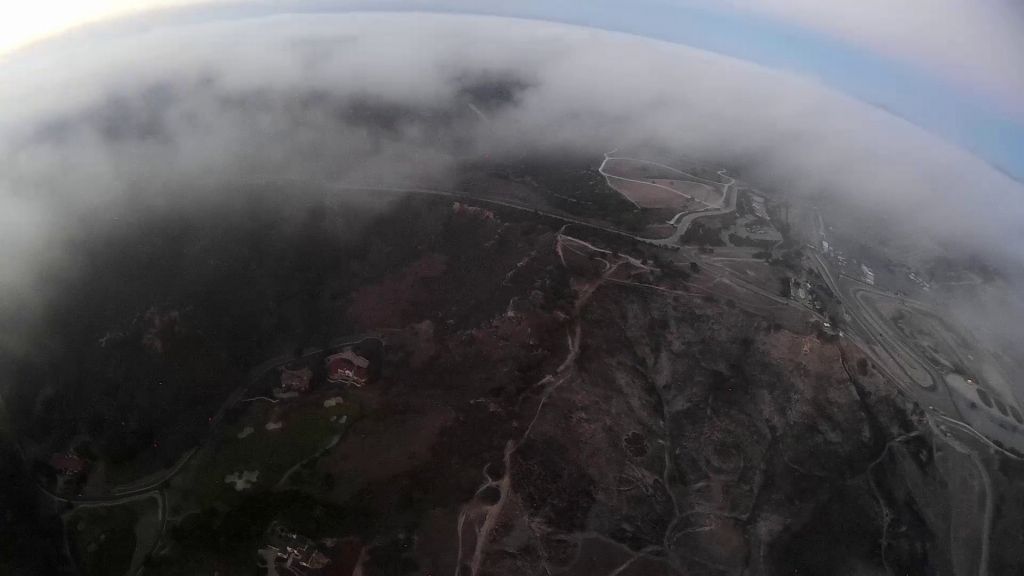
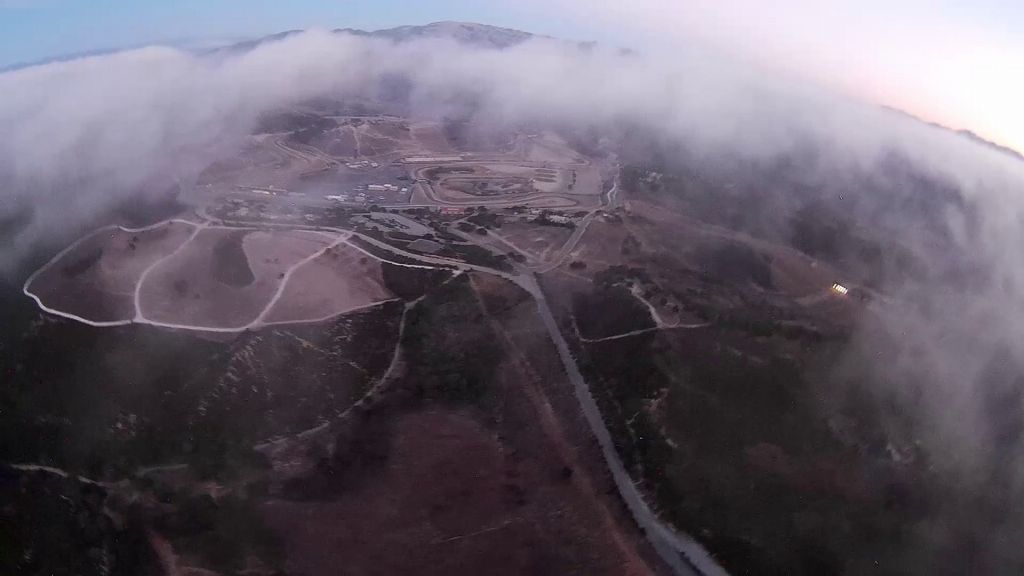
I then went flying a bit away from the track towards the fog that was rolling in. That was my first time flying VFR on top without actually being very high. I'm glad I was flying with instruments (IFR-like) though.
The flight videos aren't great due to video quality, and my rear camera that was acting up (I replaced the mobius with another one since then), but here they are if you'd like them. The viewsync composite (front/rear) are a bit more interesting:
Flight 1: You can try the Viewsync Flight #1 with both front/rear views. Sadly the rear video was skipping due to a camera problem. Otherwise, you can try the front camera only below: