Intro
I had a forced upgrade from P73 to P17gen2 after my P73 suddenly died, and honestly I wasn't really impressed with the P17gen2, it was still huge, was not faster CPU wise, and did not run any longer on batteries despite going from Intel gen9 to gen11 (lenovo has no newer CPUs for 17" and 4K). This is where I looked into other options and found the Dell XPS 9730 as pretty much the only up to date gen13 laptop with 4K and 17" LCD.
Have a look at this page on Thinkpad P70 vs P73 vs P17

XPS 9730 is definitely smaller and more pixels than the P17gen

smaller footprint and lighter, sadly also a shit keyboard :(
")
the text console is very small ;)

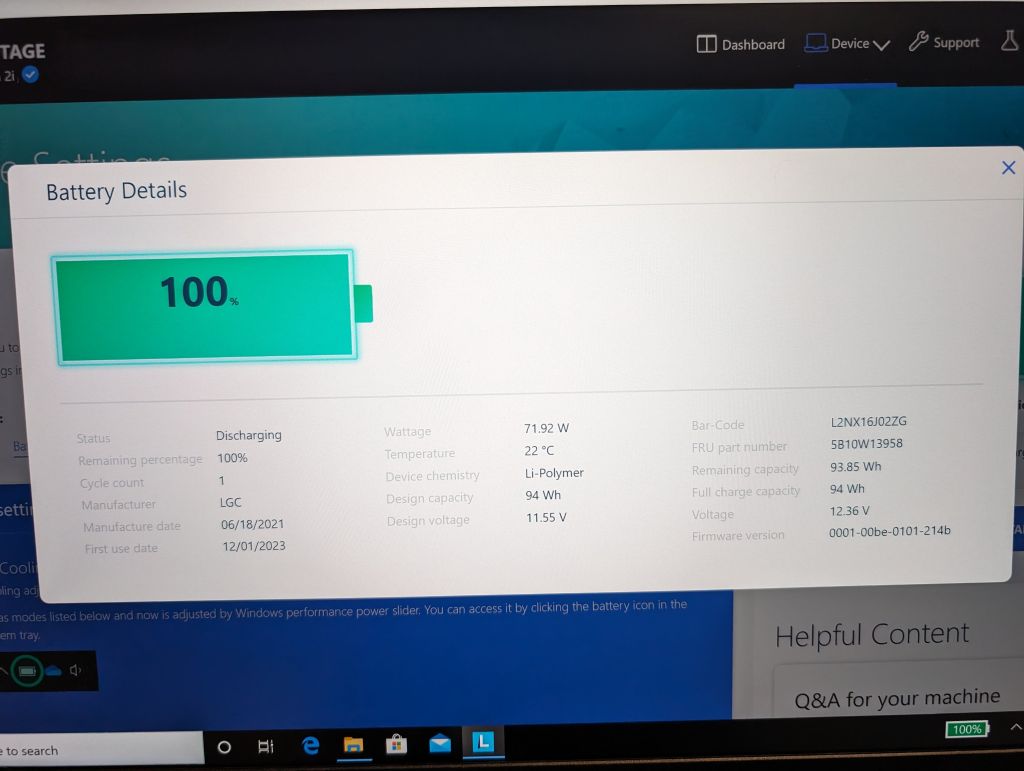
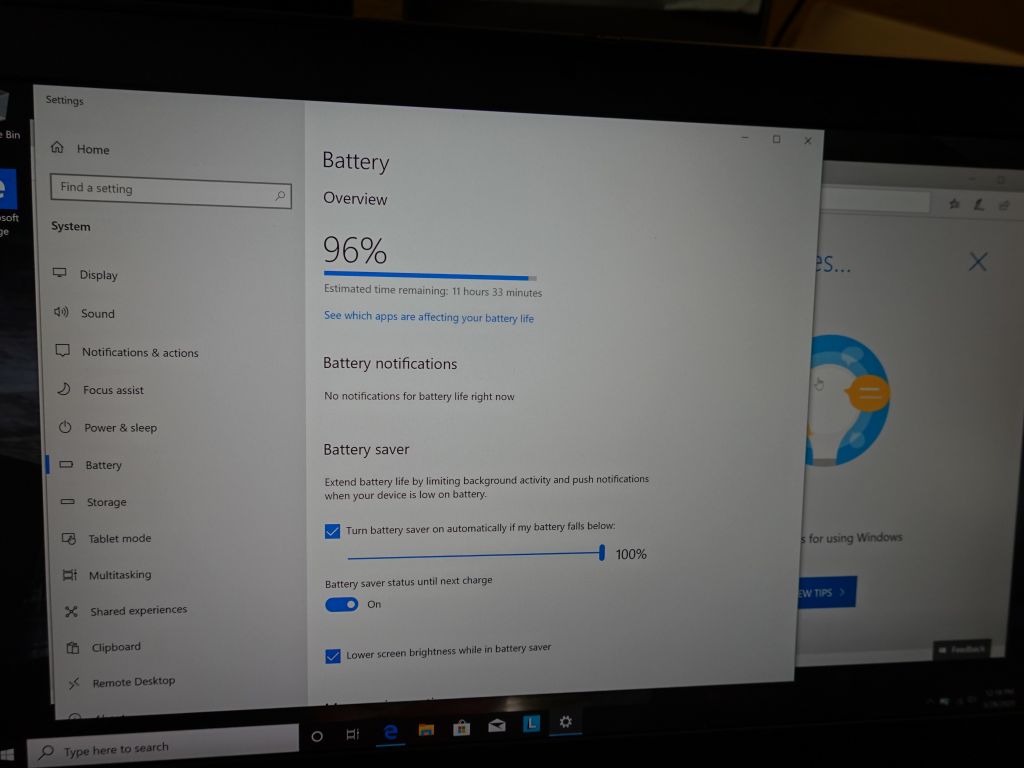
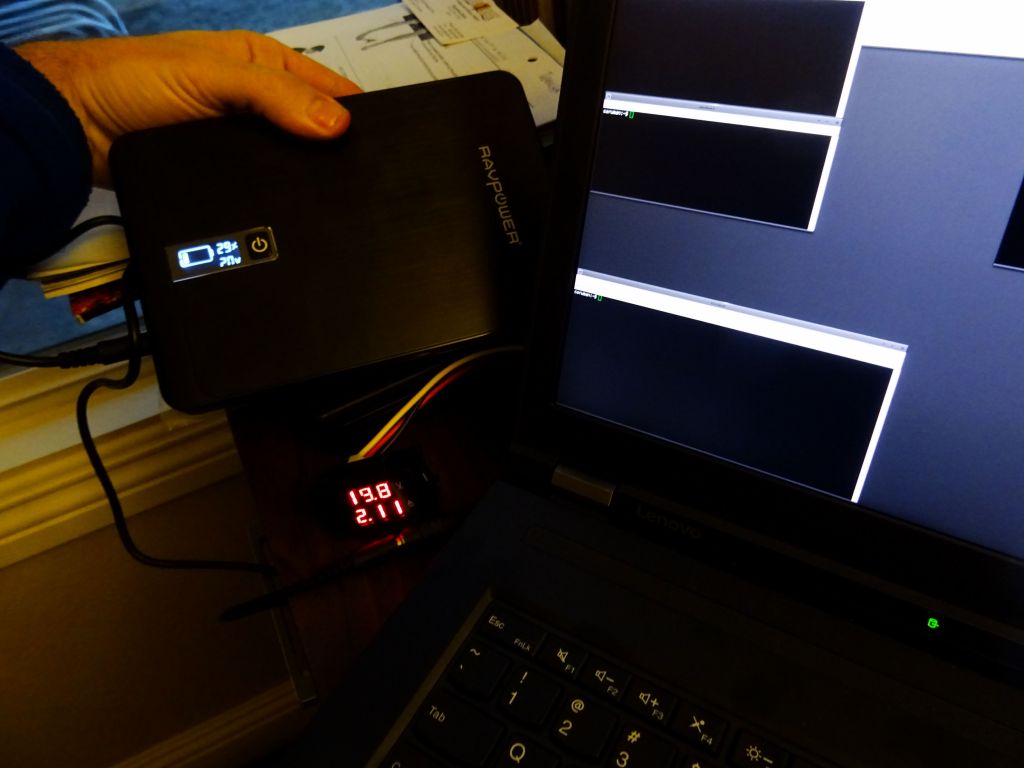
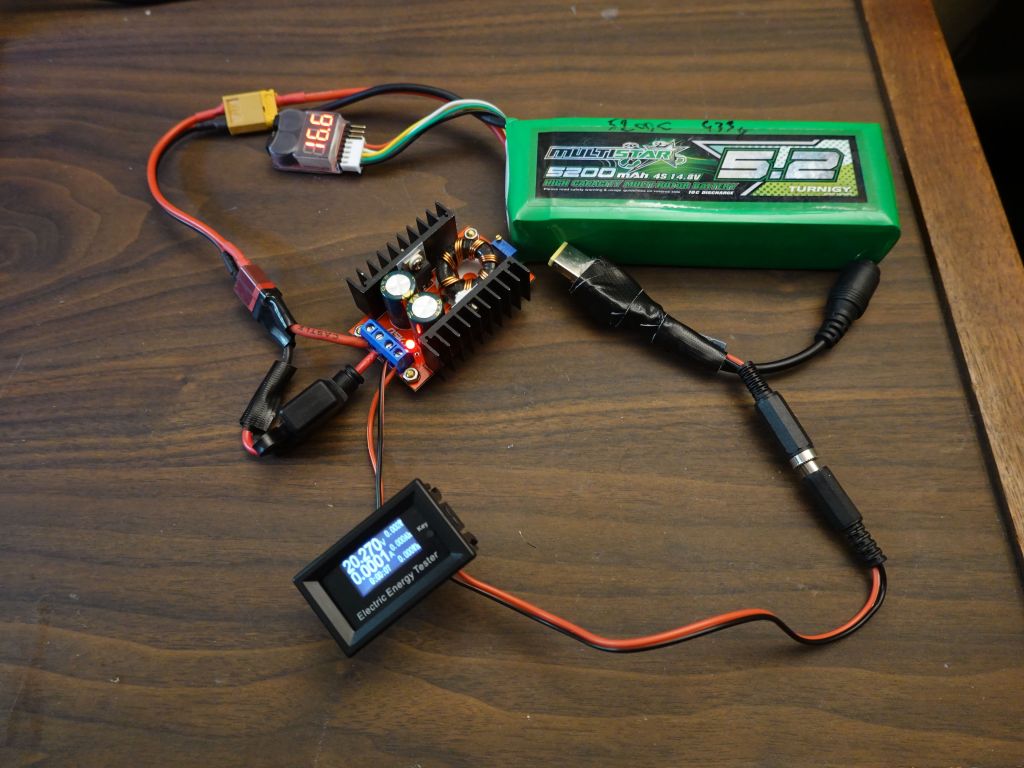
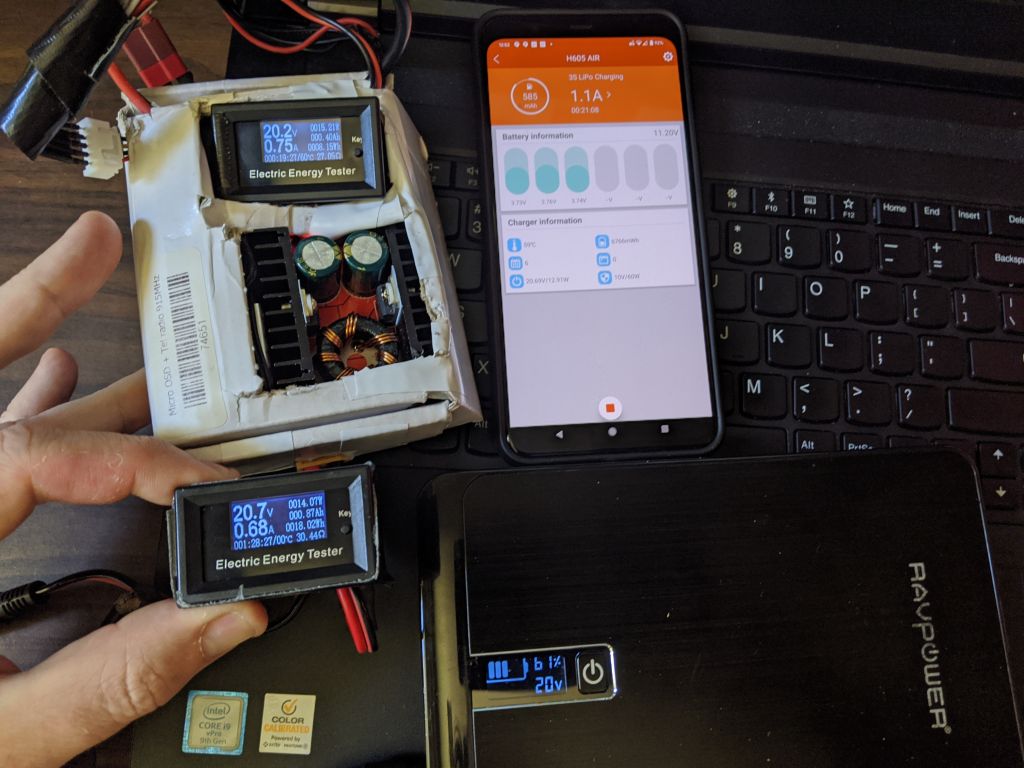
battery use is much better than lenovo

13th gen intol, 6 fast cores plus 8 low power cores

nice 3840x2400 native panel resolution
")
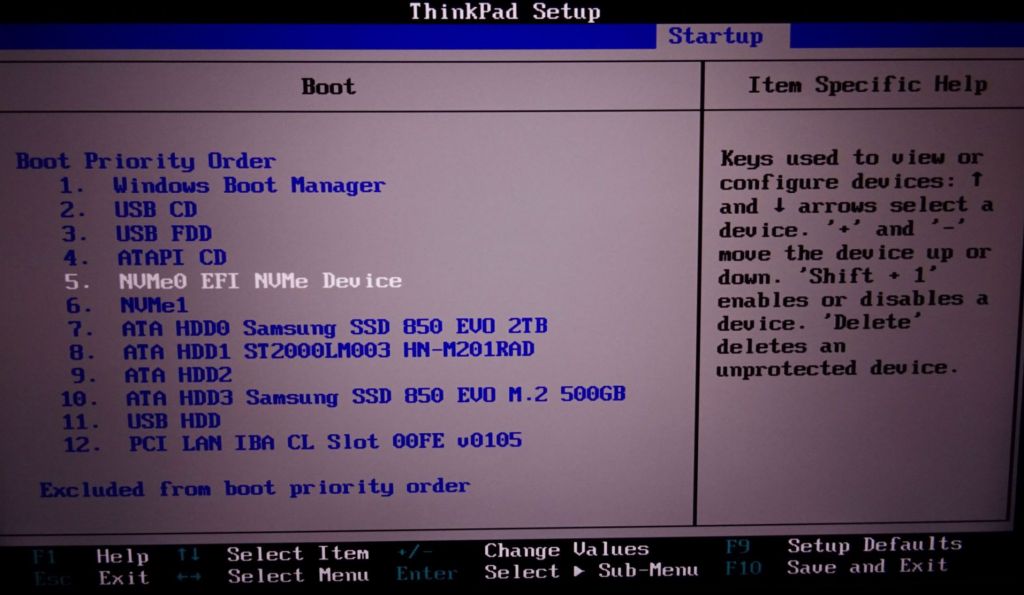
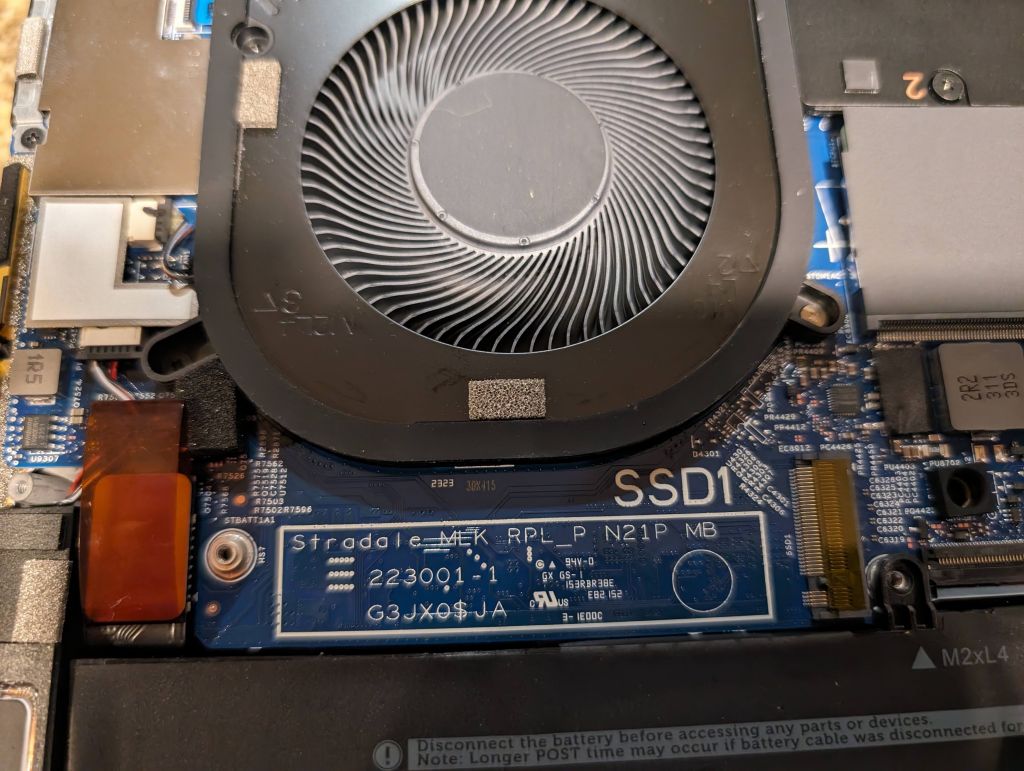
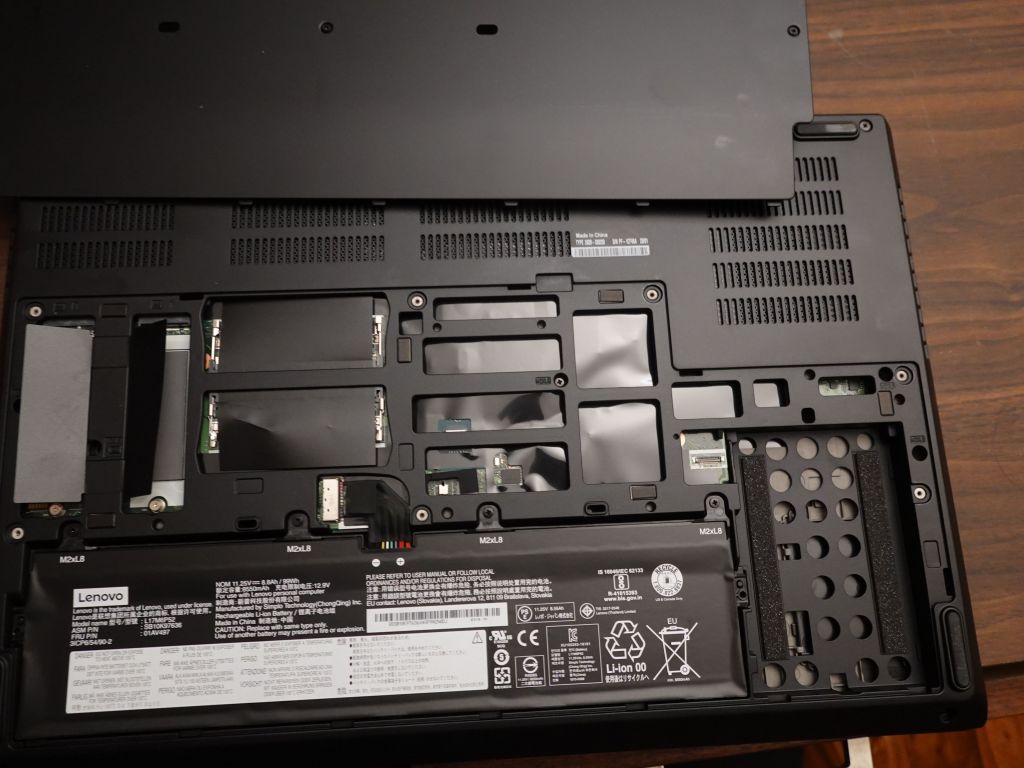
compared to lenovo, the laptop is not easy to open, but hopefully you only have to do it once to add/replace NVME M2 drives (M2 SATA is not supported)
The things I don't like about this laptop however:
no trackpoint. I'm sorry trackpoint is so much more reliable and efficient when you know how to use it. The trackpoint only is why I go back to my thinkpad when I'm not travelling and need lightweight and long battery life
the keyboard layout sucks. Why trying to save keys on a 17" laptop? Why no Pg Down/Pg Up without Fn? Why no direct home and end? and OMG sysrq does not work :( Seriously, Dell, what were you thinking? Why such a crappy small laptop keyboard on your biggest keyboard? The other reason I go back to the thinkpad is because of the proper keyboard.
Linux config files
You can get them here
Missing hardware ports
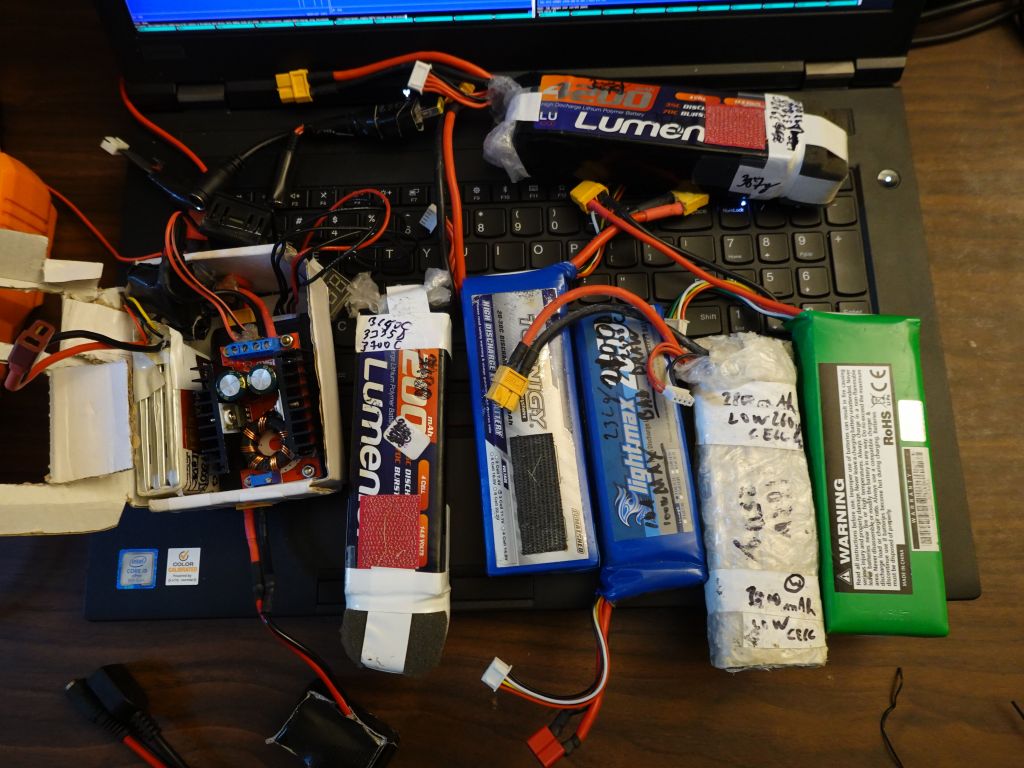
Somehow Dell decided it was worth removing the USB-A ports, that sucks, I really wanted at least one or two. Anyway, you can use USB-C to USB-A adapters, but now you're carrying dongles taped ton your laptop :-
They do provide a dongle that outputs 1x USB-A (works but dongle is too big for that), and 1x HDMI. That latter one is actually the cool one, because it just worked on linux. Getting HDMI out on lenovo with their stupid nvidia chip in the way has been a complete pain, but HDMI over USB-C actually just worked!
Hardware support
A recent kernel is important with the right build options to get support for the touchpad, the touchscreen, and sound
modprobe dell_laptop

merlin:~# lsmod | grep ^dell
dell_rbu               20480  0
dell_laptop            32768  0
dell_wmi               28672  1 dell_laptop
dell_smbios            32768  2 dell_wmi,dell_laptop
dell_wmi_sysman        53248  0
dell_wmi_descriptor    20480  2 dell_wmi,dell_smbios
dell_wmi_ddv           24576  0

Need this in kernel build:
Dell X86 Platform Specific Device Drivers

Dell X86 Platform Specific Device Drivers (X86_PLATFORM_DRIVERS_DELL) [N/y/?] (NEW) y
  Alienware Special feature control (ALIENWARE_WMI) [M/n/?] (NEW) m
  Dell Systems Management Base Driver (DCDBAS) [M/n/y/?] (NEW) m
  Dell Laptop Extras (DELL_LAPTOP) [M/n/?] (NEW) m
  BIOS update support for DELL systems via sysfs (DELL_RBU) [M/n/y/?] (NEW) m
  Dell Airplane Mode Switch driver (DELL_RBTN) [M/n/?] (NEW) m
  Dell SMBIOS driver (DELL_SMBIOS) [M/n/?] (NEW) m
    Dell SMBIOS driver WMI backend (DELL_SMBIOS_WMI) [Y/n/?] (NEW) m
  Dell Latitude freefall driver (ACPI SMO88XX) (DELL_SMO8800) [M/n/y/?] (NEW) y
  Dell WMI notifications (DELL_WMI) [M/n/?] (NEW) y
    Dell WMI Hardware Privacy Support (DELL_WMI_PRIVACY) [N/y/?] (NEW) y
  WMI Hotkeys for Dell All-In-One series (DELL_WMI_AIO) [M/n/?] (NEW) y
  Dell WMI sensors Support (DELL_WMI_DDV) [M/n/?] (NEW) m
  External LED on Dell Business Netbooks (DELL_WMI_LED) [M/n/?] (NEW) m
  Dell WMI-based Systems management driver (DELL_WMI_SYSMAN) [M/n/?] (NEW) m
Touchpad
https://forums.gentoo.org/viewtopic-t-1026576-start-0.html <<< kernel modules for touchpad
Have a look for USB HID SUPPORT and turn on raw HID SUPPORT there.
merlin:~# lsmod | grep -i HID
hid_sensor_als         16384  0
hid_sensor_trigger     20480  2 hid_sensor_als
industrialio_triggered_buffer    12288  1 hid_sensor_trigger
industrialio          131072  4 industrialio_triggered_buffer,hid_sensor_trigger,kfifo_buf,hid_sensor_als
hid_sensor_iio_common    20480  2 hid_sensor_trigger,hid_sensor_als
intel_hid              32768  0
sparse_keymap          16384  2 intel_hid,dell_wmi
hid_multitouch         32768  0
usbhid                 69632  0
hid_sensor_custom      28672  0
hid_sensor_hub         28672  4 hid_sensor_trigger,hid_sensor_iio_common,hid_sensor_als,hid_sensor_custom
intel_ishtp_hid        28672  0
hid_generic            12288  0
usbcore               389120  5 xhci_hcd,usbhid,uvcvideo,btusb,xhci_pci
intel_ishtp            73728  2 intel_ishtp_hid,intel_ish_ipc
i2c_hid_acpi           12288  0
i2c_hid                36864  1 i2c_hid_acpi
hid                   167936  6 i2c_hid,usbhid,hid_multitouch,hid_sensor_hub,intel_ishtp_hid,hid_generic

screen touch works

touchpad:
merlin:~$ xinput
Unable to connect to X server
merlin:~$ DISPLAY=:0 xinput
| Virtual core pointer                          id=2    [master pointer  (3)]
|   | Virtual core XTEST pointer                id=4    [slave  pointer  (2)]
|   | ELAN2097:00 04F3:2A15                     id=10   [slave  pointer  (2)]
|   | VEN_06CB:00 06CB:CE7E Mouse               id=11   [slave  pointer  (2)]
|   | VEN_06CB:00 06CB:CE7E Touchpad            id=12   [slave  pointer  (2)]
|   | PS/2 Generic Mouse                        id=19   [slave  pointer  (2)]
| Virtual core keyboard                         id=3    [master keyboard (2)]
    | Virtual core XTEST keyboard               id=5    [slave  keyboard (3)]
    | Video Bus                                 id=6    [slave  keyboard (3)]
    | Video Bus                                 id=7    [slave  keyboard (3)]
    | Power Button                              id=8    [slave  keyboard (3)]
    | Sleep Button                              id=9    [slave  keyboard (3)]
    | sof-soundwire Headset Jack                id=13   [slave  keyboard (3)]
    | Intel HID events                          id=14   [slave  keyboard (3)]
    | Intel HID 5 button array                  id=15   [slave  keyboard (3)]
    | Dell Privacy Driver                       id=16   [slave  keyboard (3)]
    | Dell WMI hotkeys                          id=17   [slave  keyboard (3)]
    | AT Translated Set 2 keyboard              id=18   [slave  keyboard (3)]
Other touchpad notes, including upgrading your firmware if it's too old and
setup an ACPI hotkey to turn the touchpad back on with Fn+F3 if it gets turned
off by mistake
https://ubuntuforums.org/archive/index.php/t-2392658.html
So, the two touchpads (you can get the id easily with dmesg | grep -i touchpad):
ELAN 04F3:311C <-- this is the one with issues
Synaptics 06CB:CE7E
=> I have the right one but if not lastest firmware fixes things:
https://bugzilla.kernel.org/show_bug.cgi?id=214597

https://www.dell.com/support/kbdoc/en-us/000150104/precision-xps-ubuntu-general-touchpad-mouse-issue-fix

Added a hotkey to re-enablet touchpad if it gets turned off by mistake by syndaemon
merlin:/etc/acpi# grep .  touchpad-local.sh  events/dell-f*
touchpad-local.sh:#!/bin/bash
touchpad-local.sh:su - merlin -c "DISPLAY=:0 synclient TouchpadOff=0"
events/dell-f4-cdplay-sleep-local:event=button/volumeup VOLUP 00000080 00000000
events/dell-f4-cdplay-sleep-local:action=/etc/acpi/touchpad-local.sh
Fan control needed for CPU
Fan control is also required to allow CPUs to work faster, or they will be temperature throttled.
merlin:~#  smbios-thermal-ctl -g
-------------------------------------------------------------------

Current Thermal Modes:
         Performance

Current Active Acoustic Controller (AAC) Mode:
         AAC mode Disabled

Current Active Acoustic Controller (AAC) Mode:
        Global (AAC enable/disable applies to all supported USTT modes)

Current Fan Failure Mode:
Helper function to Get current Thermal Mode settings

by default, CPUs are throttled down for temperature, install throttled to control fans
which in turn allow CPUs to run harder:
apt install thermald
merlin:~# systemctl start thermald
merlin:~# psg thermald
root       45398  0.0  0.0 287000 10240 ?        Ssl  04:09   0:00 /usr/sbin/thermald --systemd --dbus-enable --adaptive
Sound
Sound is fairly tricky, it worked in Ubuntu 23, nothing less than that and not so much on Debian.
This firmware module is crutial and missing on debian:
merlin:/# dpkg -S iwlwifi-so-a0-gf-a0-83.ucode
linux-firmware: /lib/firmware/iwlwifi-so-a0-gf-a0-83.ucode.zst
/etc/pipewire/microphone.conf
# https://wiki.archlinux.org/title/PipeWire
# this works for pipewire-media-session but not wireplumber (that uses lua)
context.objects = [
    { factory = adapter
        args = {
            factory.name           = api.alsa.pcm.source
            node.name              = "microphone"
            node.description       = "Undetected Microphone"
            media.class            = "Audio/Source"
# arecord -l
            api.alsa.path          = "hw:1,7"
        }
    }
]

merlin:~# dmesg | grep snd
[   84.237700] snd_hda_intel 0000:00:1f.3: vgaarb: pci_notify
[   84.242752] snd_hda_intel 0000:00:1f.3: runtime IRQ mapping not provided by arch
[   84.242780] snd_hda_intel 0000:00:1f.3: DSP detected with PCI class/subclass/prog-if info 0x040100
[   84.247195] snd_hda_intel 0000:00:1f.3: SoundWire enabled on CannonLake+ platform, using SOF driver
[   84.247203] snd_hda_intel 0000:00:1f.3: vgaarb: pci_notify

merlin:~# dmesg | grep firmware
[    2.924714] i915 0000:00:02.0: [drm] Finished loading DMC firmware i915/adlp_dmc.bin (v2.19)
[    2.949985] i915 0000:00:02.0: [drm] GT0: GuC firmware i915/adlp_guc_70.bin version 70.5.1
[    2.949993] i915 0000:00:02.0: [drm] GT0: HuC firmware i915/tgl_huc.bin version 7.9.3
[   83.756991] systemd[1]: systemd-pcrmachine.service - TPM2 PCR Machine ID
Measurement was skipped because of an unmet condition check
(ConditionPathExists=/sys/firmware/efi/efivars/StubPcrKernelImage-4a67b082-0a4c-41cf-b6c7-440b29bb8c4f).
[   84.624266] iwlwifi 0000:00:14.3: loaded firmware version 83.e8f84e98.0 so-a0-gf-a0-83.ucode op_mode iwlmvm
[   85.611677] Bluetooth: hci0: Minimum firmware build 1 week 10 2014
[   85.641830] Bluetooth: hci0: Found device firmware: intel/ibt-0040-0041.sfi
[   87.312791] Bluetooth: hci0: Waiting for firmware download to complete
https://thesofproject.github.io/latest/getting_started/intel_debug/suggestions.html#run-alsa-info

No sound on speakers on dell 9730 (But works on wired headphones and bluetooth) #4758:
https://github.com/thesofproject/linux/issues/4758#issuecomment-1874578163

apt-get install -t bullseye-backports firmware-sof-signed thermald
intel-microcode amd64-microcode firmware-realtek firmware-iwlwifi

apt-get install -t unstable firmware-sof-signed alsa-ucm-conf

Without alsa-ucm.conf (not always installed on debian), this crutial file was missing:
merlin:~# cat /usr/share/alsa/ucm2/sof-soundwire/rt1316-2.conf
# Use case Configuration for sof-soundwire card

SectionDevice."Speaker" {
        Comment "Speaker"

        If.lrswitch {
                Condition {
                        Type ControlExists
                        Control "name='rt1316-1 DAC L Switch'"
                }
                True {
                        EnableSequence [
                                cset "name='rt1316-1 RX Channel Select' L,L"
                                cset "name='rt1316-2 RX Channel Select' R,R"
                                cset "name='rt1316-1 DAC L Switch' 1"
                                cset "name='rt1316-1 DAC R Switch' 1"
                                cset "name='rt1316-2 DAC L Switch' 1"
                                cset "name='rt1316-2 DAC R Switch' 1"
                                cset "name='Speaker Switch' on"
                        ]

merlin:~$ inxi -aA
Audio:
  Device-1: Intel vendor: Dell driver: sof-audio-pci-intel-tgl
    alternate: snd_hda_intel,snd_sof_pci_intel_tgl bus-ID: 0000:00:1f.3 chip-ID: 8086:51ca
    class-ID: 0401
  API: ALSA v: k6.6.9-amd64-volpre-sysrq-20240101 status: kernel-api with: aoss
    type: oss-emulator tools: alsamixer,amixer
  Server-1: PipeWire v: 0.3.65 status: active (process) with: 1: pipewire-pulse status: active
    2: wireplumber status: active 3: pipewire-alsa type: plugin 4: pw-jack type: plugin
    tools: pactl,pw-cat,pw-cli,wpctl

merlin:~$ wpctl status
PipeWire 'pipewire-0' [0.3.65, merlin@merlin.svh.merlins.org, cookie:3437972412]
 `- Clients:
        31. pipewire                            [0.3.65, merlin@merlin.svh.merlins.org, pid:3849]
        33. WirePlumber                         [0.3.65, merlin@merlin.svh.merlins.org, pid:3847]
        34. WirePlumber [export]                [0.3.65, merlin@merlin.svh.merlins.org, pid:3847]
        81. Efl Volume Control                  [0.3.65, merlin@merlin.svh.merlins.org, pid:32317]
        95. enlightenment                       [0.3.65, merlin@merlin.svh.merlins.org, pid:32317]
       102. wpctl                               [0.3.65, merlin@merlin.svh.merlins.org, pid:41767]

Audio
 |- Devices:
 |      44. sof-soundwire                       [alsa]
 |
 |- Sinks:
 |      53. sof-soundwire HDMI / DisplayPort 3 Output [vol: 1.00]
 |      54. sof-soundwire HDMI / DisplayPort 2 Output [vol: 1.00]
 |      55. sof-soundwire HDMI / DisplayPort 1 Output [vol: 1.00]
 |      56. sof-soundwire Headphones            [vol: 1.00]
 |  *   57. sof-soundwire Speaker               [vol: 0.50]
 |
 |- Sink endpoints:
 |
 |- Sources:
 |      58. sof-soundwire Headset Microphone    [vol: 1.03]
 |  *   59. sof-soundwire SoundWire microphones [vol: 0.48]
 |
Configs
If that helps, a few config files ( You also can get them here )
This config file is very important if you want to configure the touchpad to emulate 3 buttons at the bottom
of the bad (left/middle/right)
/etc/X11/xorg.conf.d/70-synaptics.conf
# https://wiki.archlinux.org/title/Touchpad_Synaptics#Configuration
# https://www.dell.com/support/kbdoc/en-us/000150104/precision-xps-ubuntu-general-touchpad-mouse-issue-fix

Section "InputClass"
    Identifier "touchpad"
    Driver "synaptics"
    MatchIsTouchpad "on"
       #Option "TapButton1" "1"
       #Option "TapButton2" "3"
       #Option "TapButton3" "2"
       #Option "VertEdgeScroll" "on"
       #Option "VertTwoFingerScroll" "on"
       #Option "HorizEdgeScroll" "on"
       #Option "HorizTwoFingerScroll" "on"
       #Option "CircularScrolling" "on"
       #Option "CircScrollTrigger" "2"
       #Option "EmulateTwoFingerMinZ" "40"
       #Option "EmulateTwoFingerMinW" "8"
       #Option "CoastingSpeed" "0"
       #Option "FingerLow" "30"
       #Option "FingerHigh" "50"
       #Option "MaxTapTime" "125"
       #Option "SendEventsMode" "disabled-on-external-mouse"
       #Option "Tapping" "True"
       Option "AccelProfile" "adaptive"
       Option "AccelSpeed" "0.3"
       #Option "TappingDrag" "True"
       #Option "HorizontalScrolling" "True"
       #Option "ScrollMethod" "edge"
       # https://wiki.archlinux.org/title/Touchpad_Synaptics
       # left 40% middle 25% (40% to 65%) right 35% (from 65% to 0=inf)
       # buttons go from 90% down to 0=inf
        Option     "SoftButtonAreas"  "66% 0 90% 0 40% 65% 90% 0"
EndSection
lmsensors if the right kernel build options are set
merlin:~# sensors
coretemp-isa-0000
Adapter: ISA adapter
Package id 0: +62.0�°C (high = +100.0�°C, crit = +100.0�°C)
Core 0: +58.0�°C (high = +100.0�°C, crit = +100.0�°C)
Core 4: +57.0�°C (high = +100.0�°C, crit = +100.0�°C)
Core 8: +60.0�°C (high = +100.0�°C, crit = +100.0�°C)
Core 12: +59.0�°C (high = +100.0�°C, crit = +100.0�°C)
Core 16: +58.0�°C (high = +100.0�°C, crit = +100.0�°C)
Core 20: +52.0�°C (high = +100.0�°C, crit = +100.0�°C)
Core 24: +59.0�°C (high = +100.0�°C, crit = +100.0�°C)
Core 25: +59.0�°C (high = +100.0�°C, crit = +100.0�°C)
Core 26: +59.0�°C (high = +100.0�°C, crit = +100.0�°C)
Core 27: +59.0�°C (high = +100.0�°C, crit = +100.0�°C)
Core 28: +59.0�°C (high = +100.0�°C, crit = +100.0�°C)
Core 29: +58.0�°C (high = +100.0�°C, crit = +100.0�°C)
Core 30: +58.0�°C (high = +100.0�°C, crit = +100.0�°C)
Core 31: +58.0�°C (high = +100.0�°C, crit = +100.0�°C)
dell_ddv-virtual-0
Adapter: Virtual device
CPU Fan: 2866 RPM
Video Fan: 2857 RPM
CPU: +61.0�°C (low = +0.0�°C, high = +0.0�°C)
NB: +52.0�°C (low = +0.0�°C, high = +0.0�°C)
Other: +56.0�°C (low = +0.0�°C, high = +0.0�°C)
Other: +51.0�°C (low = +0.0�°C, high = +0.0�°C)
Other: +53.0�°C (low = +0.0�°C, high = +0.0�°C)
Ambient: +28.0�°C (low = +0.0�°C, high = +0.0�°C)
Other: +49.0�°C (low = +0.0�°C, high = +0.0�°C)
Unknown: +26.0�°C (low = +0.0�°C, high = +0.0�°C)
Video: +53.0�°C (low = +0.0�°C, high = +0.0�°C)
ubuntu 6.5.0-14 kernel:
merlin:/lib/modules# sensors
ucsi_source_psy_USBC000:002-isa-0000
Adapter: ISA adapter
in0: 5.00 V (min = +5.00 V, max = +5.00 V)
curr1: 0.00 A (max = +0.00 A)
iwlwifi_1-virtual-0
Adapter: Virtual device
temp1: +39.0�°C
ucsi_source_psy_USBC000:004-isa-0000
Adapter: ISA adapter
in0: 5.00 V (min = +5.00 V, max = +5.00 V)
curr1: 0.00 A (max = +3.00 A)
coretemp-isa-0000
Adapter: ISA adapter
Package id 0: +51.0�°C (high = +100.0�°C, crit = +100.0�°C)
Core 0: +44.0�°C (high = +100.0�°C, crit = +100.0�°C)
Core 4: +43.0�°C (high = +100.0�°C, crit = +100.0�°C)
Core 8: +46.0�°C (high = +100.0�°C, crit = +100.0�°C)
Core 12: +41.0�°C (high = +100.0�°C, crit = +100.0�°C)
Core 16: +41.0�°C (high = +100.0�°C, crit = +100.0�°C)
Core 20: +45.0�°C (high = +100.0�°C, crit = +100.0�°C)
Core 24: +47.0�°C (high = +100.0�°C, crit = +100.0�°C)
Core 25: +47.0�°C (high = +100.0�°C, crit = +100.0�°C)
Core 26: +47.0�°C (high = +100.0�°C, crit = +100.0�°C)
Core 27: +47.0�°C (high = +100.0�°C, crit = +100.0�°C)
Core 28: +48.0�°C (high = +100.0�°C, crit = +100.0�°C)
Core 29: +48.0�°C (high = +100.0�°C, crit = +100.0�°C)
Core 30: +48.0�°C (high = +100.0�°C, crit = +100.0�°C)
Core 31: +48.0�°C (high = +100.0�°C, crit = +100.0�°C)
nvme-pci-e200
Adapter: PCI adapter
Composite: +30.9�°C (low = -40.1�°C, high = +119.8�°C)
(crit = +129.8�°C)
Sensor 1: +40.9�°C (low = -40.1�°C, high = +139.8�°C)
Sensor 2: +30.9�°C (low = -40.1�°C, high = +119.8�°C)
ucsi_source_psy_USBC000:003-isa-0000
Adapter: ISA adapter
in0: 5.00 V (min = +5.00 V, max = +5.00 V)
curr1: 0.00 A (max = +0.00 A)
ucsi_source_psy_USBC000:001-isa-0000
Adapter: ISA adapter
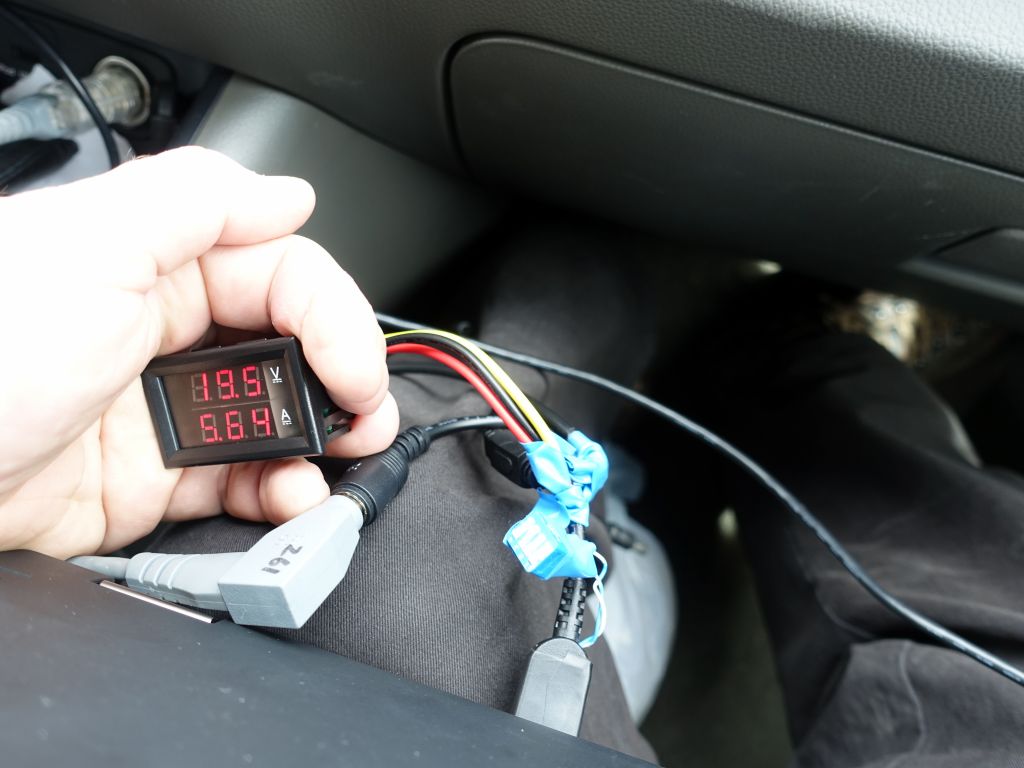
in0: 18.00 V (min = +0.00 V, max = +20.00 V)
curr1: 6.50 A (max = +6.50 A)
dell_ddv-virtual-0
Adapter: Virtual device
CPU Fan: 1221 RPM
Video Fan: 1206 RPM
CPU: +53.0�°C (low = +0.0�°C, high = +0.0�°C)
NB: +43.0�°C (low = +0.0�°C, high = +0.0�°C)
Other: +47.0�°C (low = +0.0�°C, high = +0.0�°C)
Other: +42.0�°C (low = +0.0�°C, high = +0.0�°C)
Other: +45.0�°C (low = +0.0�°C, high = +0.0�°C)
Ambient: +31.0�°C (low = +0.0�°C, high = +0.0�°C)
Other: +42.0�°C (low = +0.0�°C, high = +0.0�°C)
Unknown: +27.0�°C (low = +0.0�°C, high = +0.0�°C)
Video: +36.0�°C (low = +0.0�°C, high = +0.0�°C)
nvme-pci-e100
Adapter: PCI adapter
Composite: +31.9�°C (low = -5.2�°C, high = +89.8�°C)
(crit = +93.8�°C)
BAT0-acpi-0
Adapter: ACPI interface
in0: 13.13 V
curr1: 1000.00 uA next to P17gen2")


, but it's sadly missing the trackpoint")


, lots of clips to unclip carefully")


")


 to replace the ones that break on their machines")


")


")
 is not bad for a laptop that big")


 )")