This is my pretty custom build log for an FPV Cularis with Ardupilot. If you'd like a basic build log with lots more info on basic Cularis building, see this: http://www.rcgroups.com/forums/showthread.php?t=669739
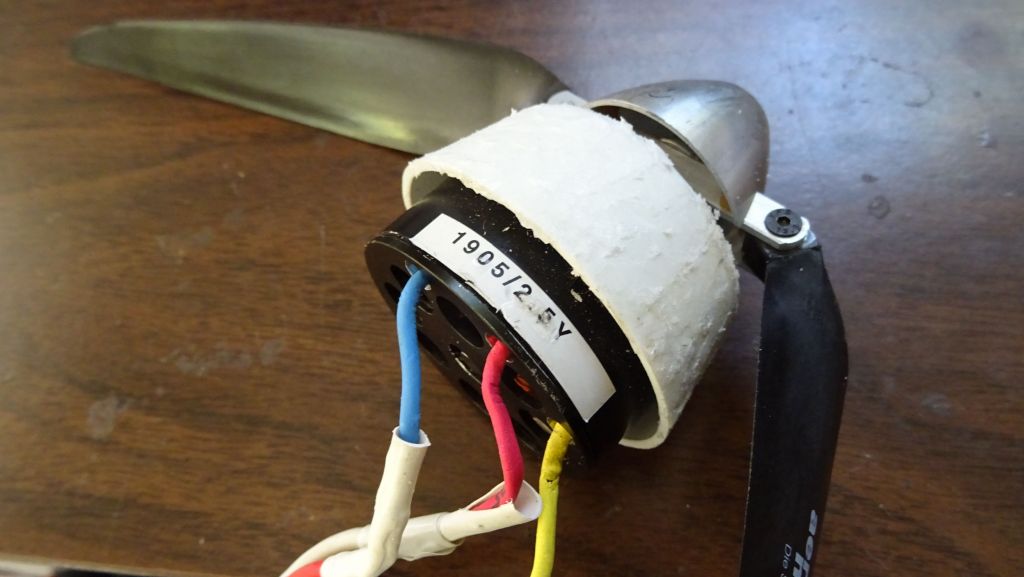
After an unfortunate high speed crash of my old Multiplex Cularis, due to a servo horn that failed (because of a prior crash due to an underpowered setup, and a takeoff that went into a stall and full power crash into the ground), I decided to make sure my new Cularis build would have enough power to take off under any condition with sheer motor power. Incidently, the totally overpowered motor I inherited with my old Cularis was 1200W capable, so I switched to a 4S setup (from 3S) and better wires/connectors so that I could get more than 30A (which was my limit on the old one).
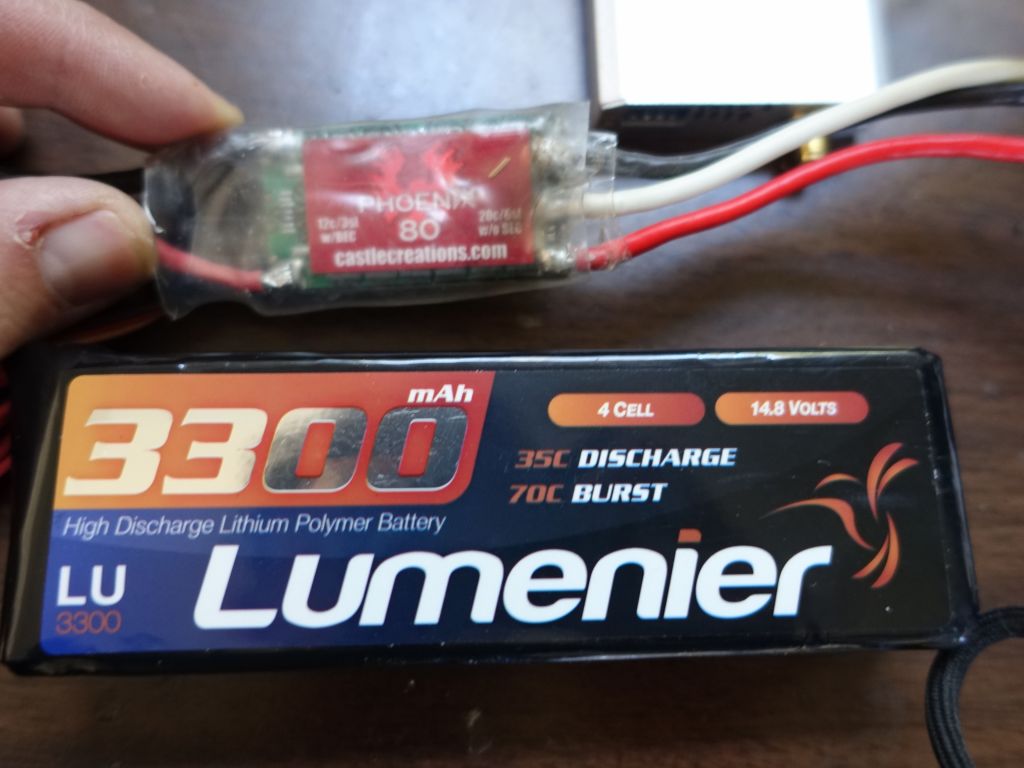
Since I already had an 80 Amp Castle Phoenix ESC, I'm now 60A limited probably because of some wire limitation somewhere, and I can now get 60A peak at 16V, or 960W (from 300W or so before). This now gives me over 3kg of thrust, which is more thrust than the Cularis' weight, making sure that I can take off easily without stalling or worrying about throwing at the right angle and right speed.
Here are the specs:
80Amp Castle Phoenix ESC
Neumotor 1905 2.5Y 600-1200W motor 865kV (too heavy and powerful but I inherited it with my old Cularis)
4S 3300mAh lipo
14x8 folding prop, 60A, 960W power at full power takeoff (same power with 12x8 prop)
5V BEC to power servos and backup power to pixhawk
Pixhawk with ardupilot 3.2.3
433Mhz telemetry radio
MinimOSD with minimosd-extra R800
12V uBEC for Vtx
900Mhz 500mW video TX with 5V output used to power 2 mobius cameras and FPV camera
Narrow angle Mobius for forward bottom view
Wide angle Mobius for rear bottom view
Fatshark TVL 600 FPV cam on top
RC controlled onboard video switcher for the 3 analog video sources
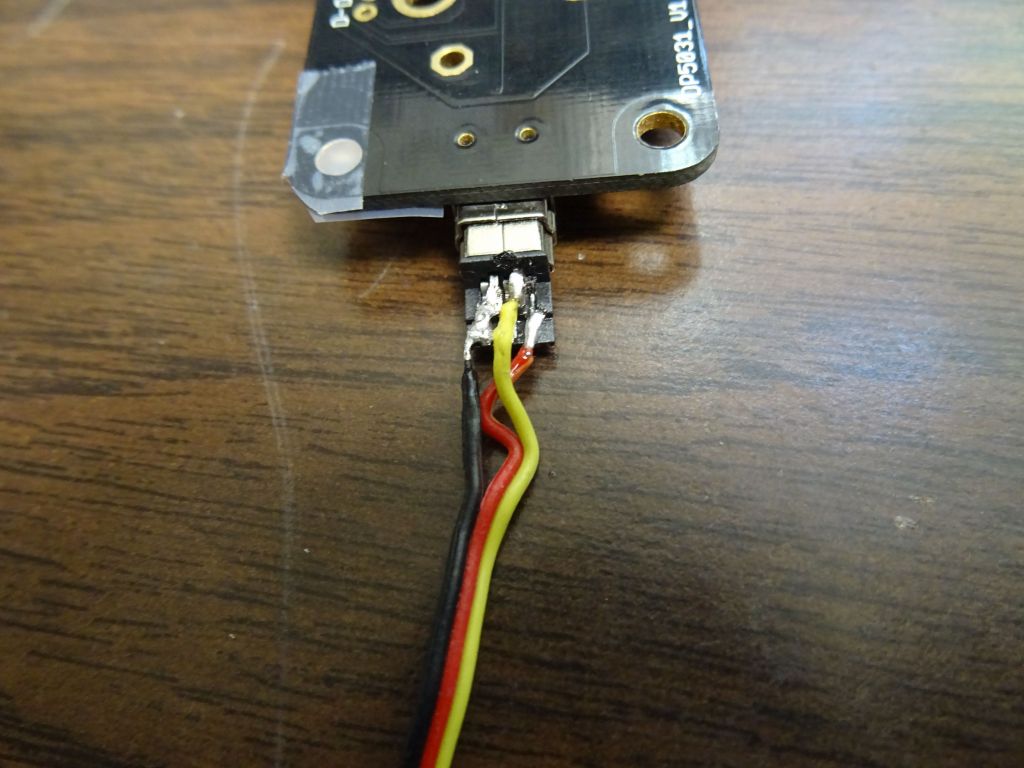
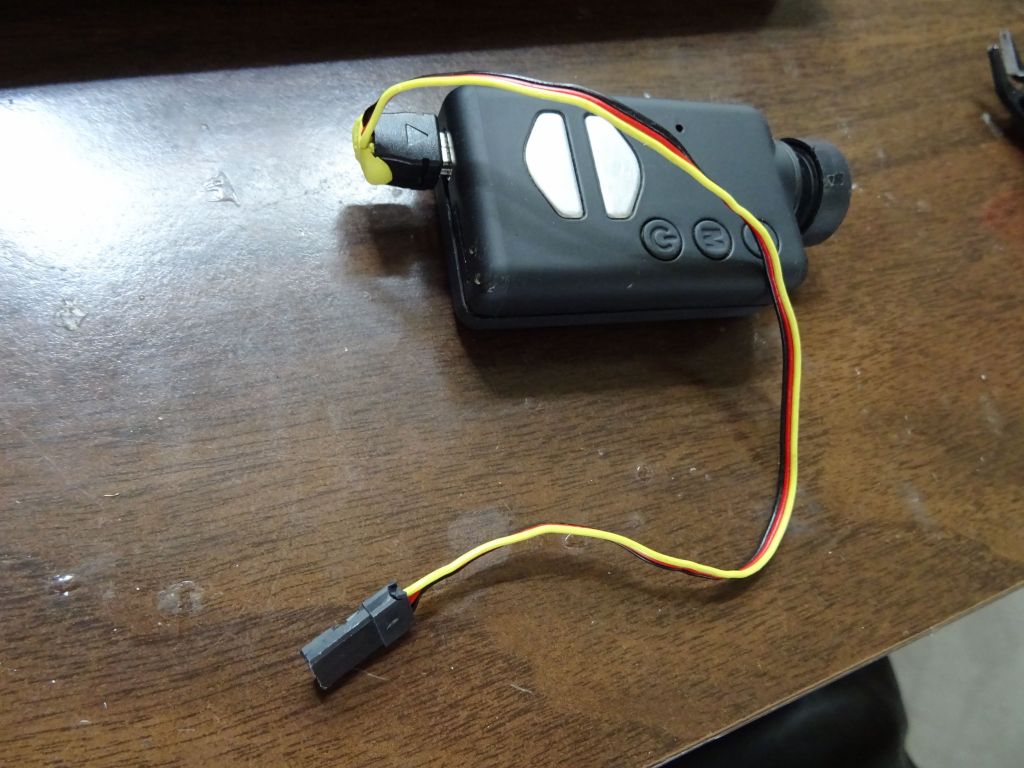
Lost model finder plugged into an RC channel
Separate loud Keyringer with independent battery, sound activated
Total weight is a bit heavy, around 2.1kg, but with the huge wings, it's not a big problem. The wing area is 55dm^2, and wing loading of about 40g per dm^2 (the pure glider version is only 25g per dm^2).
Since I was doing a build from scratch, I took the time to carve the body to add electronics that I had to fit badly in my last retrofit. My old Cularis has crap hanging all around it, creating a fair amount of drag. This new build, I did my best to keep the airframe as clean as possible. I kept the cameras inside as much as possible:
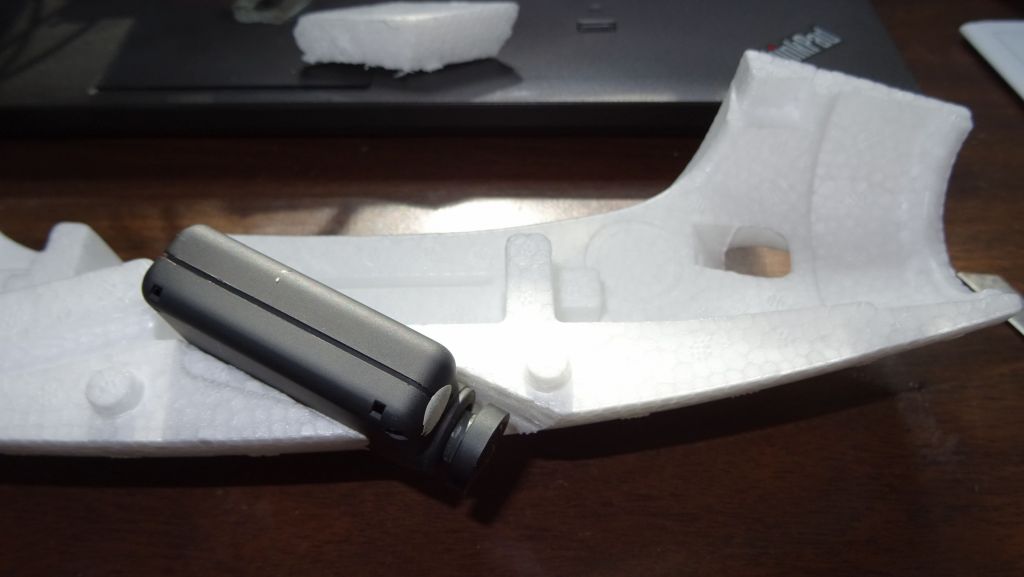
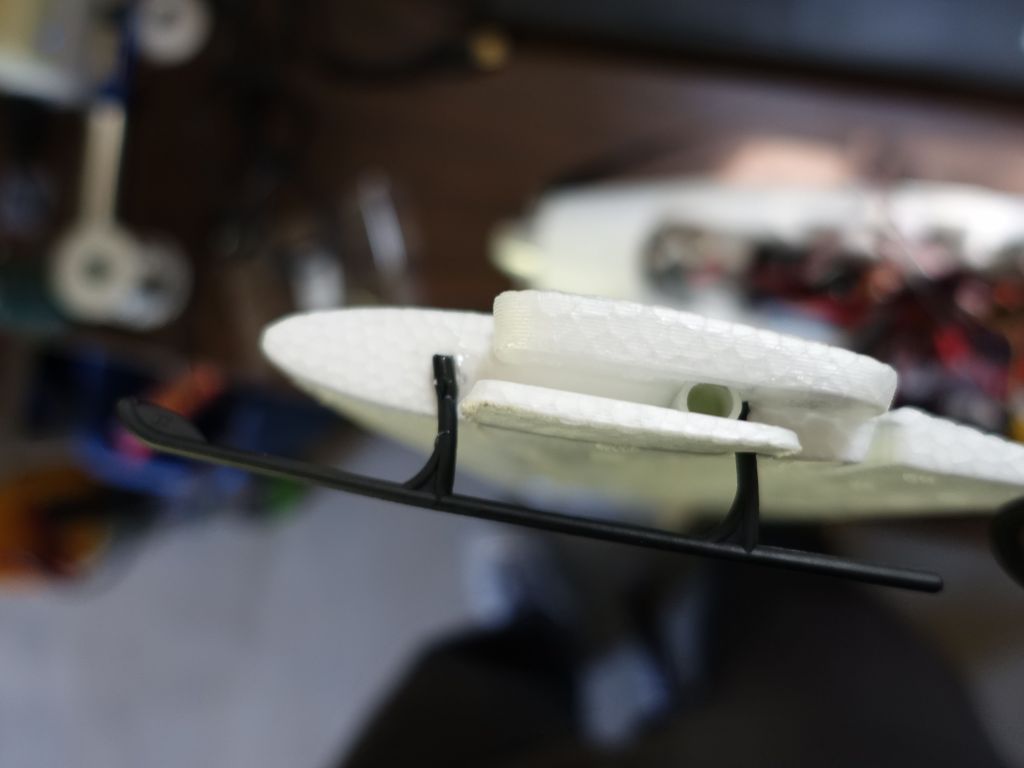
I had to put small skids from a heli to allow for not landing on the camera
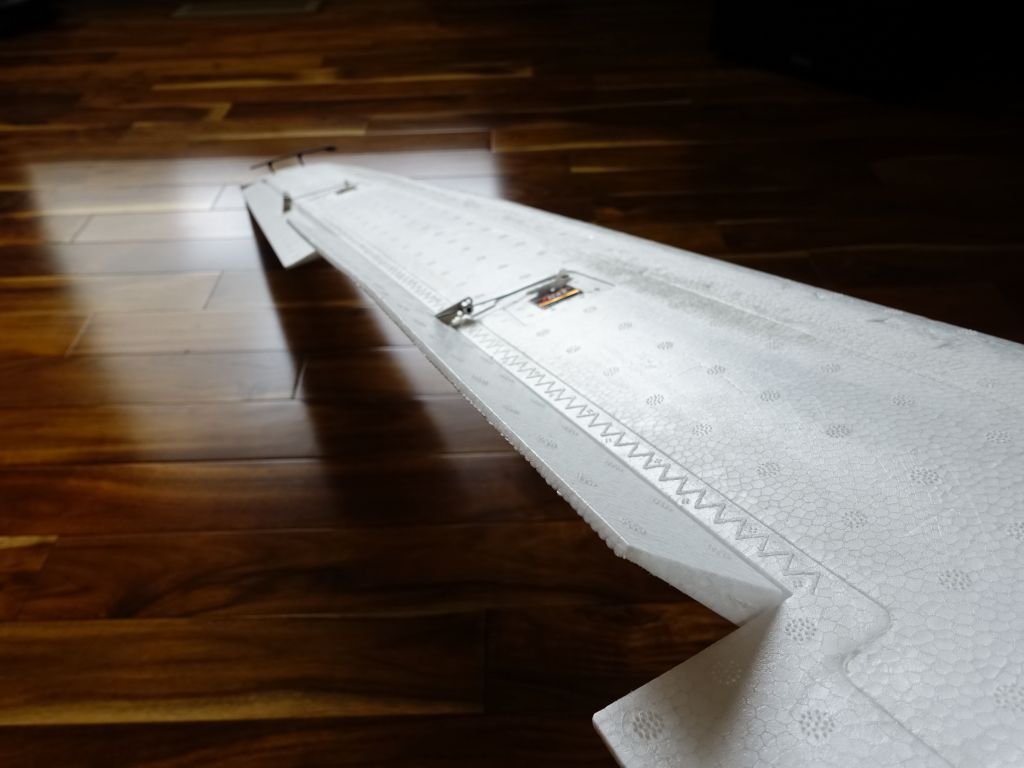
I didn't think the wings through well enough, this is where you put extra connectors, like the one I'd have used for an airspeed sensor I'd have fit at the end of the wing:
Grr, I totally should have put an extension cord for my airspeed sensor before closing the wing:
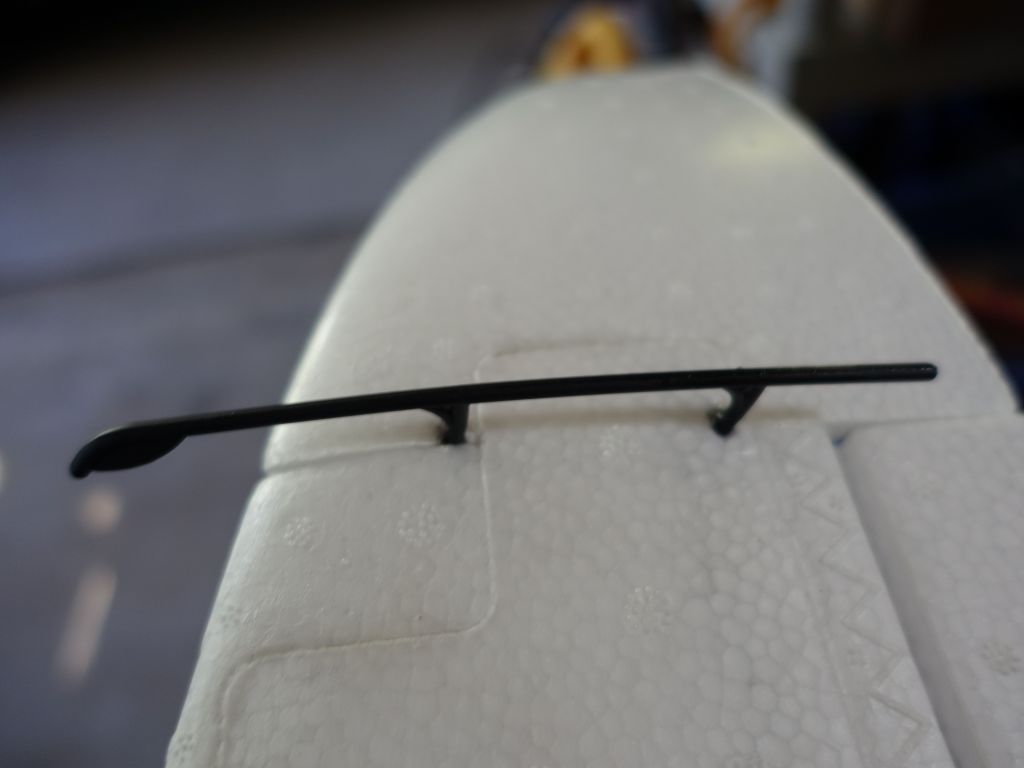
Since I had skids on belly anyway, I also didn't like damaging my wings on each landing, so I added another kind of heli skids under the wing tips:
Speaking of the wings, I've moved my servo center to allow much deeper flap deflection (this means that flaps up is mostly level/flat, flaps center is half way down, and flaps down is a lot more down than normal if center were level). This picture shows the result:
I carved out the battery bay to fit a bigger battery a bit farther back (for better aft CG):
before
after
Power kit:
this motor isn't meant to fit there, and is a bit heavy, but it works. 1200W is nothing to sneeze at :)
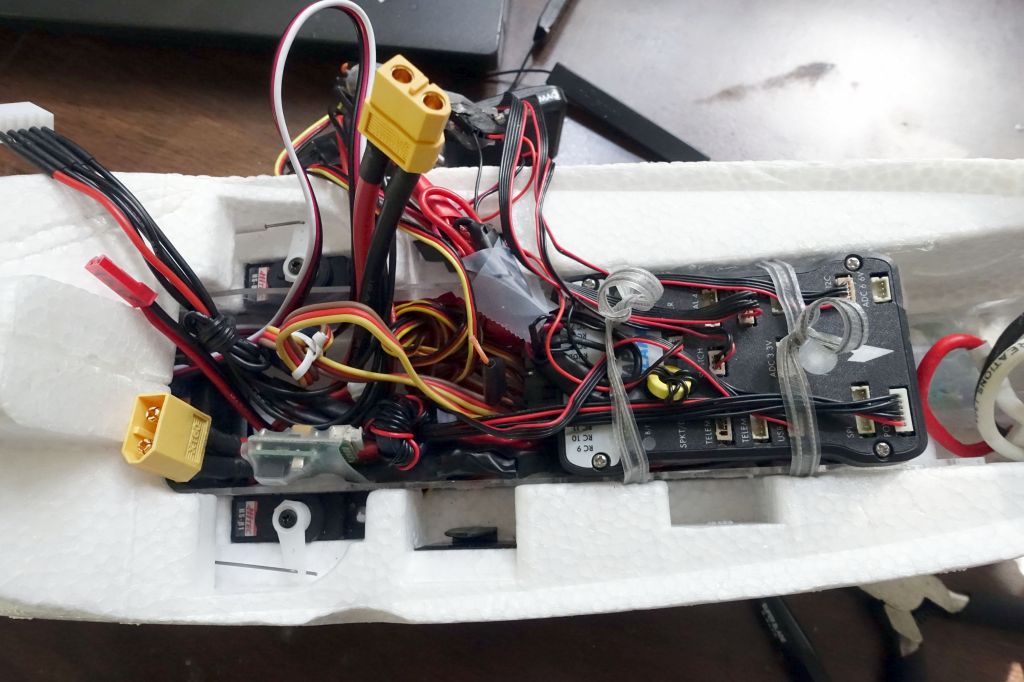
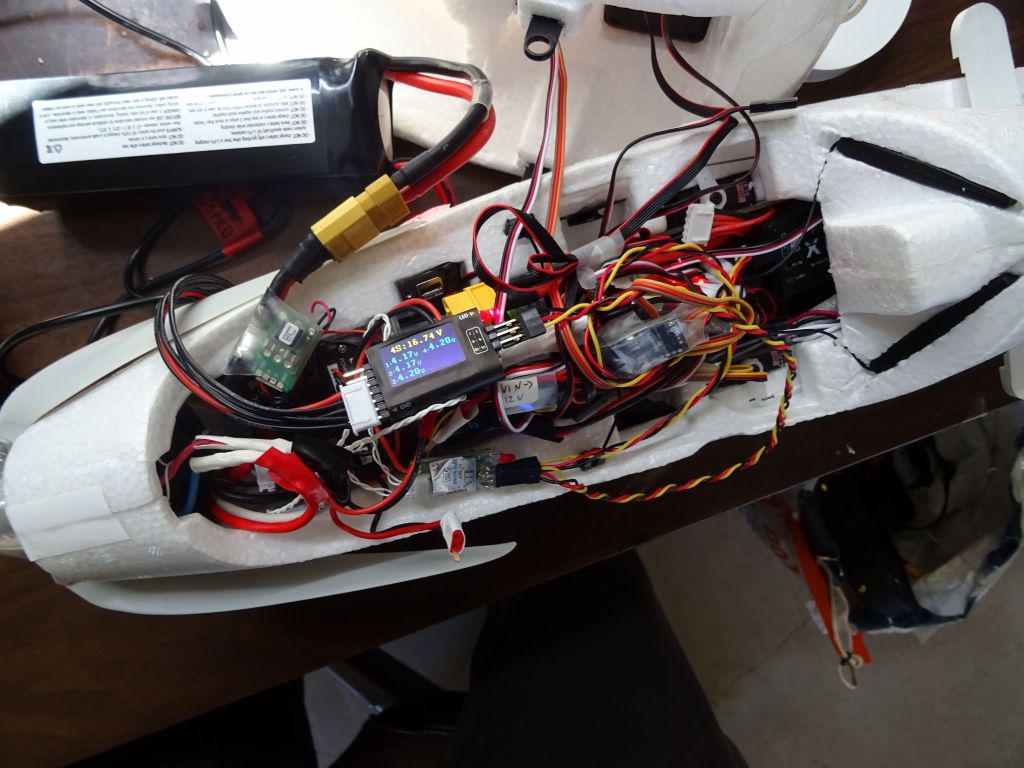
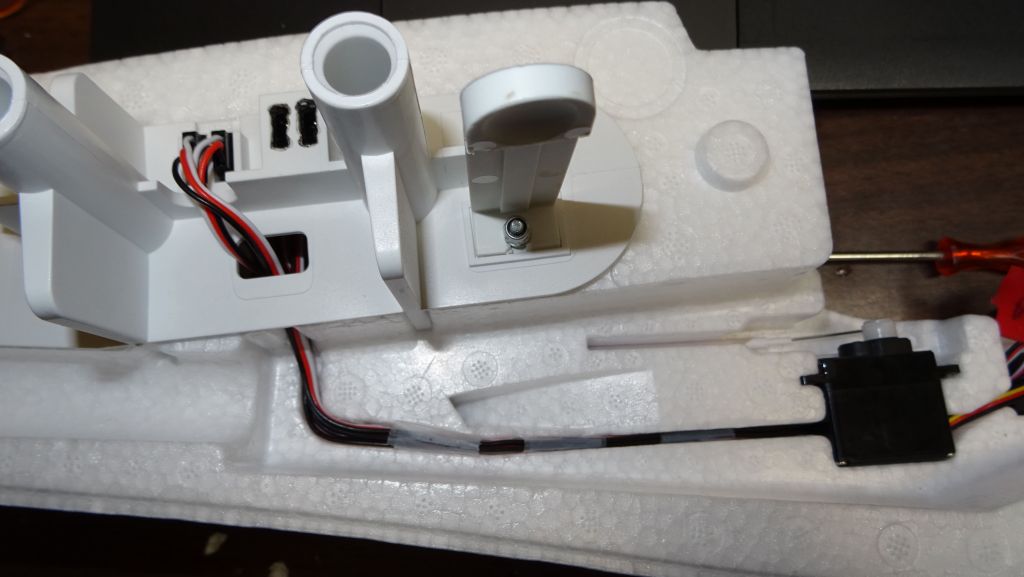
Now let's get to the avionics. It's a very tight fit. Thankfully the pixhawk fits just on top of the plastic separators. Under the pixhawk, the 12V uBEC, 5V ESC, and first mobius camera:
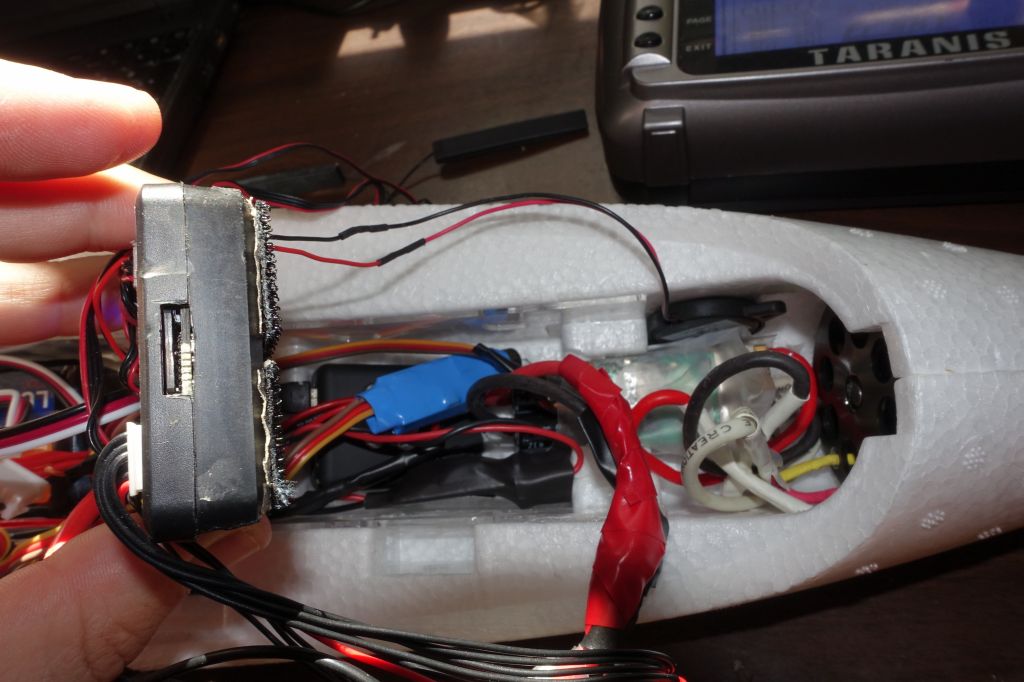
I made a hole to fit my 3DR radio mostly inside the body
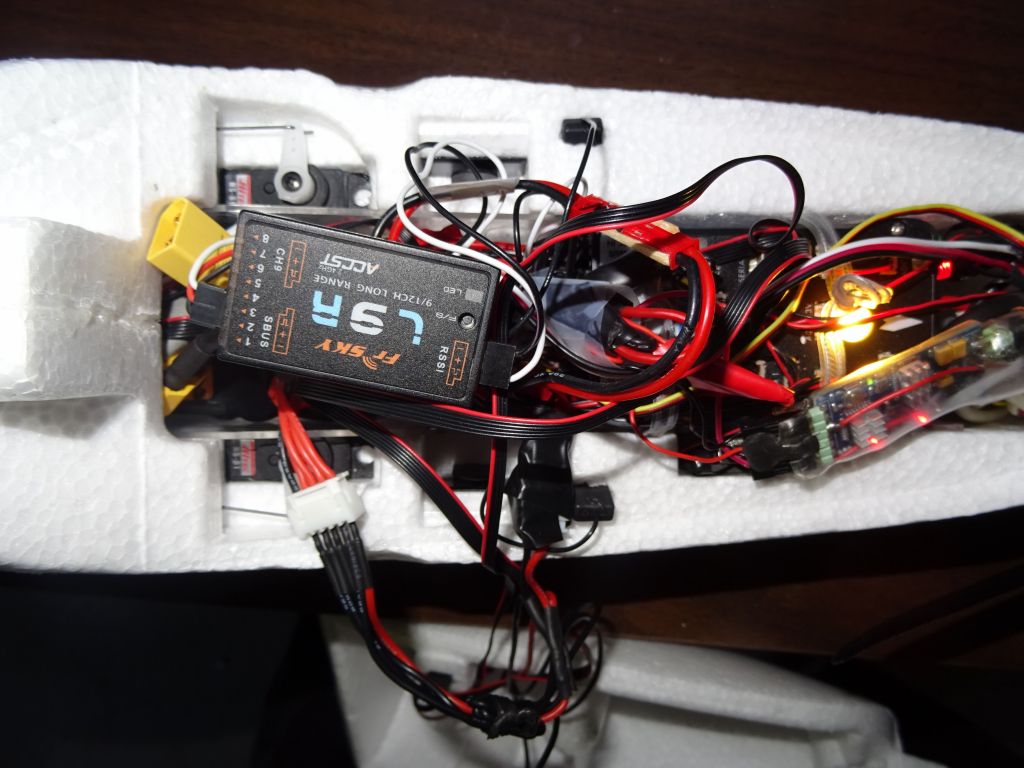
In this build, I put the L9R antennas in inverted V inside the body, underneath the electronics (see the 2 antenna PCBs sunk into the foam. Later, I carved up the foam some more to fit the receiver under the electronics, away from interference hopefully and also putting it farther away from the GPS/compass on top:
I designed my power system with a BEC to plug on the servo side of my pixhawk so that the pixhawk is getting power from 2 sources: power module and ESC on the servo side. This also lets me plug all the electronics (except the motor) into the battery balance plug directly without having the main battery connector plugged in. This is huge for debugging on the bench because I now know there is no way at all that my motor can power up and shred my fingers, or like last time, my laptop, when the pixhawk decided that return to land meant taking off from my desk.
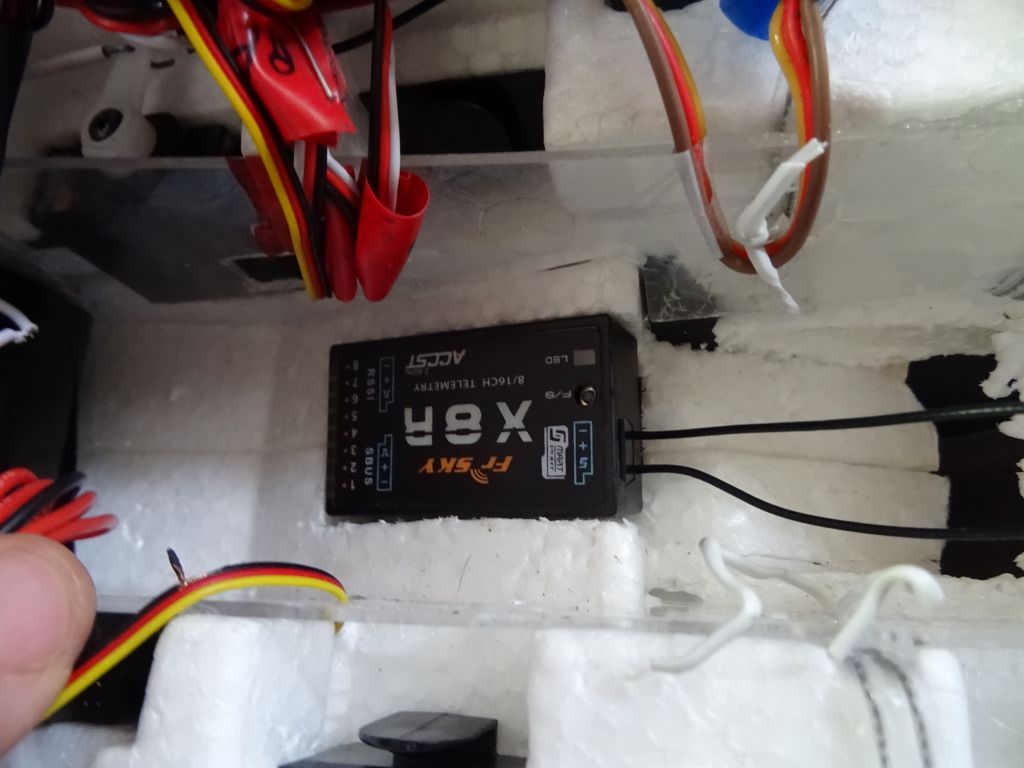
On this test I added an X8R as a 2nd receiver with RPM sensor and battery tester to try them out. By then, things were getting very full and the canopee hard to close. I had to carve up the top to allow it to close:
The video system, I made my own power/video cable for the mobius, and low profile bracket for my FPV camera. My first design looked good, except for a not so small detail:
testing 3 cameras with my video switcher board
custom made low profile bracket for my FPV camera
yeah, all done
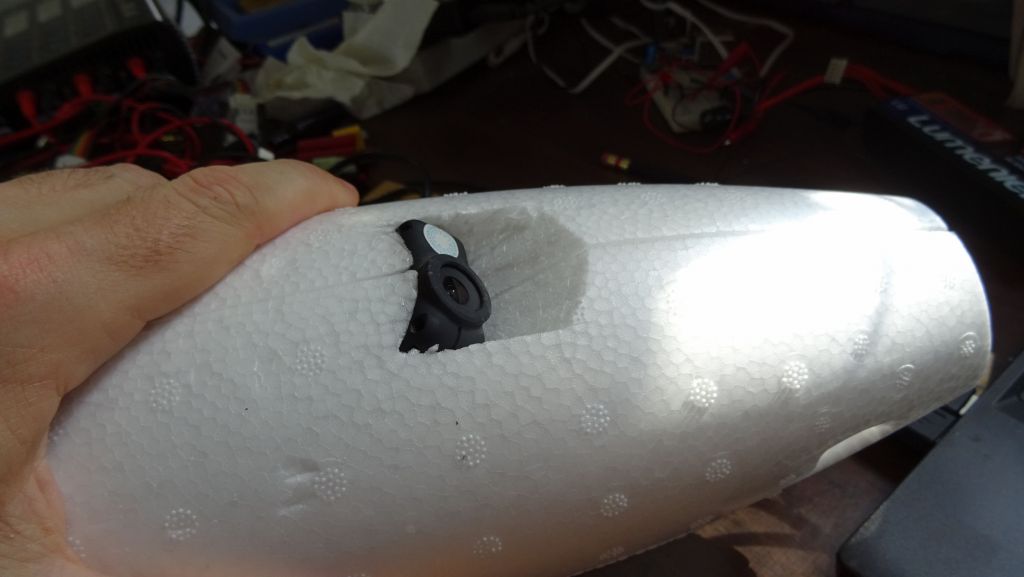
oh crap, my prop is totally going to rip out the camera
I had to redo the top, moved the battery voltage forward and camera back
instead of putting steel balls for CG, I added a keyringer in front of the Vtx
moved the antenna a bit back, closer to the rudder surface
hopefully this is as clean as possible airflow-wise
rear pointing mobius barely fits between the receiver and the battery, but it fits
more carving to limit drag compared to having the camera be outside
Here is a demo of my 3 cameras:
And my test flights went great, although I had to adjust the CG and trim a bit. The hill from Rancho is great since it gives you altitude to recover before hitting the ground. Too bad the rangers want to prevent anyone from flying from there:
first flight before FPV camera
self made video receiving station
Unfortunately, as I write this, my Vtx apparently half died and doesn't transmit past 100m or so, so I can't fly FPV with it, but he's a quick video showing what it's supposed to look like. Forgive the questionable landing, it was very hard to get down due to updrafts and a pretty good upslope wind, so I had a hard time controlling the way down while being pushed around by wind, also I didn't have enough trim down when crow flaps were on (I fixed that in the taranis later), I got a bit slow, making it harder to control. On the plus side, my aileron washout modification ensured that I didn't get any tip stalls (which would have caused a spin there):


")