So, I was looking for a replacement for my Multiplex Cularis, but hopefully one that would have a bit more cargo space for avionics and not be as much of a bitch to build (the Cularis requires way too much tricky assembly and too much careful cutting to make space for avionics).
I wanted a big glider with flaps, and a front motor (not a crappy little pusher motor with whiny prop that would never have a lot of trust for takeoff with a heavy load). The Diamond 2500 turned out to really be the only match I could find, but it was out of production. I did however find that the Hobbyking BFG 2600 was a Chinese ripoff of it, which in this case came in handy because the original wasn't around anymore.
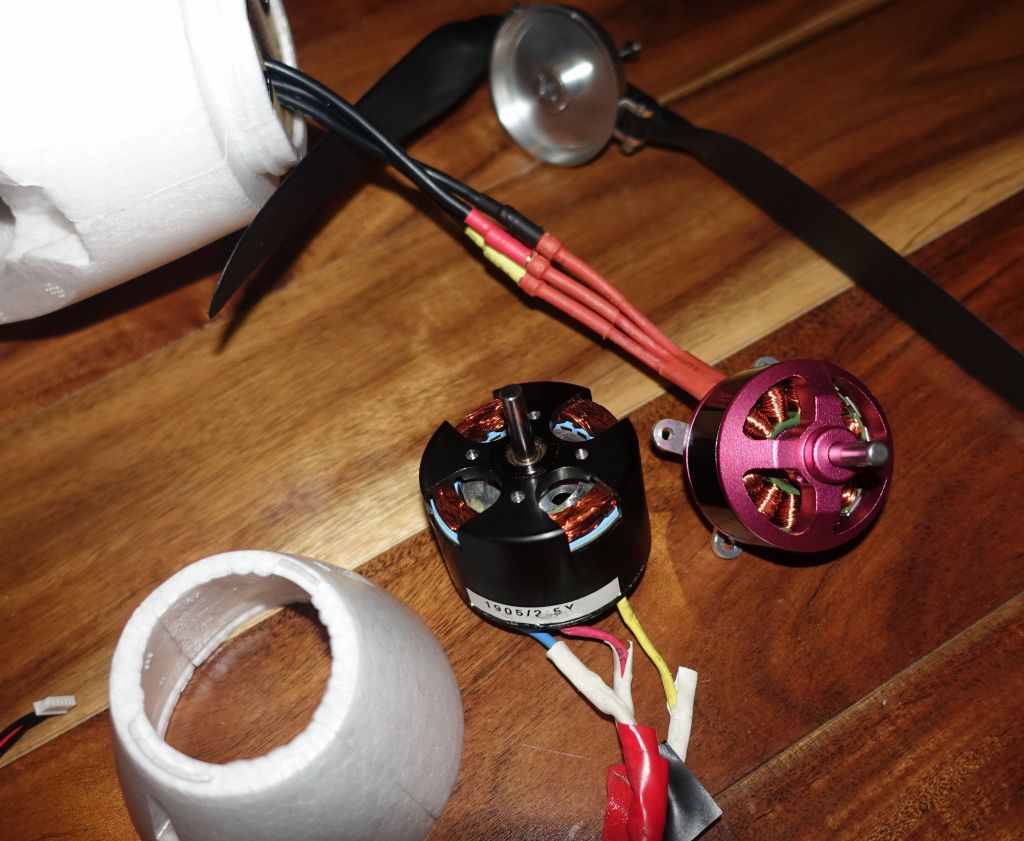
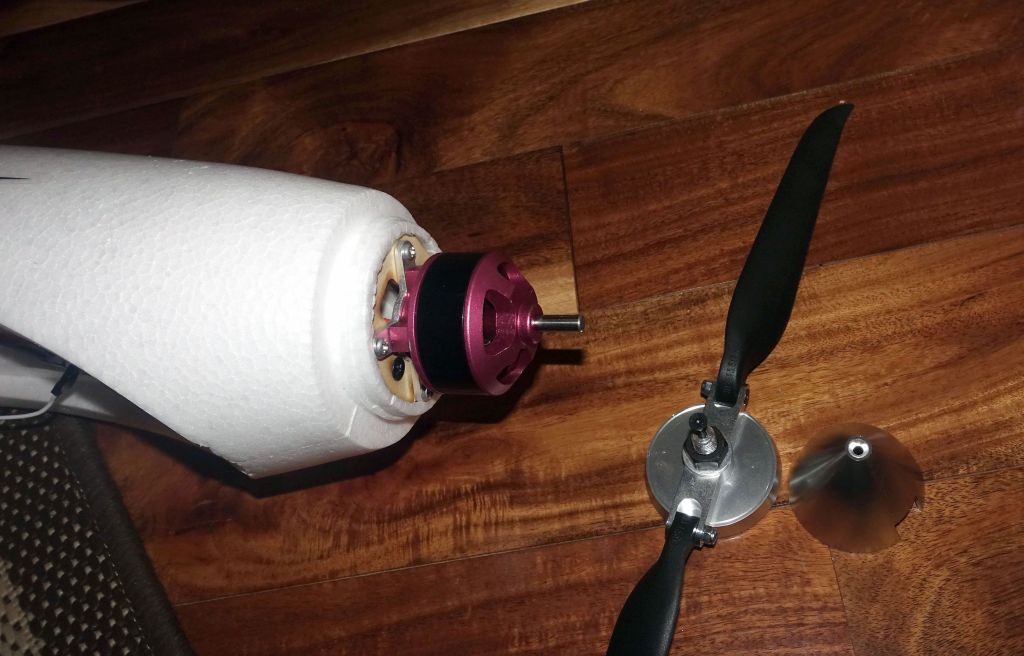
I typically would wary of RC gear from China because too much of it cannot be trusted, but in this case I didn't really have many other options. So, I read up on the failure rates and quickly found out that I should immediately throw away the ESC and replace it with a proper one. To be fair, the entire aircraft was $200 and my replacement ESC only was $90 (Castle Edge Lite 75A). The good news was the 60A motor seems to be decent enough so far, which is good because my old motor from the Cularis would not fit on this model anyway. Update: Motor is crap too, I burned both motors I got. The motor makes incredible power for its size and weight (and likely price), but nothing is free, the motor is too small and too light for the amount of power it puts out, buyer beware... Turnigy L3020B-600 Brushless Motor (800w) seems to be the smallest replacement that will fit.
here are bigger motors that should provide the power without burning up
you can see how much smaller the stock motor is, no wonder it burns up
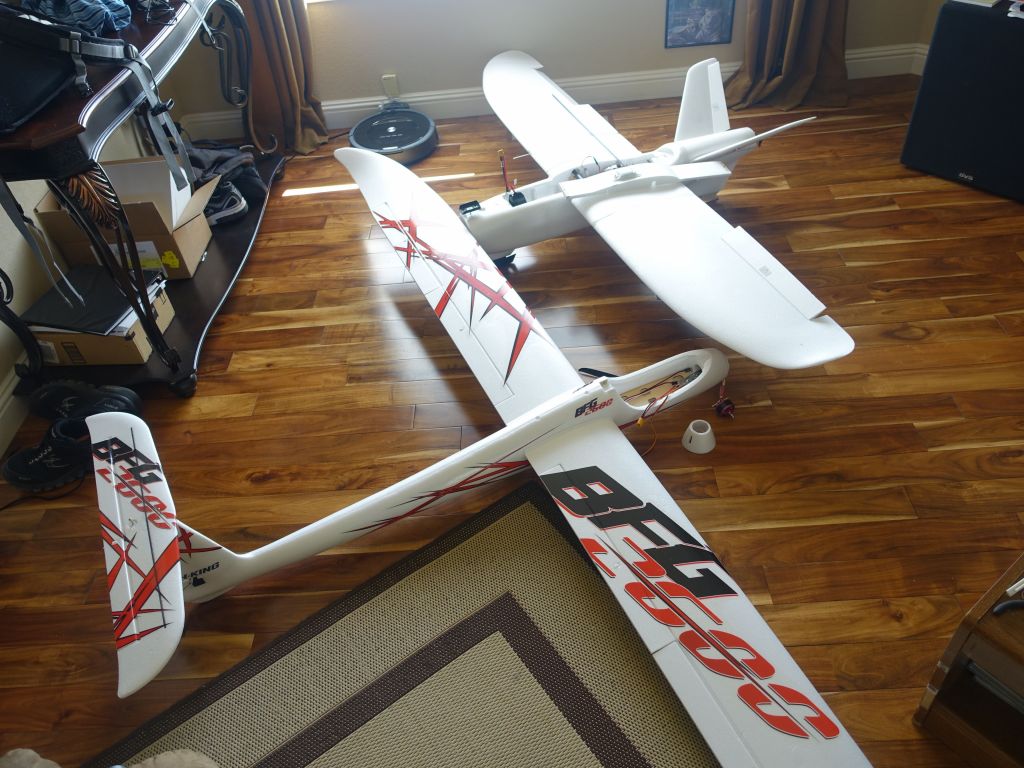
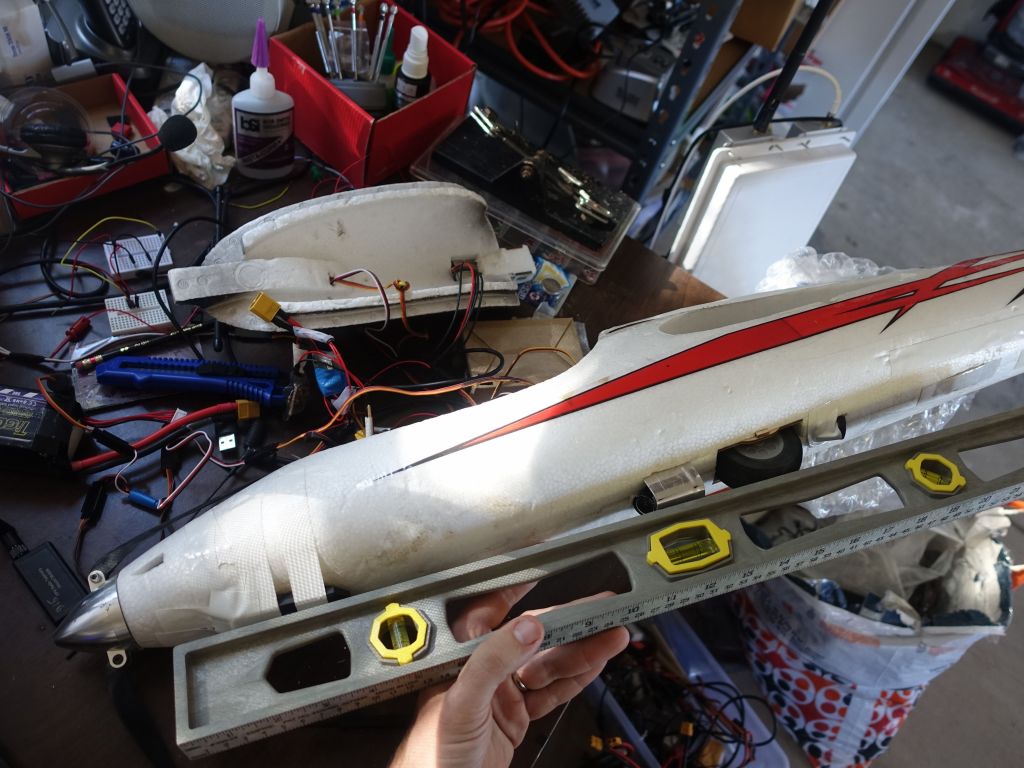
The BFG2600, is indeed a big f'ing glider, as can be seen next to my X-UAV Talon with wing extensions (2.6m wingspan instead of 2m wingspan). Obviously the BFG is much more aerodynamic than the Talon which is a big of an air SUV :)
Thankfully it also flies at slower speeds and has very efficient flaps which when used as crow flaps allow for a steep slow descent for landing in smaller places (the X-UAV Talon does not fly slow and requires a fair amount of space to land):
flaps that are designed to go mostly down (more down than up), like barn doors
The build by HK was mostly ok, except for the cheap servos (I'm going to replace at least the elevator servo), control surfaces that need to be freed up before they can move, and the stickers just interfered with flying: they were half glued and peeling off:
this scared me, I filled it with gorilla glue so that it doesn't fail
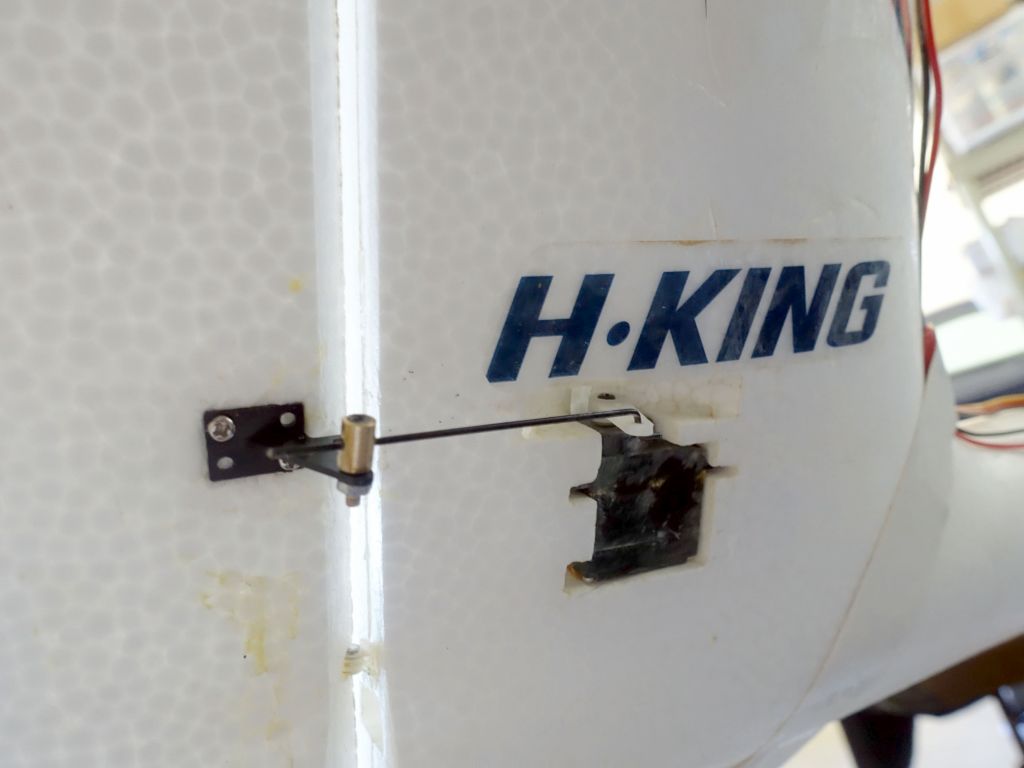
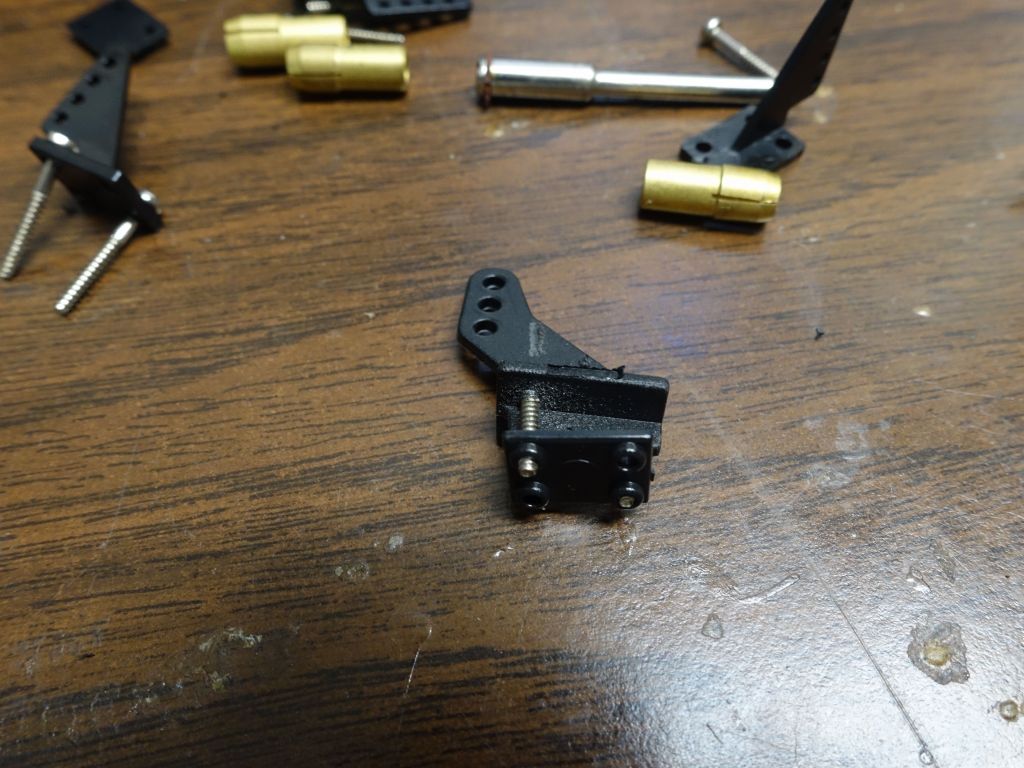
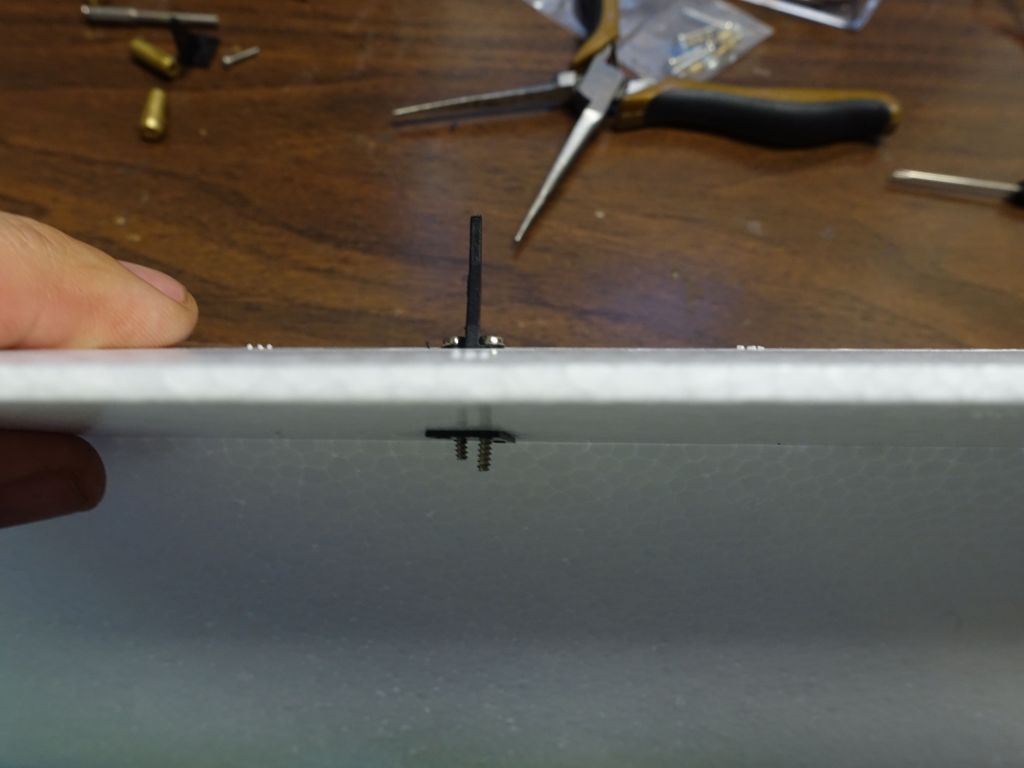
the rudder horn is mostly broken in all shipments because they don't disconnect it for shipping
I ended up putting another horn with backing plate to replace the broken one:
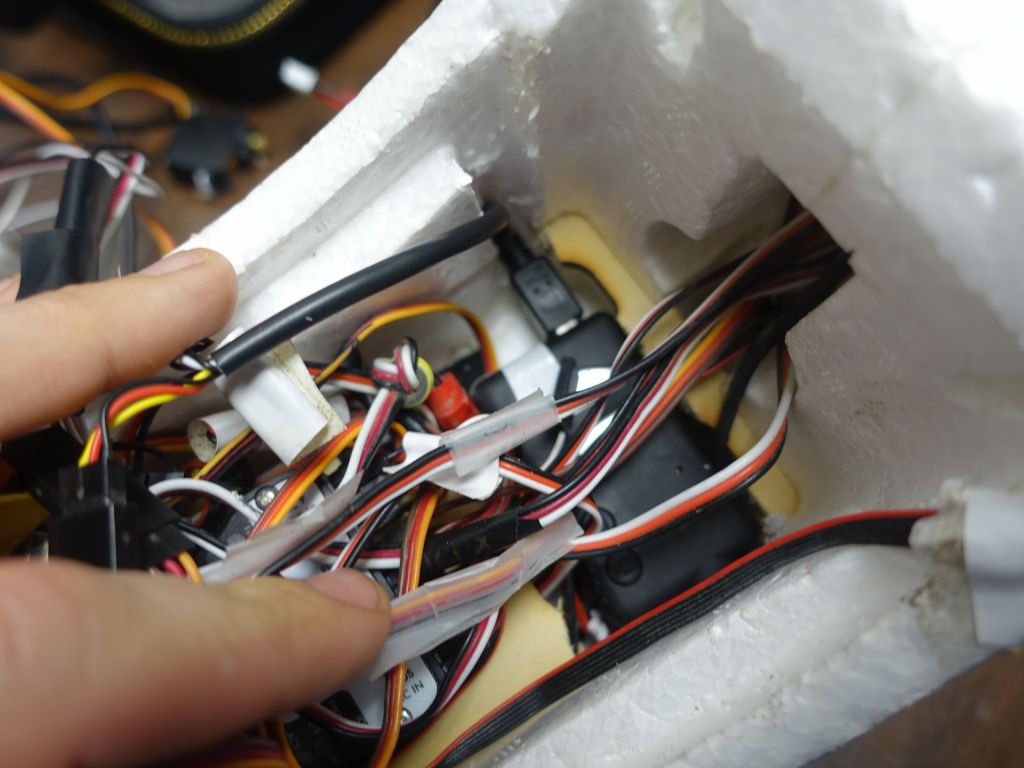
While having the airframe built was great, unfortunately routing wires to the rear of the plane after the fact was near impossible, I had to make holes in the airframe to painstakenly route them half inside, half outside:
I made this hole to see how I could route cables inside (not so much) and stick the GPS/accelerometer
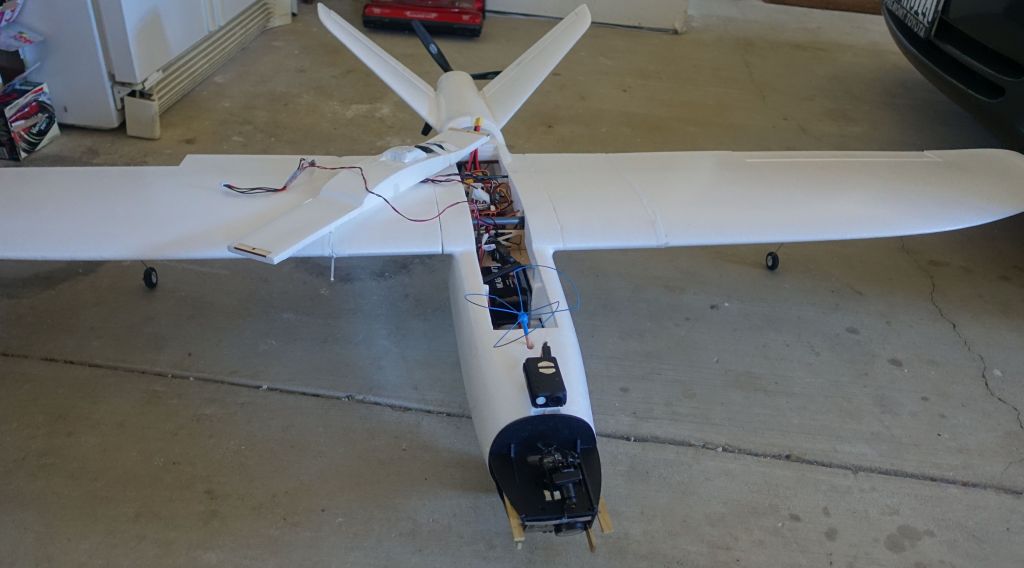
all decked up, and ready for an FPV flight with a spotter
Now while the glider is bigger and can carry more weight, it doesn't actually have that much more cargo space than the Cularis, and when it's already built, it's also hard to put anything behind the main cabin as all the space is glued together and doesn't have much continuous empty space inside you can put extra gear in:
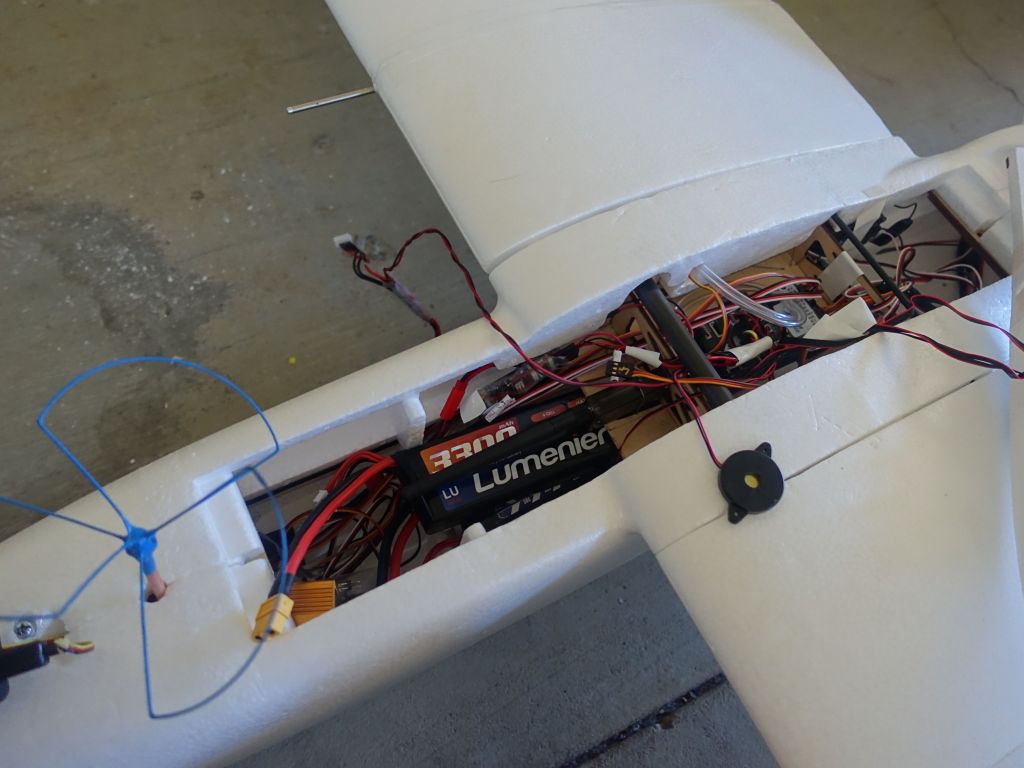
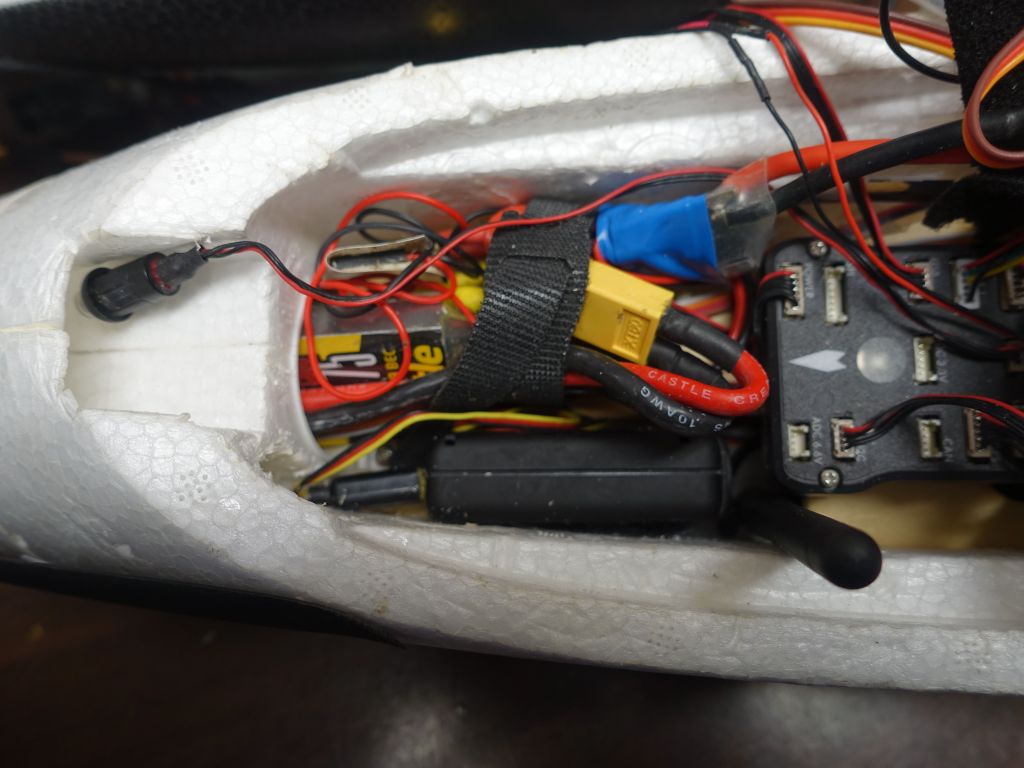
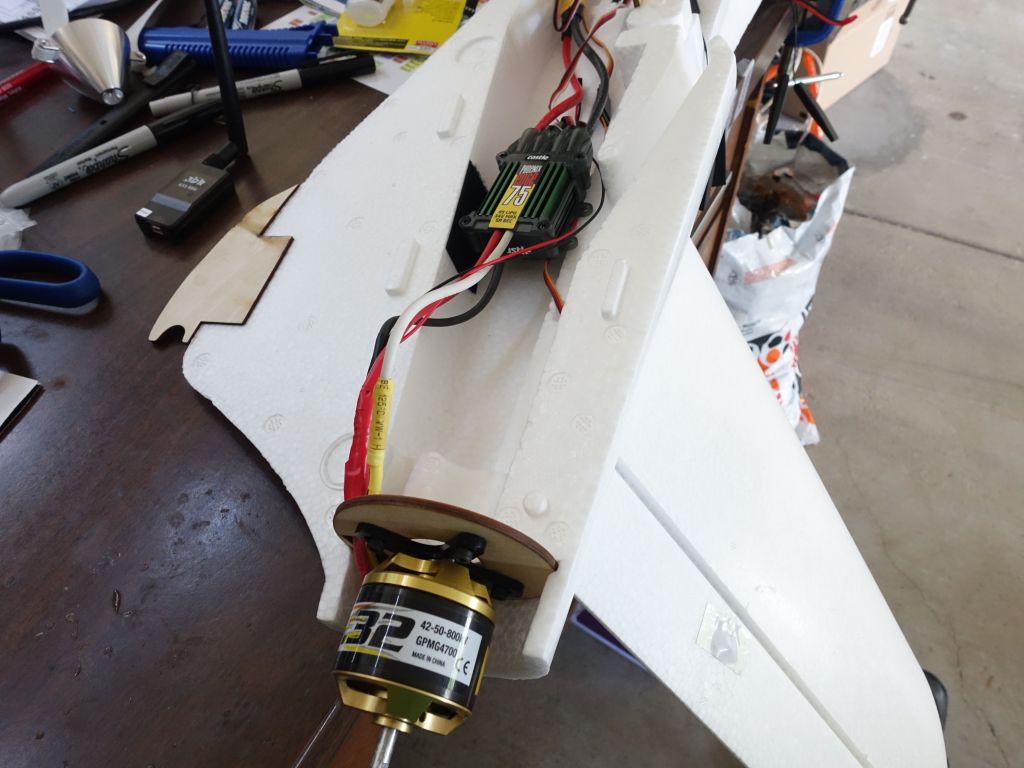
I had to start cutting the wood to put things underneath. Note how the ESC is also tucked in the motor hole to save space
the space meant the battery had to go on top of the pixhawk, which wasn't good since the pixhawk had to have free movement to be shielded from vibrations
I built this fancy battery stand :)
just enough room for a 4200 4S battery on top, not bad
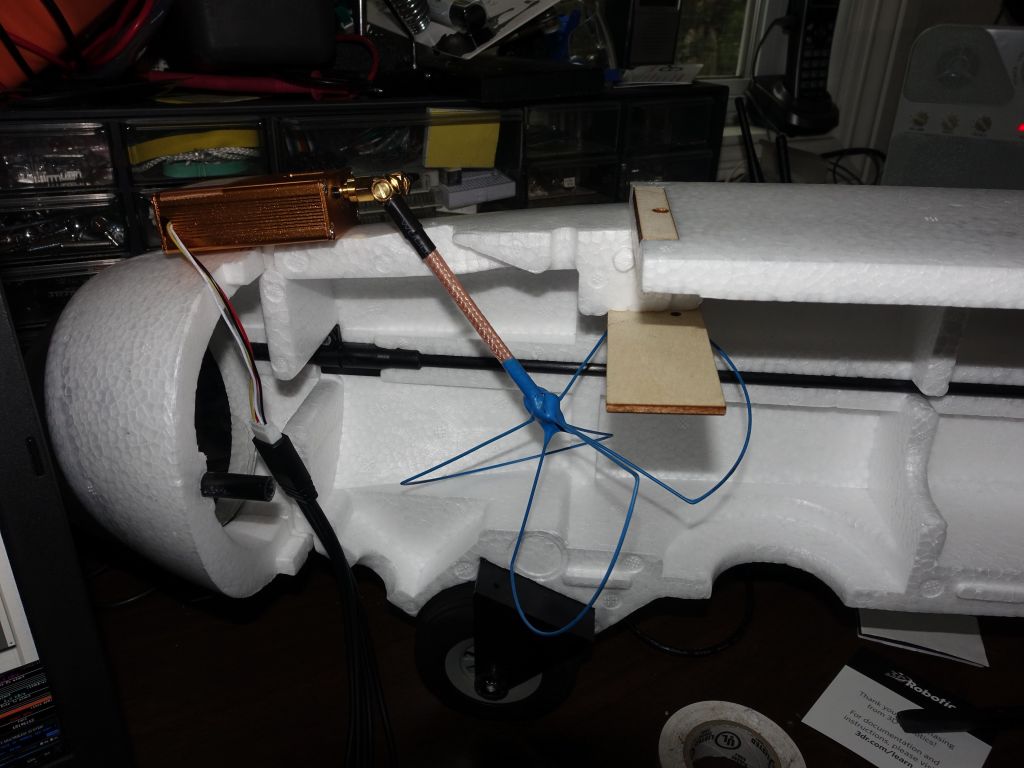
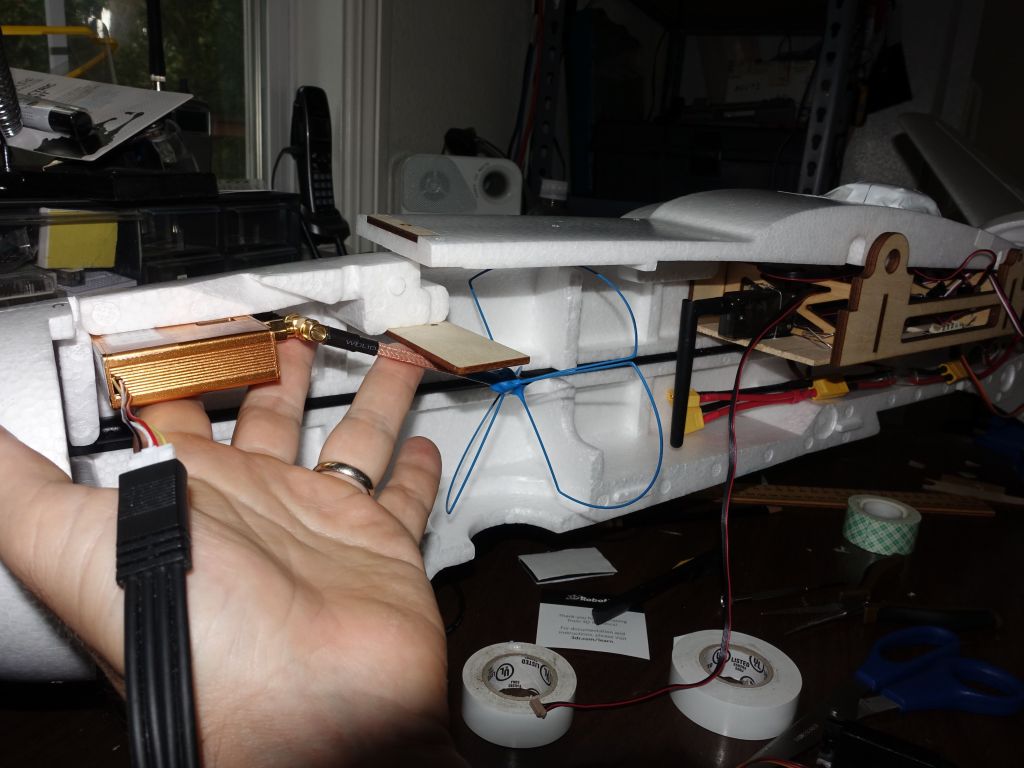
You can see the hole for the 3DR radio and once you add 2 mobius (one in the front, and one just behind the battery), things get very packed
Now, the video. For my maiden, I just stuck a mobius in the rear, which upset the CG a bit, caused 3 stall spins after takeoff while I was racing to adjust the trim, and it almost caused me to crash (see the first 45 seconds). Good reminder that too much rear CG is deadly to a plane:
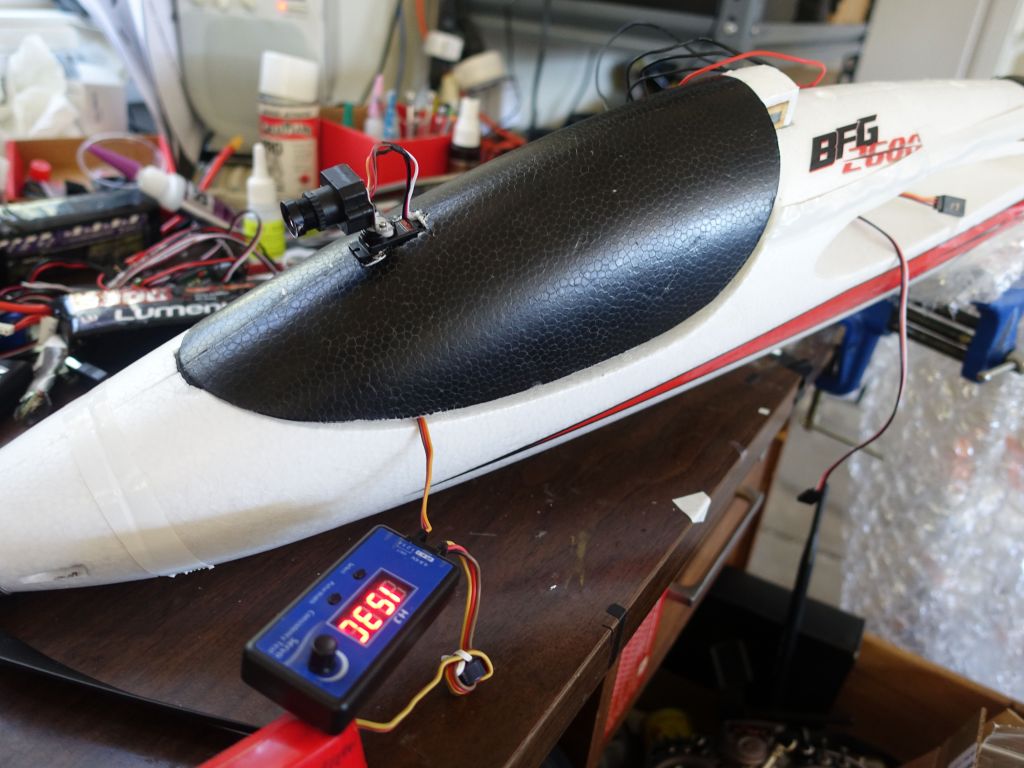
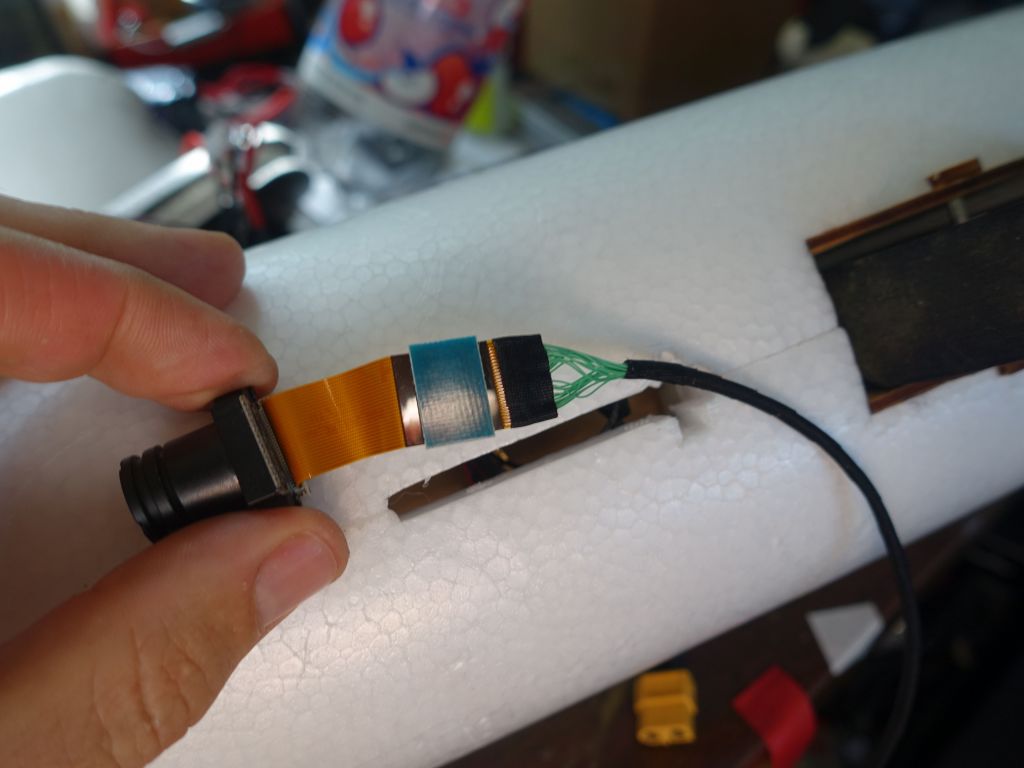
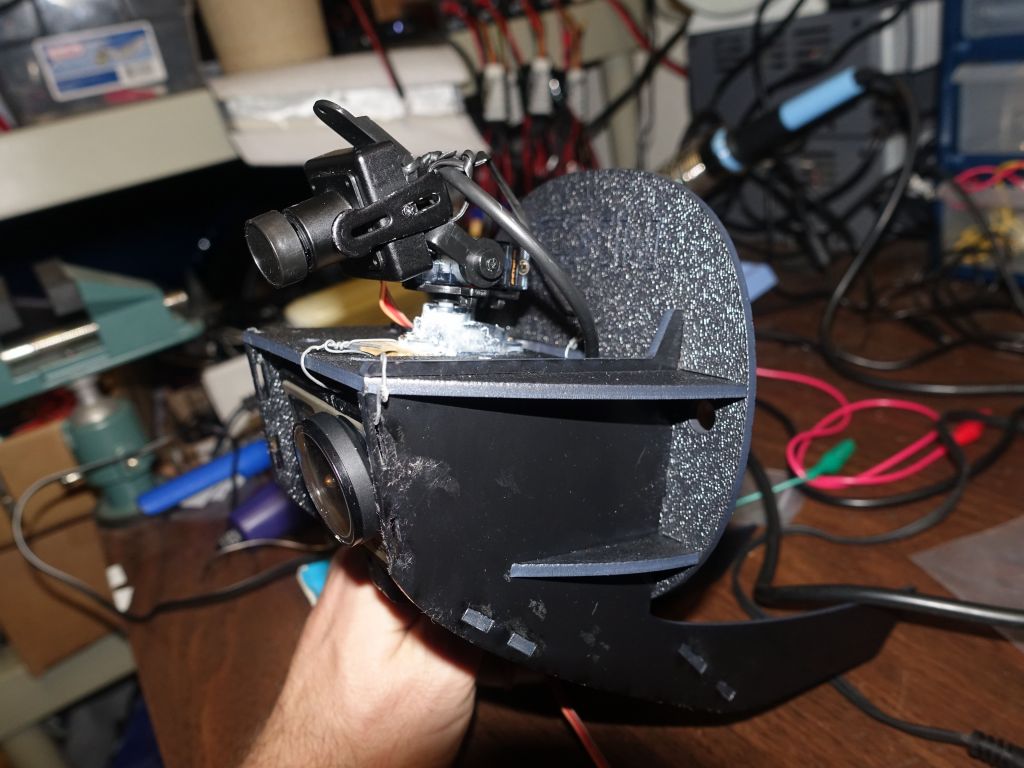
After everything was ready, I had 3 cameras and can switch in flight: top FPV camera, and 2 mobius underneath where the lens is moved to the end of an extension cable to fit the lens where the camera wouldn't fit:
nice and sleek|clean airflow-wise, and no worries of hitting the camera first when I land thanks to the wheel
sadly, my 900Mhz VTX died, so I replaced it with a 600mW 5.8Ghz VTX for now
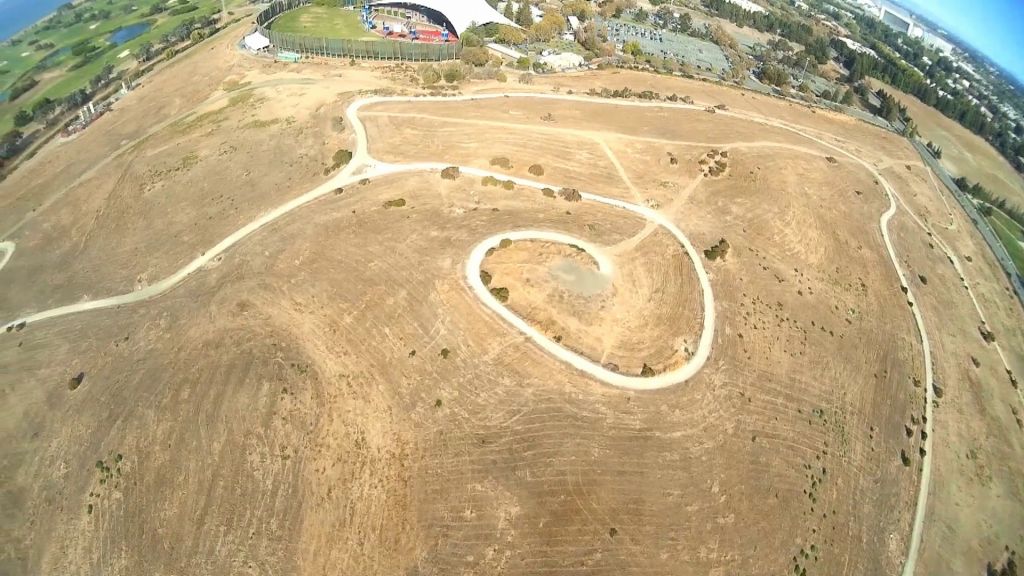
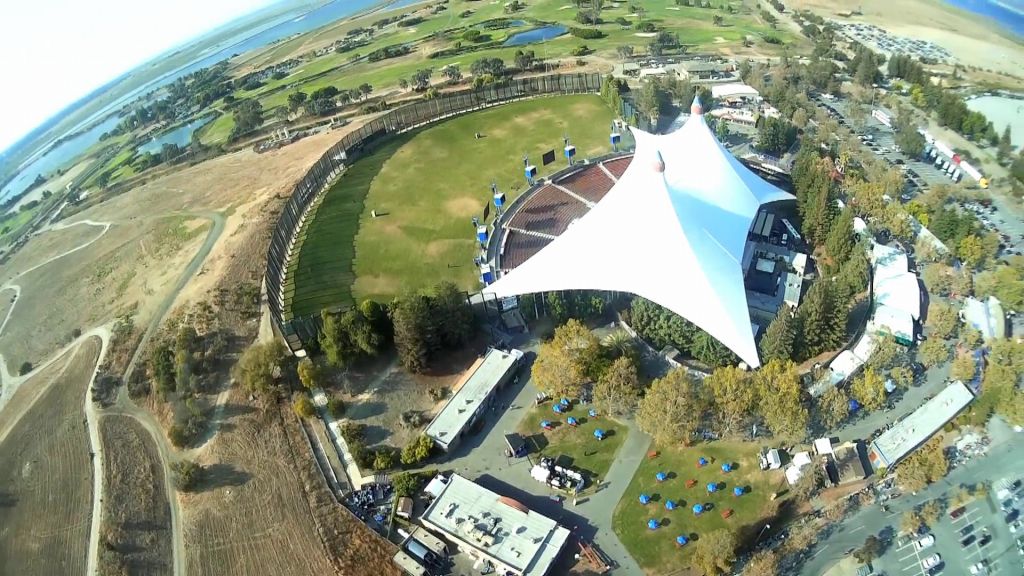
A few pictures from the front and rear cams on a _very_ windy day:
the soccer field I was flying from
shot from the rear camera
And this is what the OSD looks like (bad video quality, but enough to see where I'm going):
wind speed 25kph, 2.7km of gliding distnace in that direction while I was only 299m from takeoff point
I can switch to the 2 HD cameras in flight to see where they aim
landing, mostly against the wind, crow flaps fully deployed hence the bad glide ratio (which is what you want for landing)
If you don't get sea sick, you can see the front and rear video, along with the heavy wind sounds. It's fun to play them at the same time:
So, what are my impressions of the BFG2600?
I removed the steel balls in the wings, I don't need that weight and this gives me more weight back to carry the electronics (thanks to http://haveblue.org/?p=1235 for the weight reduction tips).
I also replaced the heavy metal rod that goes through the wings with a carbon fiber one. You can order a 2m tube from rockwestcomposites, and order 2 cuts at 83cm (12cm outer diameter, 10cm inner diameter). This will give you 2 tubes plus a left over: https://www.rockwestcomposites.com/t-rnd-472 . Actually while I don't know the quality, aloft hobbies has some cheap ones now: https://alofthobbies.com/carbon-fiber-tubes.html
It's a lot of plane for the money, especially since almost fully built
If you trash the ESC and put a good replacement one, the stock parts are mostly good enough (except maybe for the servos)
The servo horns are stupidly fragile. no idea why they picked those. I added gorilla glue to make them stronger.
You do need to disconnect the servo rods and move all control surfaces to free them up
I love that the flaps are designed to go down so much, makes for easy braking and landing in smaller spots with a steep approach
The carrying capacity is great although the cargo space is a bit more limited than you'd think considering the size (this is mostly due to all the space lost to where the wings join)
Speaking of the wings, having to connect/disconnect and carefully route 4 servo wires each time is really a pain in the rear. Cularis had a much better connect/disconnect mechanism
As mentioned earlier, routing cables to the tail without having cables run outside of the plane is almost impossible on the prebuilt plane. Shame...
Overall it flies great, no tip stall issues as long as the CG isn't too far back
So I do quite like the BFG2600. I hope I'll be able to soar with it one day, so far despite the huge wings I haven't been able to gain altitude on thermals yet. The good news is that it flies well, even in very heavy winds (I've tried 35kph winds so far), and has ample power to take off easily despite all the electronics it's carrying.
Update (2015/10/14)
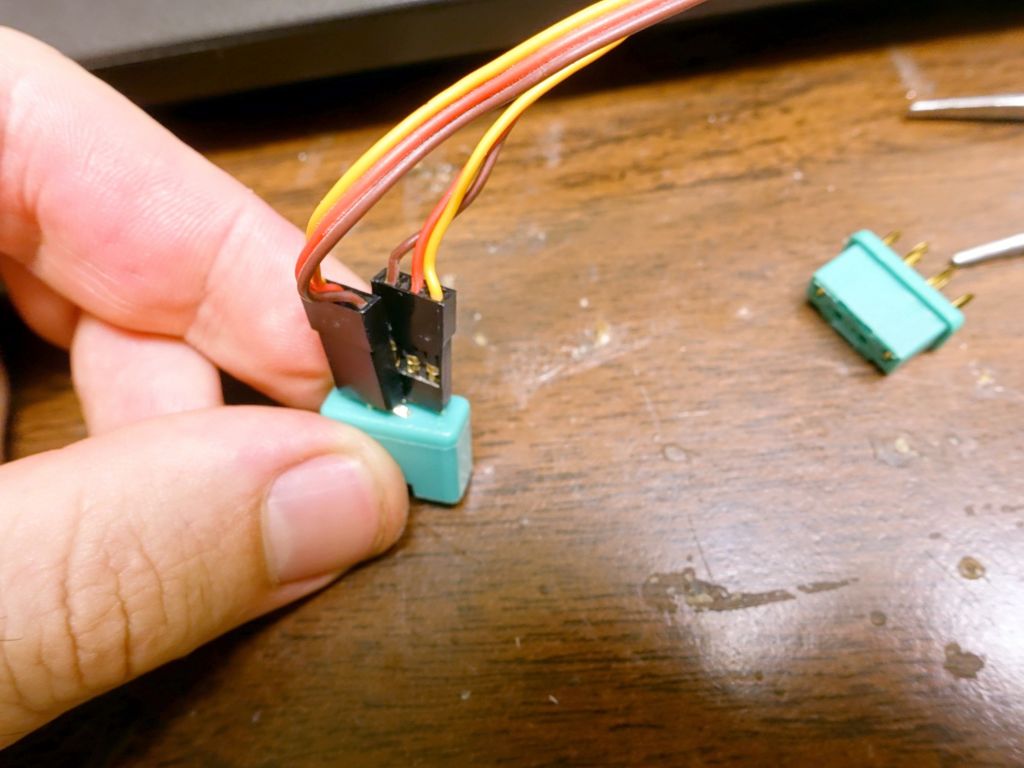
I added an airspeed sensor in the wing, however by then I decided to fix the issue of connecting/disconnecting the wings, which was a constant pain, and only going to get worse with the airspeed sensor. I hacked the MPX connectors so that I could simply plug the servo connectors into them (better than cutting the wires and soldering since I can revert easily if needed). I put a metal wire through the connector to make sure the servo connectors would stay in:
I've bent the back pins so that they align with the servo plugs (weird that it wasn't default)
the other side of the MPX plug, I've just soldered to servo cables going to my autopilot
the left wing (top wood flap) has the plug into the wing since it's the hardest one to route cables for
the right wing has both the servo wires and an extra set of cables for the airspeed sensor
the metal wires allow for securing the servo plugs, it'd be bad if they got disconnected :)
On one side I was able to put the connector inside the airframe. On the other side, due to lack of room (a camera going through the space where the connector would have fit), I just have a dangling connector, but it's not as bad since it's only one. For the airspeed I2C cable, it needs four wires, but I was able to use only 3 with a servo cable and reuse the ground from the servo connector
on one side I was able to put the connector inside the airframe
All in all, this new connection system works pretty well, I'm happy with it :) (but it sure would have been nice if this kit had come with a built in quick disconnect, I spent way too long making my own).
Update (2015/11/10)
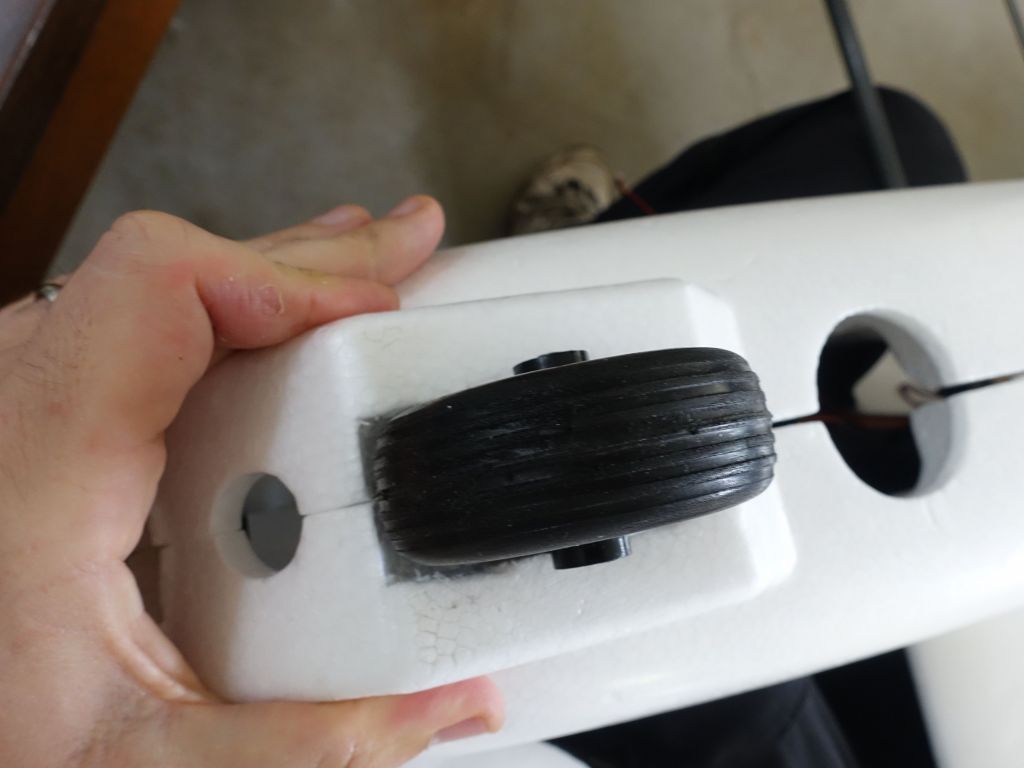
I had a few issues with the front camera between having it take a nice front facing shot that doesn't show the bottom of the plane, and not being hit by pebbles when I land. I briefly tried to put a metal shield around it, but in the end the shield was getting ripped away on landing, it was just too close to the ground. I ended up fixing this by ungluing the wheel and lowering it a bit, giving more clearance for the camera lens without needing the metal shield:
This was supposed to protect the camera, but it got caught and ripped off on landings. Instead, I raised the wheel
I also found out that the mobius cameras leak on the 433Mhz band, so burried them a bit lower down in the plane so that they don't affect the LRS reception as much:
it's still a bunch of wires, hard not to have them interact
After having had a Talon sitting my garage for almost a year, I finally got around to building it. The instructions were poor, but the build was easy, so it didn't matter:
turns out I wouldn't be using the dome, like most people
my wing extension kit came with this seemingly useless replacement gear that weighed way too much
sadly, the wood support didn't have any underneath plate to put the autopilot on
so I had to make my own plate to attach to the supports
The kit came with 2 kinds of servo horns. I ended up using the bigger ones, and made holes to use the backing plates with screws:
I got the wing extensions right away:
I got to fit my pitot tube between the main wing and the extension
The motor and ESC aren't super easy to access once everything has been glued:
Given how big the inside of the plane, is, I figured the bluebeam 1.3Ghz antenna might fit inside, but not quite, bummer:
almost fits...
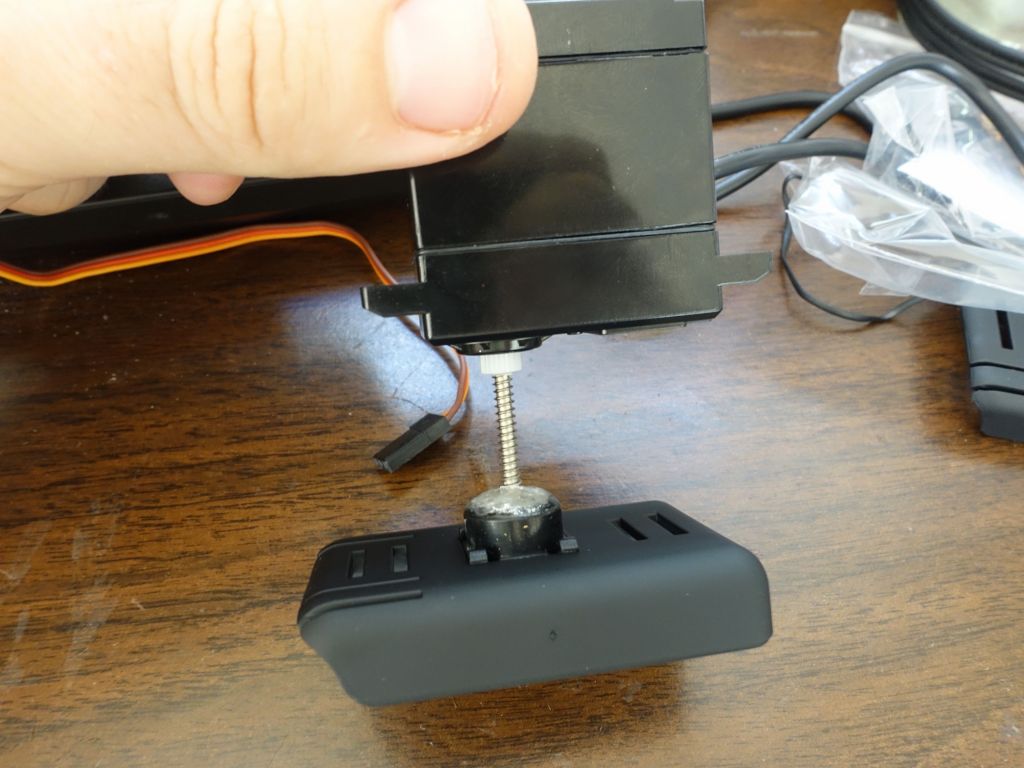
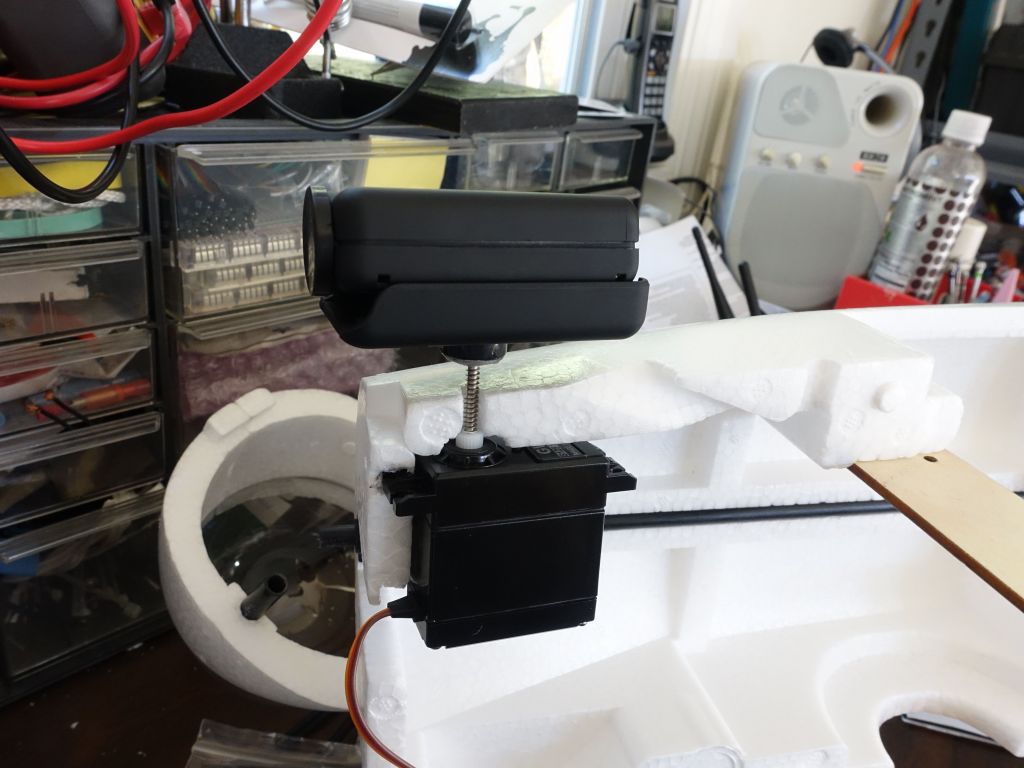
I however had plenty of room to put a 360 degree servo attached to a mobius mount:
The wheel didn't turn freely, I had to cut out some extra foam to help it:
I then went for my first flight, I had to put 10,000mAh of batteries in the very front of the plane just to balance out the CG :)
didn't bother putting the dome
The first flight was "interesting" as in I didn't have flaperons working yet, landings were at pretty high speed. The other issue was that my elevator was way too sensitive and I had a hard time adjusting the pitch for landing, causing me to come for many landing approaches before I nailed one:
After a trip, I spent some time to put my FPV gear in because I wanted my next videos to have telemetry showing airspeed and other options on the video so that I could review it more easily and check minimal speed with and without flaps, and see how things go before stalls
I figured I'd cram the $500 gopro inside the CXN mount so that it would be less exposed in case of a crash, and the FPV camera goes on top:
I added some wood so that it would hit first instead of the cameras :)
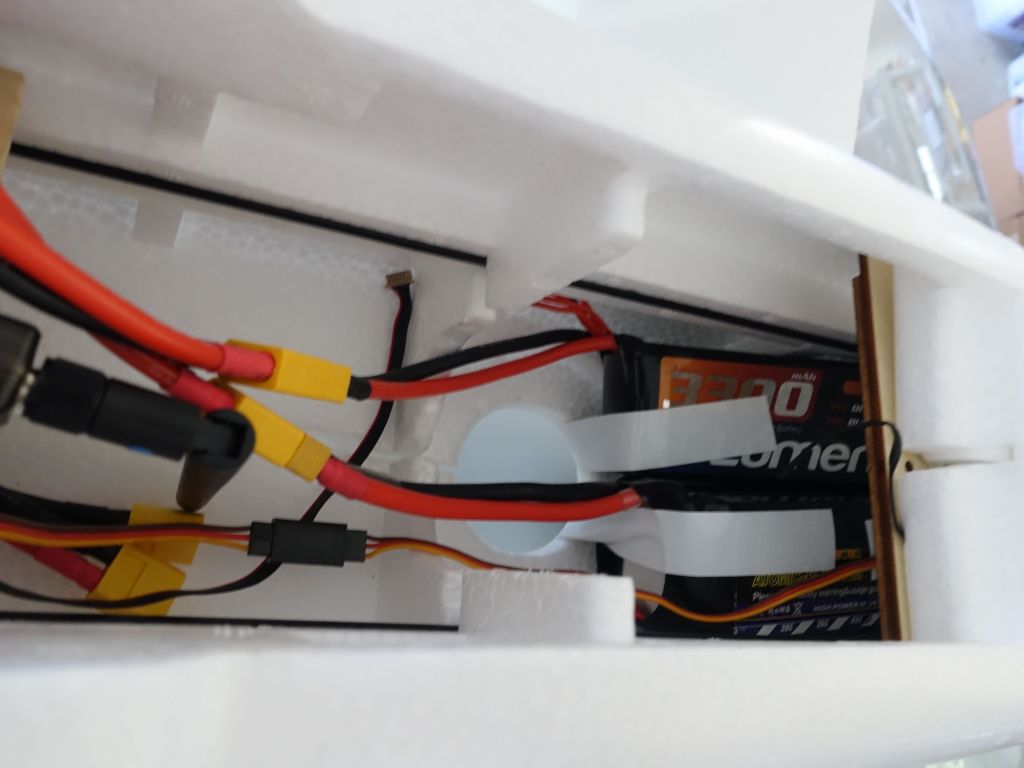
The batteries can now be in a more central position without breaking CG:
I then went for the new maiden flight. Takeoff was a bit dicy since my Talon now weighed 4kg with all the gear, but things were ok. It flew pretty fast though and I wanted to see how much I could slow it down with flaps. Unfortunately, after trying full flaps, things looked ok for one second or two, so I got my hand off the flaps slider and that's exactly when the plane pitched straight down.
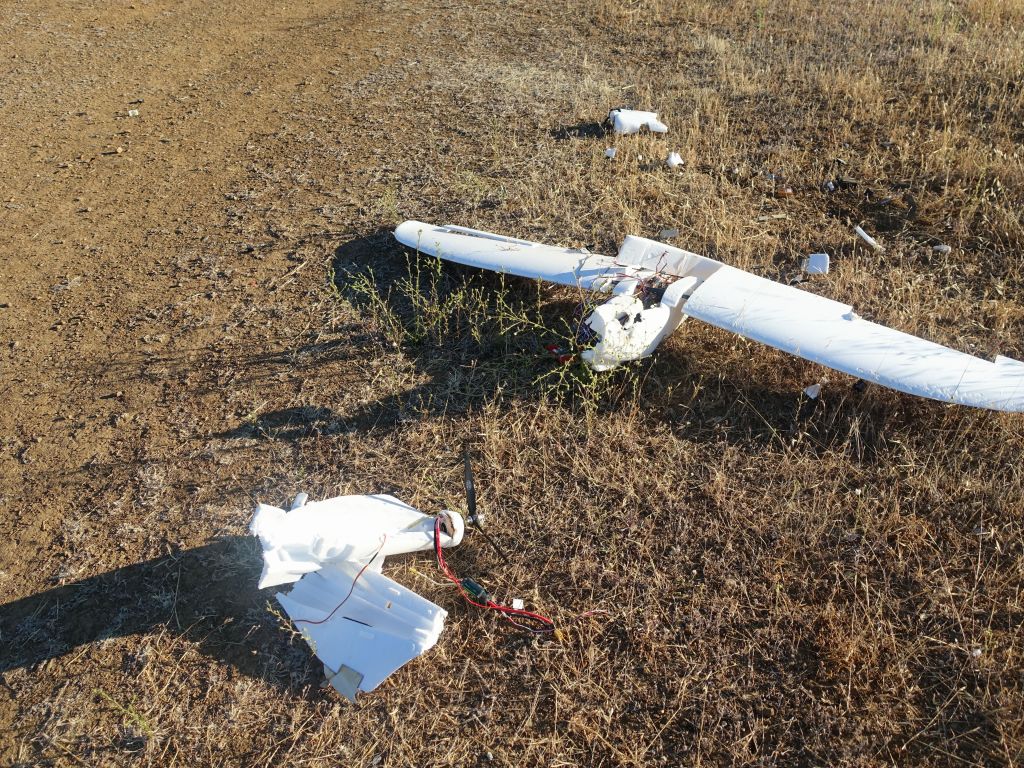
I only had enough time to pull on the elevator but not enough to retract the flaps. Replaying the video shows (with only a few pixels) that one of my ruddervator surfaces got unglued due to the G and weight stress, causing a full loss of control and full speed crash into the ground :(
The impact was severe enough pretty much everything was broken, including both microsd cards that were in the cameras:
first card has an internal short and won't work and 2nd card was sliced by the shock :(
the lipos also didn't like the Gs, but thankfully did not burst into flames
The mobius did survive the crash (the lipo inside got compressed and the lens cable unhooked, but it's working again). The gopro unfortunately had its LCD damaged, so it can still record but won't display what it's doing anymore :(
Obviously, this was very disappointing, although I leanred a few things:
flaperons on the X-UAV Talon are very dicy because they almost work as reverse elevator :(
you need to very heavily glue the ruddervator surfaces, and I failed to do that. Expensive lesson...
This page was copied to the official place on ardupilot website The new location may be more up to date and you should likely link to it instead of this page: http://plane.ardupilot.com/wiki/flaperons-on-plane
Elevons, Ruddervators and flaperons with Ardupilot/APM::Plane
Note that this page is current as of August 2015 and tested with APM::Plane 3.3, although what I'm describing should be relevant to older versions too.
Ardupilot/APM::Plane takes your RC input and either passes it through, or uses it as input for automatic modules like FBWA or CRUISE (and in some cases will mix the RC input with the generated output, like allowing you to add aileron control to the aileron control computed by let's say RTL).
The part where things get complicated is:
Elevons (flying wings have only 2 controls used as elevator and ailerons)
Ruddervators (V-Tail) where rudder and elevator are mixed into a V-Tail surfaces. This is used by planes like the X-UAV Talon
Flaperons is simply allowing your 2 ailerons (using one channel each) to be used as flaps and ailerons
Elevon and ruddervators are well documented. Even if you care about flaperons, you should look at this page since it explains the basics of mixed modes, and they are relevant to flaperons too: http://plane.ardupilot.com/wiki/arduplane-setup/first-time-apm-setup/reversing-servos-and-setting-normalelevon-mode/
The first concern on a pixhawk is that using any of those mixed modes requires decoupling the control surfaces from direct passthrough control coming from the RC Controller. Passthrough is a mode where if the pixhawk has a bad failure, it's able to connect RC1-8 directly to the relevant output channels without doing anything with them.
Obviously, if your control surfaces are mixed by the pixhawk, passthrough will not work anymore. While this kind of bothred me, I've been told that pixhawk failures are so rare that I should just forget that passthrough even exists, and not worry aobut losing it (besides quadcopters never had passthrough support anyway).
For flaperons, in the past, I naively connected my first aileron to channel 1, and my 2nd aileron to channel 5, setting RC5_FUNCTION to 18. This looks like it works, as in Ardupilot can control both ailerons in auto mode while it will passthrough channel 5 in manual mode and allow my controller to generate flaps down by controlling both ailerons.
This of course, did not allow Ardupilot to control ailerons itself in auto modes, but I didn't care.
But, I soon found out that if I had flaps down with my controller and then switched to auto mode, ardupilot would receive an aileron command on channel 1 and assume that I'm trying to mix in a turn into RTL or FBWA. APM::Plane could support this properly, but does not. You can follow this issue for details: https://github.com/diydrones/ardupilot/issues/2186
Given this, the only way to get proper flaperon support is to use the support in ardupilot is to give aileron control to Ardupilot (i.e. no passthrough anymore). There is only incomplete documentation on it, hence this post. See:
do not do any more aileron mixing on your TX, only send aileron input on channel 1
channel 1 is unfortunately lost, as in you can't connect an aileron to it (this is because RCx_FUNCTION does not work for channels 1-4). This is arguably a shortcoming of ardupilot because it is able to use a channel for input and output like we will do for channel 5 below.
you then need to put your ailerons on 2 other channels. Unfortunately, again, they must be on channels 1-8, even if it would be convenient to put them on RC13 and RC14 so has not to burn channels used by your transmitter. Turns out that as discussed on https://github.com/diydrones/ardupilot/issues/2523 , your ailerons still work in passthrough mode when the pixhawk is crashed or rebooting, but this only works if they are on channels 1-8, so in the end you probably wouldn't want to put them on channels 13 and 14 where passthrough would not work. Given that, you put your ailerons on channels 5 and 6 and set RC5_FUNCTION to 24 and RC6_FUNCTION to 25 (which one is which doesn't matter).
now, you need to add a channel on your transmitter to say how much flaps you want in manual mode. The good news is that you can re-use RC5 for this (i.e. it'll be used to sample flap input and totally separately used to generate aileron output). You don't have to do this (you can send flap input on channel 9 for instance) but reusing channel 5 saves you an RC channel since you're unable to move your ailerons on output channels higher than 8.
Ok, from there it gets more tricky. If you are unlucky, sending flaps input may cause your flaps to go up and act as spoilers, which is not what you want. To be clear with direct aileron control from your TX, you can have your flaperons go up or down (flaps or spoilers) but once you go through Ardupilot, they will only work as flaps. It's not ideal but likely good enough for most.
So, here's what you need to do next:
Setup your transmitter to send flaps on channel 5 (either a switch or a rotary button)
Set FLAP_IN_CHANNEL to 5
Set FLAPERON_OUTPUT to 4
Switch to FBWA or CRUISE, tilt your plane and make sure the ailerons move in the right direction (flap goes down on the wing that you tilt down). If they don't, try setting FLAPERON_OUTPUT to 1
Once this works, try your flaps switch and make sure flaps go down and not up. If they go the wrong way, change RC1_REV from 1 to -1 (or the other way around) and change FLAPERON_OUTPUT too. Make sure FBWA still moves the ailerons in the right direction, and now your flaps should go down.
Only then, try the ailerons on your TX. If they go the wrong way, reverse channel 1 on the TX without touching RC1_REV (if you put your stick left, the left aileron should go up)
Tuning
Go to failsafe setup in apmplanner/mission planner, and make sure the max/min values match RC5_MIN/MAX (or adjust them) so that your flaps move all the way (RC1_TRIM should also be set to 1500)
Set FLAP_SLEWRATE to 100 to allow moving flaps from 0 to 100% in one second (or lower this to make your flaps move more slowly)
Also have a look at TKOFF_FLAP_PCNT and LAND_FLAP_PERCNT if they are relevant to you.
When you are flying in manual mode, it can be helpful to setup an elevator down mix on your TX when you set flaps (i.e. the more flaps you send, the more elevator down you should send to correct pitch up from flaps). I recommend you set up the mix value on a rotary switch so that you can control the elevator down correction during a test flight (if you set too much elevator down as a fixed value in your mix, you'll be stuck not being able to use flaps for landing if you put too much elevator down). Note that using a Frsky Taranis makes such complex mixes much easier (or possible) compared to some other more basic controllers.
Crow flaps
See http://plane.ardupilot.com/wiki/fixed-wing-faq/#how_would_i_setup_crow_flaps gives some hints.
If you need crow flaps (which means your ailerons must go up, not down), you can use these instructions and reverse RC1_REV so that when you send flaps input, ailerons go up instead of down (while the real flaps go down). Then you should be able to set your flaps channels as flap or flap_auto (see http://plane.ardupilot.com/wiki/flight-features/channel-output-functions/#flap_auto ).
Note that this is not as versatile as direct RC control where you could use your flaps surfaces 2nd ailerons for tight turns in thermals, but only if a switch if flicked, as with this setup you can only have both flaps go down at the same time your flaperon-ailerons go up as spoilers, and only ailerons can be used for turning.
This is likely good enough for most people though.
Notes
Manual flaps input is mixed into auto modes. That means if you're landing in manual mode with flaps set to full on your TX, and you flip the mode to RTL or some other mode to abort the landing and go back to an auto mode, flaps will stay full. You need to retract them on your TX.
RCx_MIN and RCx_MAX for flaperon output channels limit deflection of flaperons and you can use the TRIM value to move the neutral position in case you want more down travel than up travel.
RC1_TRIM acts as normal aileron trim, RC1_MIN and RC1_MAX should match the TX setting
If you share RC5 for flap input from TX and aileron output, you must ensure that your TX MIN and MAX for that channel match what you set for RC5_MIN and RC5_MAX if you changed the aileron travel.
Don't go fly yet. Go back to square 1 and make really sure that FBWA/CRUISE moves the ailerons in the right direction and that ailerons also go in the right direction in manual mode.
Now, go flying and enjoy!
Associated bugs with background:


, like barn doors")


 and stick the GPS/accelerometer")


")

, things get very packed")


")
")

 has the plug into the wing since it's the hardest one to route cables for")

")


")