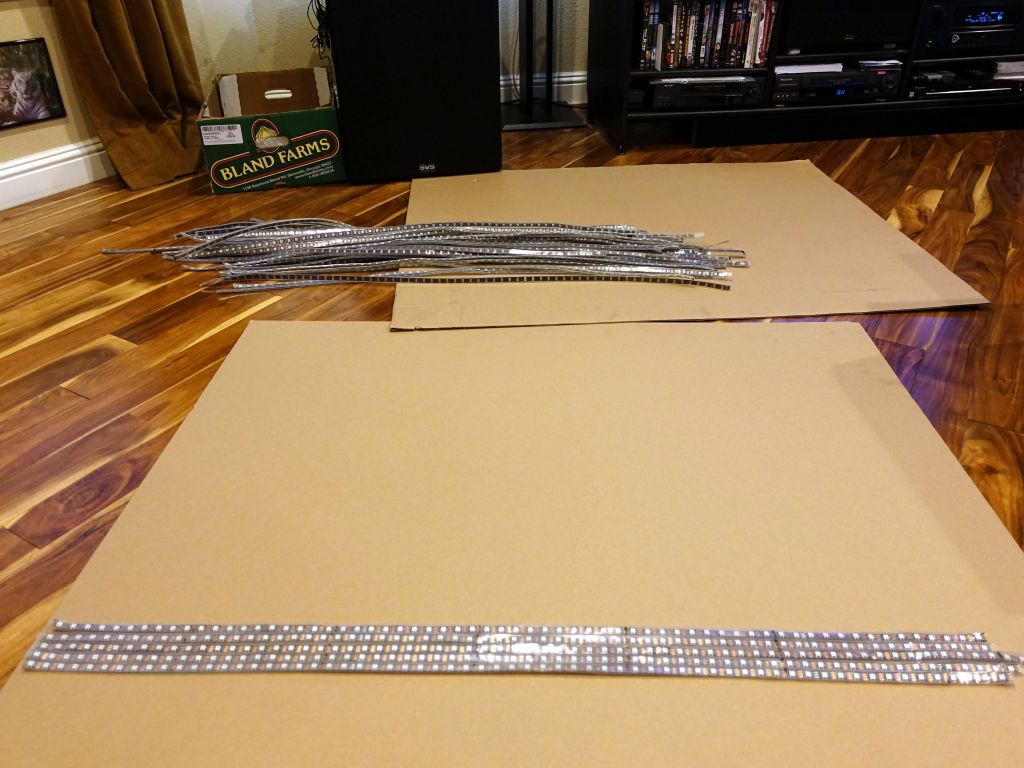
I inherited 64 strips of mostly 64 neopixels per strip (some were as low as 61, and some as high as 66).
not all the same lengths
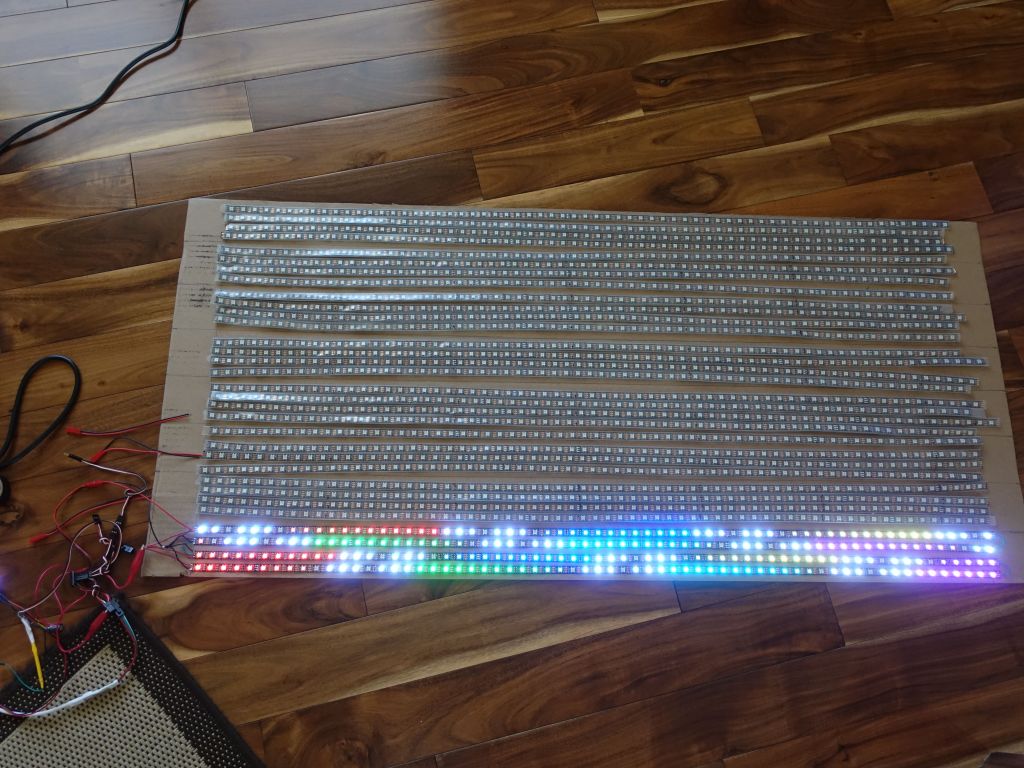
64 strips is run as 16 lines of 4 strips of 64 pixels (256 pixels), were tested 4 by 4, as the line of 256 pixels that they were with a Neopixel tester that sends test patterns:
the neopixel tester I'm using, along with a 5V 10A DC converter outputting 8A into the controller (testing full white)
The first 16 lines took a long time (almost 2 full days due to the time to measure everything including the cardboard, cutting it carefully, marking where all the LEDs will go, and then testing as I go along to make sure I'm not repeating something that will have to be undone:
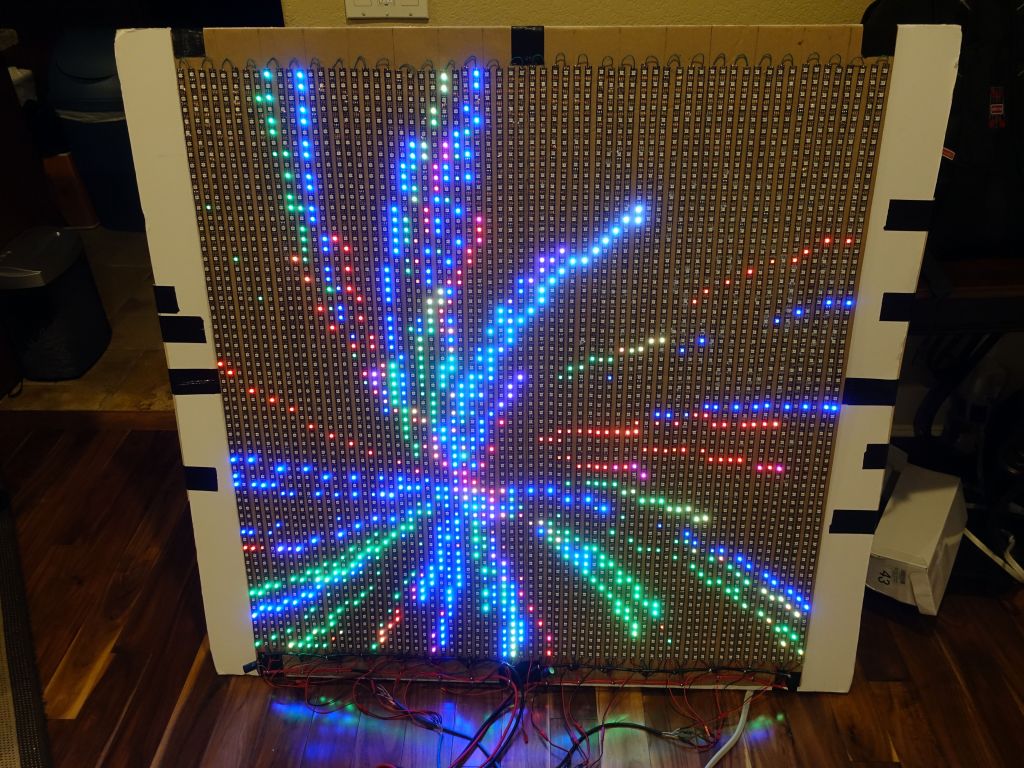
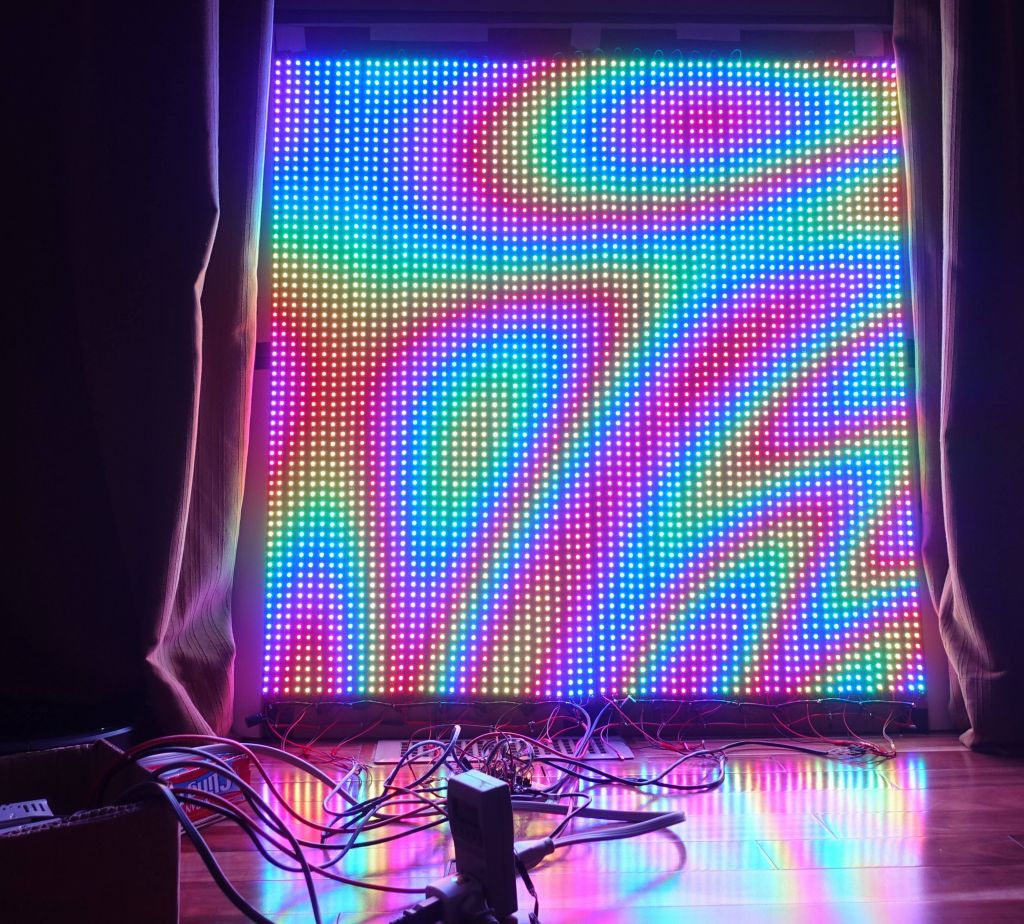
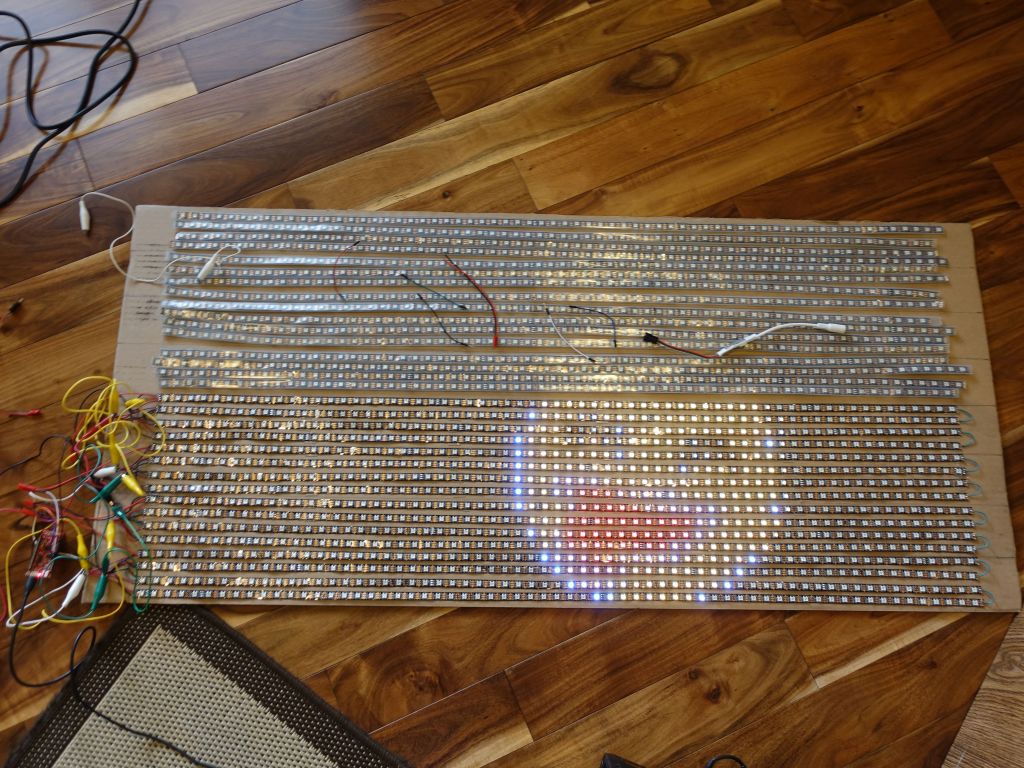
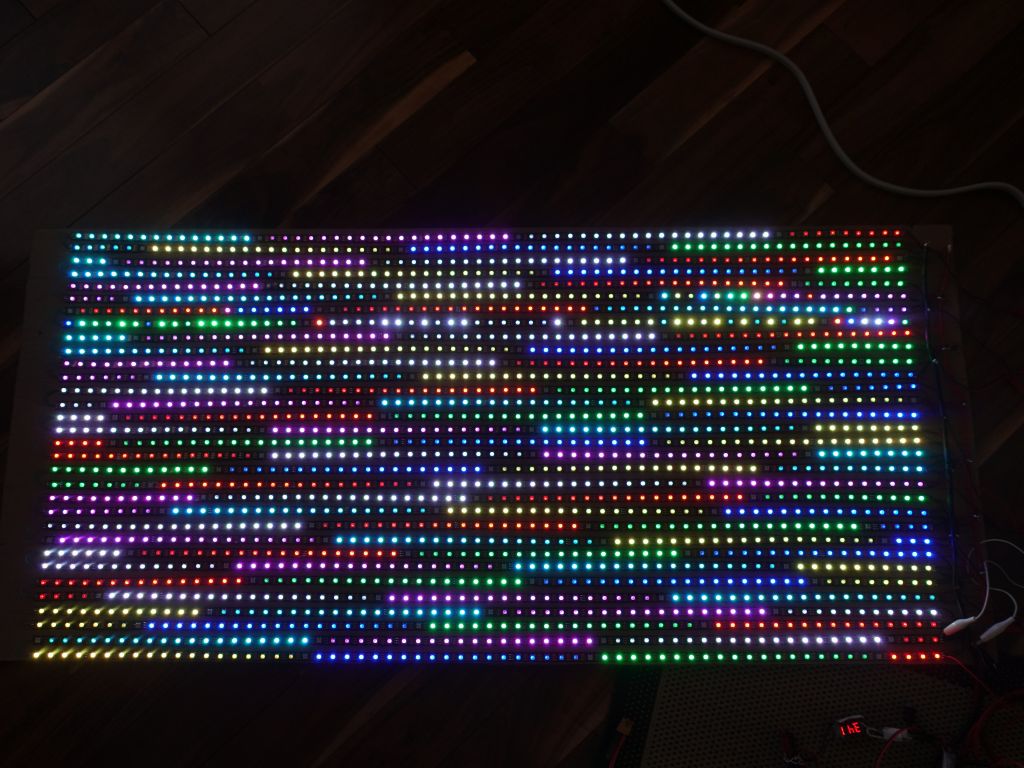
A bit of test from my MatrixGFXDemo.ino code
Then comes the issue of attaching all of this. I decided very early to remove the IP67 protection as the silicon is resitant to virtually all glues, making it very hard to work with. I also had to splice broken LEDs in the strips I inherited, so it's much easier to do without the protective casing. I simply attached the bare pixels with those very stick glue dots:
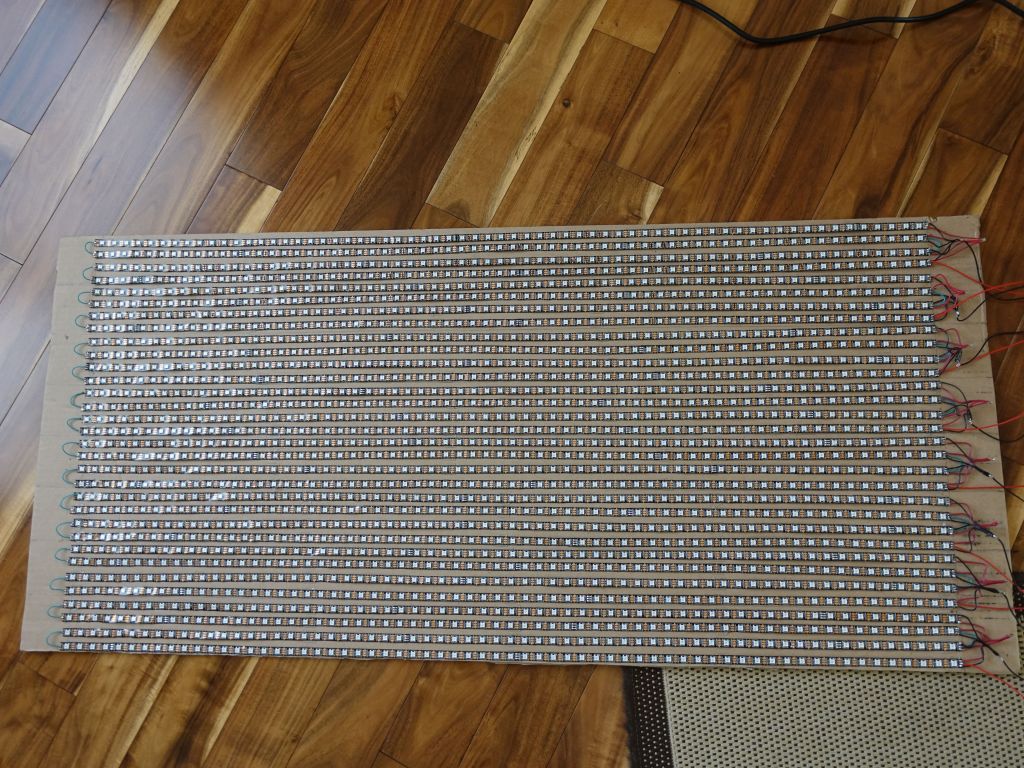
After about 3 days of work, got 50% done:
Power delivery: getting the wire sizes right is important, but turns out you don't need huge wires for 64 pixels. What I did was connect power from each of them at the end and therefore spread the maxium 10A they can draw to 4 times 2.5A, which can go fine over smaller wires as pictured below. The green wire goes between the Data Out to Data In pins of the strips (3 short green wires only for 4 strips)
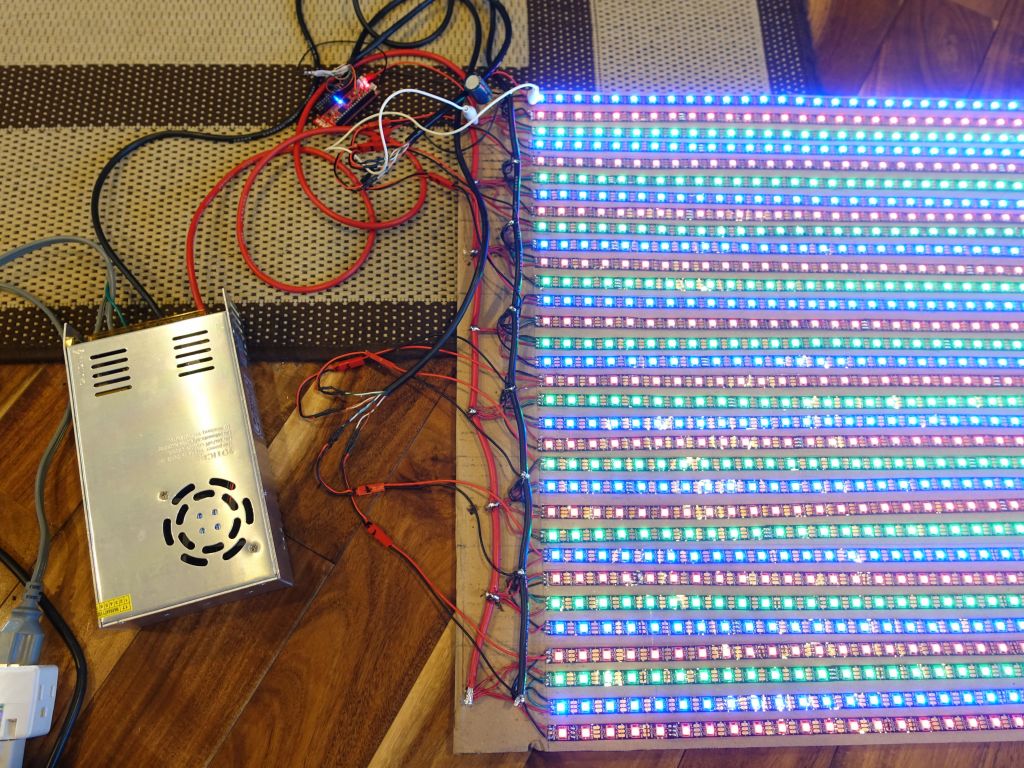
The 64x64 array was meant to be 2 arrays of 32x64 for ease of transport, each with their own 60A 5V power supply (when actually 40A would have been enough for each set of 2048 LEDs even if their maximum is around 80A in theory). I used thick 10 gauge wire to make sure the power bus could support 100A or so if needed, even if in real life, it'll never really much more than 20-30A:
power testing, this can replace a small sun ;)
Once 50% was verified to be working fine, the other 50% was still a lot of work, but I didn't have to stop for testing of the power, layout, and design. It took another day and a half to do the other 50% at much higher pace, getting all the little wires cut at the right length in advance, gluing all the strips in one fell swoop (still hours or work), and then all the soldering, with validation at the end:
looking better
yeah!
For anyone contemplating that work, most of the work was:
cutting the cardboard backing to the right size, and marking where the strips were going to go
cutting/fixing all the strips (they were second hand, some were broken or the wrong length)
320 glue points for the strips, one by one :)
cutting lots of little wires to the right length, stripping them
only then does soldering come in
then test each set of 4 strips (64x4) with a special neopixel tester
build the 10 gauge power bus
the hardest thing has been to solder all the little wires to the 10 gauge power bus turns out. They don't like staying together due to size and thermal issues.
and all the twisted pair and wiring on both sides (seemed trivial but it was more work than I thought) to connect to the microcontroller
End result:
ESP32, why not something else like Teensy?
So, my shirt that drives 24x32 uses ESP8266. ESP8266 can do up to 4 lines of parallel output, which is not sufficient for a proper frame rate on 4096 pixels. ESP32 does allow up to 24 lines of parallel output (untested) and can easily do 16 lines of output (110 frames per second for 4096 pixels).
Teensy would would have worked too, but I've had too many problems with teensy, namely:
the hacked up build environment patched on top of some version of the arduino sdk. Recently I've had 30 second pauses before compiles even happen if I'm using the serial port (reported the bug, never heard back, never got fixed). This made sense years ago, but not anymore today that arduino supports other hardware boards "the right way"
newer sdk patch that's supposed to fix things, working even less for me (1.42 beta worked even less than 1.41 when I tried it).
serial output just stopping randomly after outputing X lines, making debugging impossible. This was a big deal for me, I reported it, but never got a fix.
no hypervisor like task that catches crashes and gives you a traceback with line numbers like you get on ESP chips (which really helps for debugging problems). This is also a big plus of ESP chips
no onboard flash usable for an SPIFFS filesystem (like the 4MB of flash on ESP32). Now, I'll have to admit that SPIFFS starts falling in performance due to how it's written when you reach 1MB or more of data, but it could be fixed with a better driver and beats no onboard filesystem at all on teensy (you need the 50-ish dollar teensy 3.5 to get an sdcard reader)
closed bootloader that prevents better debugging, and maintained by a single person who is very helpful, does a lot of work, but cannot compete with more open chips maintained by multiple people. It pains me to say this, because Paul Stoffregen does an incredible amount of work for one person, but he remains one person with a closed bootloader design and a hacked up SDK (sorry to say it). Compare with ESP32 which has near real time support on https://gitter.im/espressif/arduino-esp, plus https://github.com/espressif/arduino-esp32/ .
and not that it really matters to me, but despite all these issues, teensy costs at least 2 to 3 times the price of ESP32.
Teensy 3.6 is 32 bit 180/240 MHz ARM Cortex-M4 single core vs 32-bit LX6 microprocessor, operating at 160 or 240 MHz dual core
Teensy 3.6 is 1MB of flash vs 4MB of flash for ESP32 (which can be segmented for OTAs via Wifi and SPIFFS filesystem)
Teensy 3.6 has 256KB vs usually 520MB of SRAM on ESP32 (although not that much more than teensy's memory amount is usable for code).
ESP32 is dual core (although that adds complexity), adds Wifi and BT vs built in sdcard on teensy 3.6
Teensy has more pins but requires an expensive breakout board to use them all
I think teensy 3.1 (now 3.5/3.6) was the best chip around for many years, but honestly ESP32 seems like a better solution for most needs, especially debuggability. This is not to say that Teensy 3.6 is a bad offer, it does a few things better than ESP32, but at a much higher cost, and its SDK and problems explained above, make it a less desirable solution for me.
Why not use those premade 32x32, 32x64, or even 64x64 RGBpanels?
This is a very good question. First, they don't exist for neopixels, they exist for a different lower tech solution that requires a lot of work to drive.
It's a lot easier to get a lot of pixels for not much work on those RGB panels: https://www.adafruit.com/product/2276 , but they are thicker, don't bend at all, and driving them is a lot more work than neopixels. Sadly, because they require row scanning (like an old CRT TV), they also don't look good if you move them, move your head, or take a picture unless you drive them at very high speed, which is harder to do with microcontrollers.
Turns out that those panels can be made bendable too now: https://www.adafruit.com/product/3803 but still, they don't seem to come in bigger pitch sizes, and still have the persistence of vision problem I just described.
In the case of a big display, neopixels that usually require too much space (high pitch), actually come out ahead if you want your display to be 1m^2. RGB panels come out ahead for smaller displays with high resolution, you can go as low as 2-3mm pitch, which beats all existing neopixels: https://www.adafruit.com/product/2279 .
If you want to go higher sizes with those RGB panels, it gets more complicated as you need to drive them even faster. An ESP32 can reasonably drive up to 96x64 pixels while a tensy 3.6 can almost drive 128x128 with a bad refresh rate. You need a raspberry pi or an FPGA for bigger matrices.
My point here is that neopixels cost more, but they're a lot easier to drive, despite the timing issues you start running into when you're driving a lot (the more you drive per line, the lower the refresh rate, putting a reasonable limit for a single MCU around 10,000 LEDs if you're ok with a 35Hz refresh rate).
I personally wish for Neopixel matrices that ship in 32x32 or higher, potentially with the option to inject a new data line every 256 or 512 pixels (so you can drive them as one big slower array, or cut the data line in the middle and inject parallel data lines for faster refresh rates.
ESP32 8 or 16 Parallel output and driver
First, 4096 pixels without parallel output, I would only get 7fps, which is quite slow.
With Sam's driver: https://github.com/samguyer/FastLED , you can use the RMT driver in ESP32 which allows for 8 parallel outputs. This can be used for more than 8 pins, I used it with 16 and the driver can switch RMT back and forth between the first set of 8 pins and the 2nd set of 8 pins.
Yves' driver obviously gives you better FPS, but taxes the CPU a lot more by doing all the bit banging. Also, in my testing, it did not work reliably until I added level shifters, while Sam's driver actually produced better waveforms that worked at 3.3V without level shifters.
The 2 drivers don't get setup the same though, see those differences:
Which driver is best for you? I'd say it depends but if you are ok with up to 8 parallel pins, use Sam's driver with RMT, and if you want more pins (up to about 24), use Yves' driver.
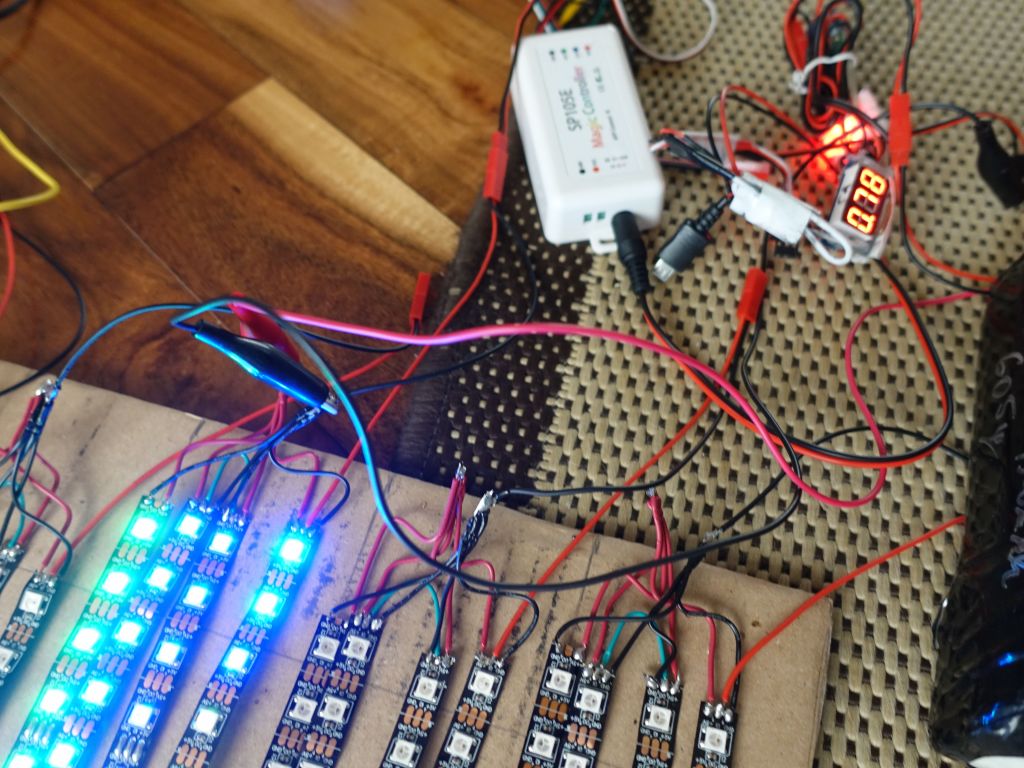
Wiring and Level Shifters
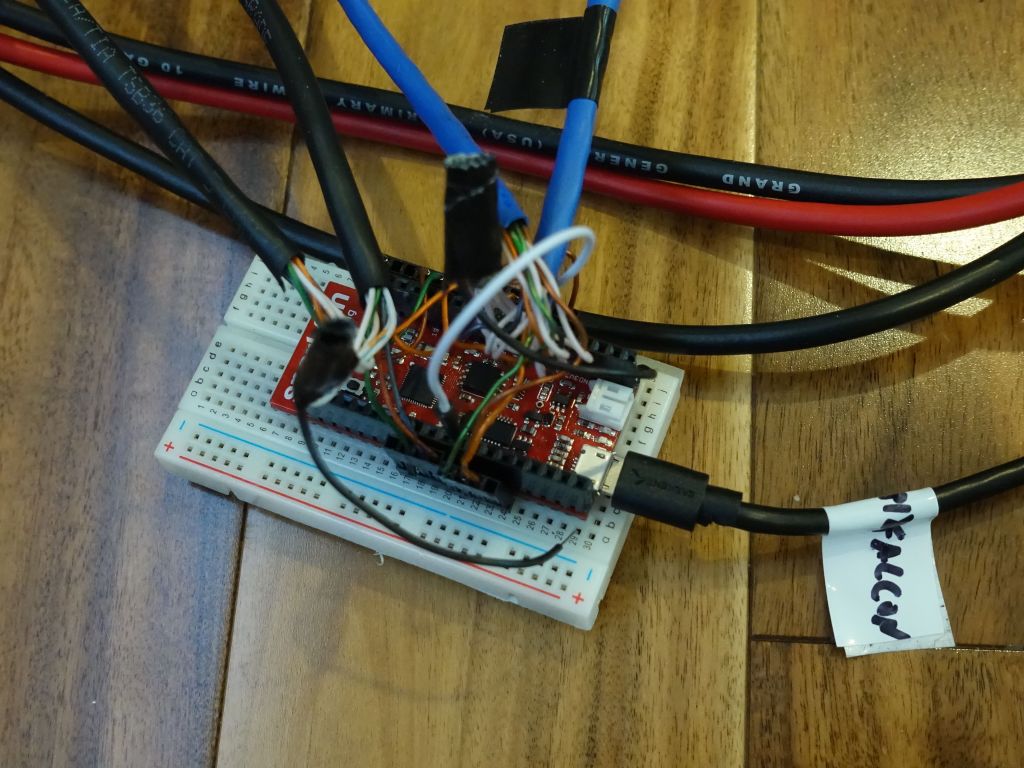
I first did it wrong by wiring directly to ESP32. This was doubly a mistake because there is sadly no standard pin numbers between ESP32 boards, meaning that I had to re-wire my plugs if I changed chips:
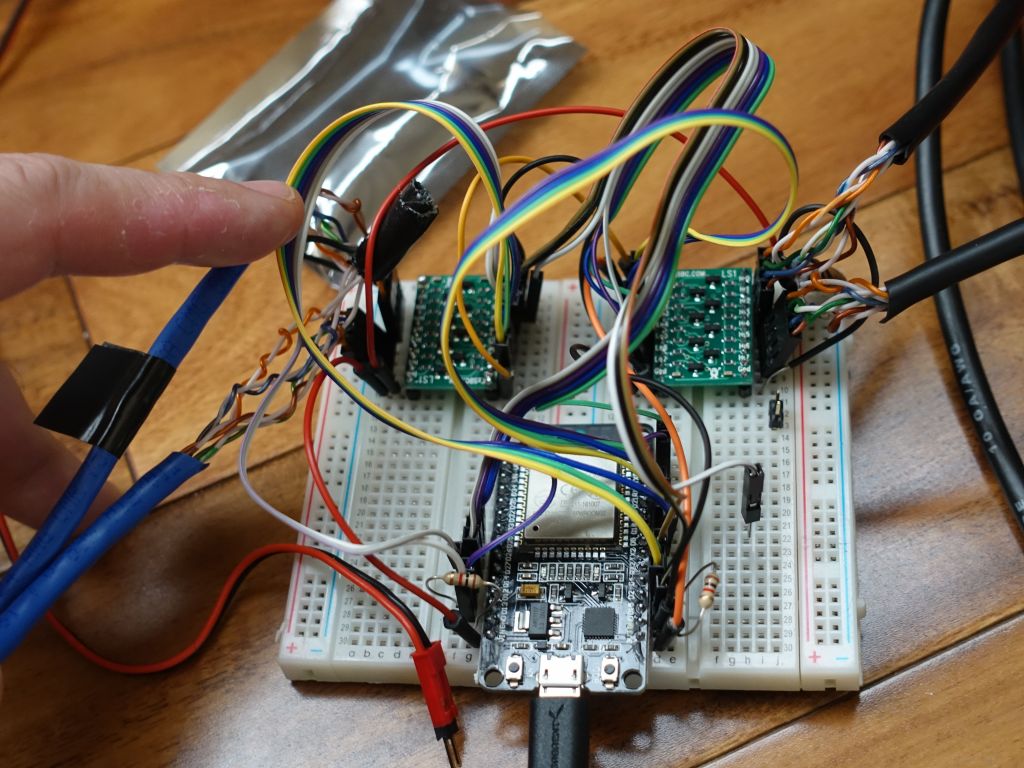
My other problem was that while 3.3V output worked ok enough, when using Yves Basin's 16 line parallel output code, the software built waveforms didn't work well enough at 3.3V. I had to add level shifters, which also nicely added a level of indirection between my cat5 twisted pair cables and the pin numbers on the chip:
Later, I changed one more thing which was to reomve the bidirectional level shifters that were unnecessary and caused issues at boot on ESP32 by messing with some IO pins. Turns out I had go make sure GPIO2 and GPIO12 were low at boot or flashing and reboots would fail (hence the resistors in the picture). However, I ended up replacing them with simpler 74HC245 unidirectional level shifters which don't mess with I/O pins and removed the need for the resistors
Software
Thankfully I was able to leverage the weeks/months of work I put on https://github.com/marcmerlin/FastLED_NeoMatrix and then demos I wrote for it, or shamelessly borrowed from more talented programmers :)
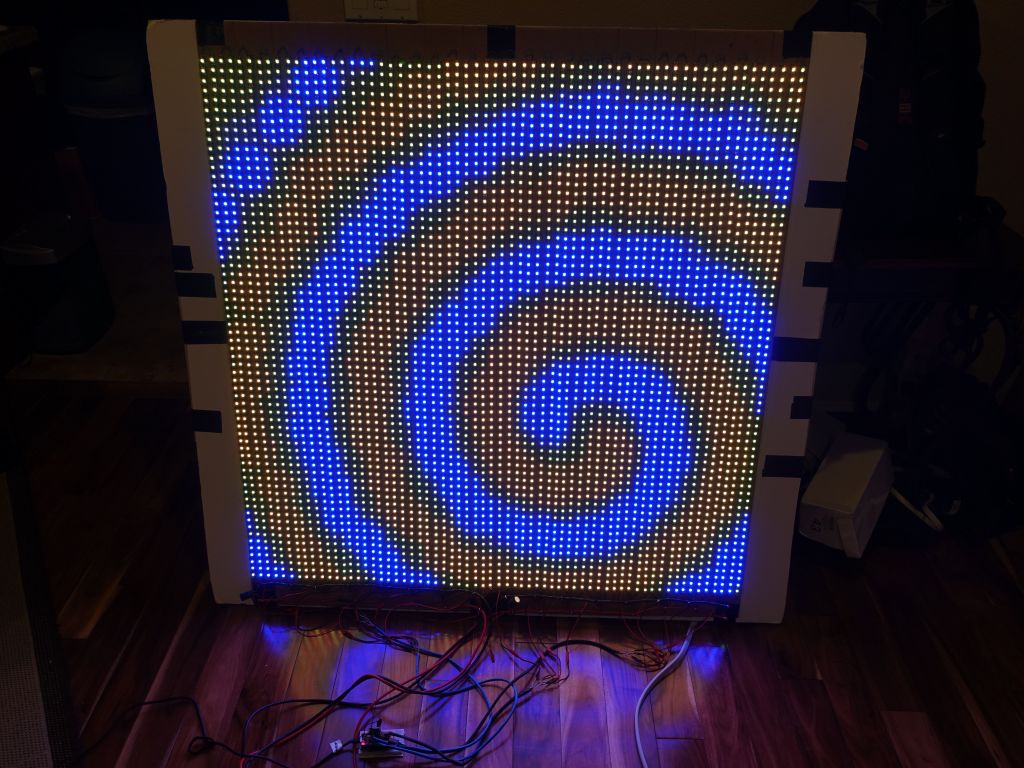
I then spent a lot of time on my https://github.com/marcmerlin/NeoMatrix-FastLED-IR code that ran my Neopixel shirt and adapted it so that its demos would work on a 64x64 matrix while skipping the handling of neopixel strips that are on my pants and arms. I then did a recording of the entire set of demos, including 64x64 animated gifs I found and liked, and ended up with 41mn:
Conclusions
The build was a lot of work, no fun at all: over 4 days of solid work... If you do this, strongly consider getting pre-built matrices that are ideally at least 32x32. Sadly most of the ones for sale today are 16x16 which still means getting 16 of them for about $500, laying them out and soldering them. It's not trivial work either if you re-inject power in them in more than one place, but clearly less work than laying 64 strips by hand like I did.
Get power right. I had some experience there, so I did my math beforehand and verified as I went along. It's not so hard to change a power supply, but it sucks if you have to replace all your power wires you spent so long to cut and solder.
Software is key of course. Running 16 strips in parallel requires some work from a small embedded CPU. Doing Infrared at the same time is not trivial. You can look at my code on how I got it to work, including this bug I found: https://github.com/espressif/arduino-esp32/issues/1781
The RMT driver on ESP32 is great doing doing DMA to 8 lines and either doing infrared without interrupts (sadly I found no IRRemote compatible RMT driver for arduino), or for outputting 8 lines of neopixels at once without big banging from the CPU (this is the FastLED Neopixel driver that Sam Guyer wrote). 8 lines only gives 55fps for 4096 LEDs, while 16 lines gives a nicer 110fps and leaves the RMT driver free for IR Receiving (putting aside that there is no driver at the moment).
I couldn't have done this without plenty of great work from others, be it the FastLED authors and contributors, Yves who offered his suport since he did a bigger build than mine, and his 16 line parallel driver, Jason Coon and others for the Aurora SmartMatrix demos I was able to use, and Mark Estes for even more LEDMatrix demos he wrote and that I was able to use too. Thanks all.
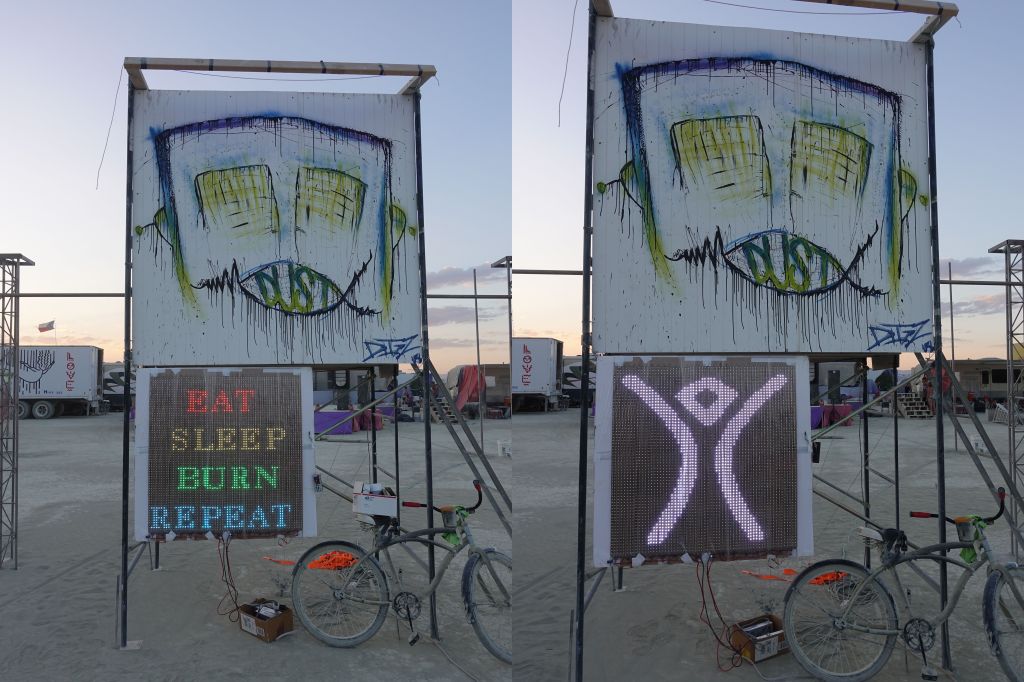
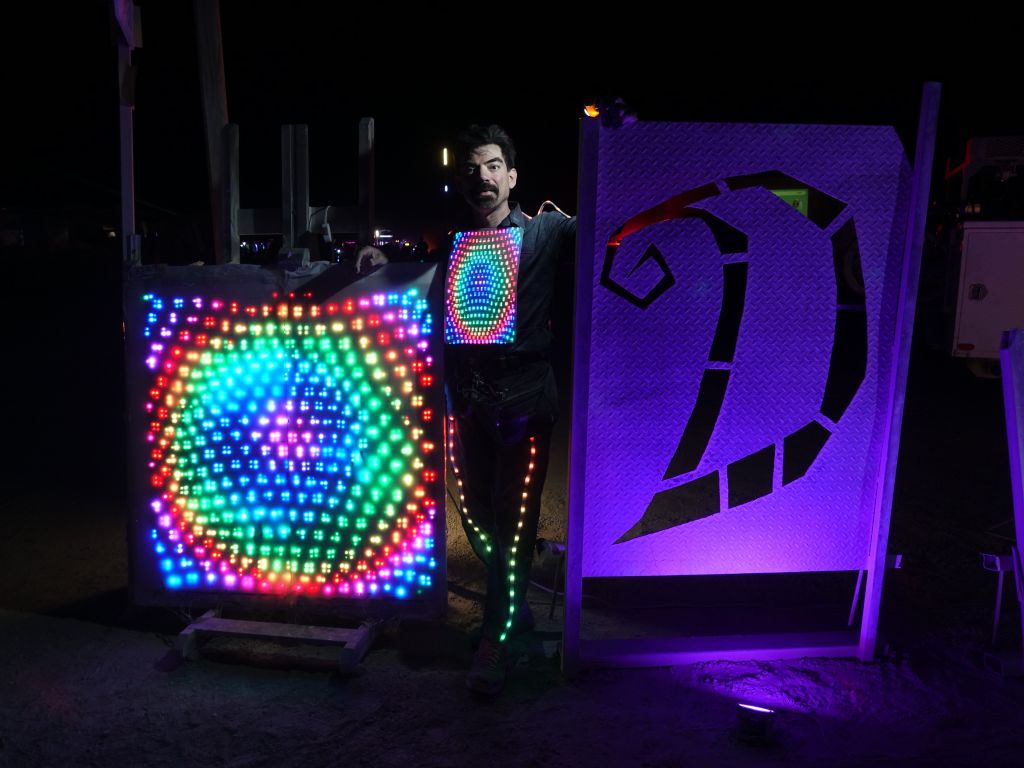
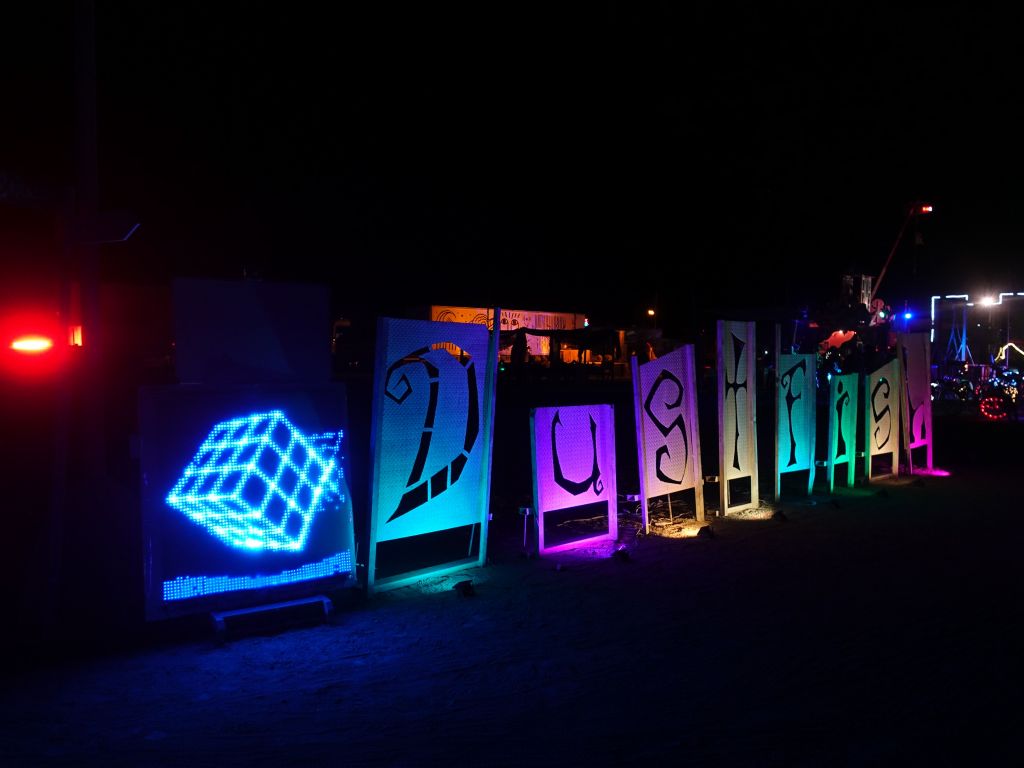
Burning Man
Oh yeah, I built this for Burning Man and despite being hard to transport due to its size, it made it there ok and survived the playa dust for a week:
due to lack of skill and lack of time, I used my protoboard and taped it on the reard of the display. Not professional, but it works
running matrix demo
animated GIFs are fun
somehow my protoboard and ESP32 survived the playa dust for the week

")


")